Story Behind Image

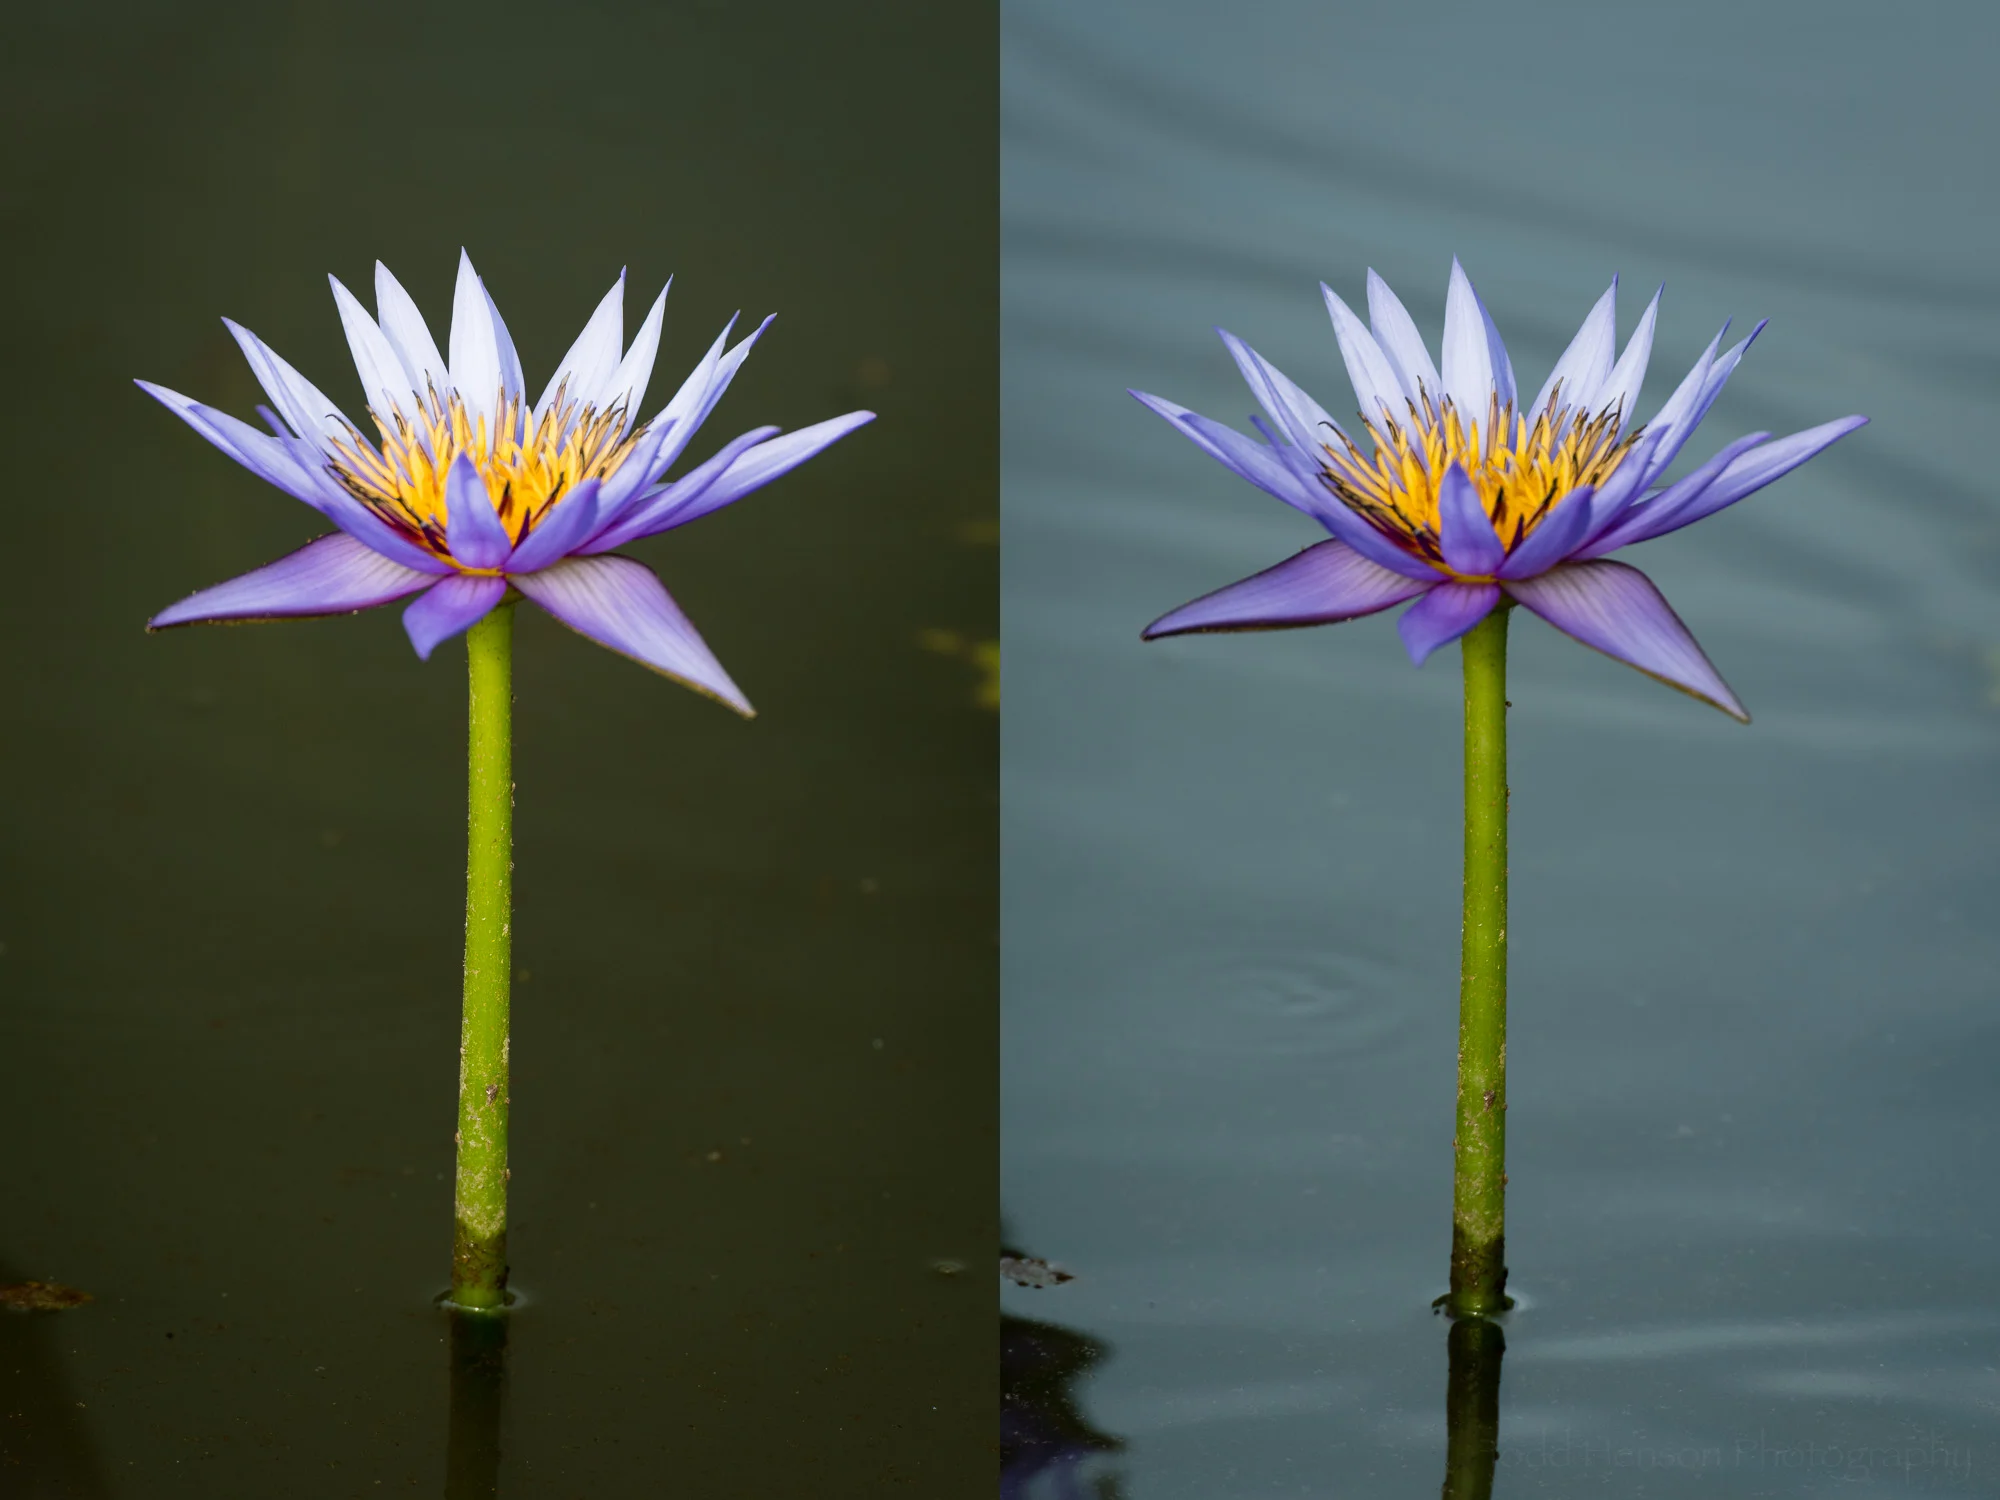
Purple Tropical Water Lily by Todd Henson

Purple tropical water lily at Kenilworth Aquatic Gardens.

Water lilies can be such beautiful photographic subjects. But often they grow in crowded, busy, sometimes dirty ponds that create a compositional challenge. And they are often growing far enough into the pond you can’t quite get close enough to fill the frame or position them against a decent background.

But if you keep looking you can sometimes find a great subject against a pleasing background. I was fortunate to find such a situation at Kenilworth Aquatic Gardens in Washington, D.C.

I was there for the lotus flowers, but the park also hosts water lily ponds, and I love trying to photograph water lilies. So this trip I actually went to the water lily ponds before looking at the lotus ponds.

I’m glad I did. It was still early and the sun wasn’t yet fully out over the ponds. This created a nice, soft light to show off the flowers without any harsh shadows.

Now to find a subject. I was very fortunate to find a lone water lily growing well above the water. And positioned just behind the water lily was a good sized lily pad.

Often the lily pads are damaged or dirty. But this lily pad was fairly intact and not too discolored. There were some off color patches, but by using a telephoto lens and a large aperture, which created a shallow depth of field, I was able to blur the lily pad enough that any rough patches mostly disappeared into the background.

I did the best I could to stand tall enough to look into the flower as much as possible. I wanted to see all that beautiful detail and color, the purples and the fiery oranges.

I also tried to line up the stem of the flower with the notch in the bottom of the lily pad, and place the flower so it was surrounded by out of focus green from the lily pad in the water behind it.

In the end this is my favorite photograph from the trip.


Do you enjoy these posts?

Sign up to receive periodic emails with updates and thoughts. Don’t worry, I won’t spam you. And please consider purchasing artwork or products from my online store, and using my affiliate links in the sidebar to the right when shopping online.

I appreciate your support!


Prelude to Rafting - The Story Behind the Image by Todd Henson

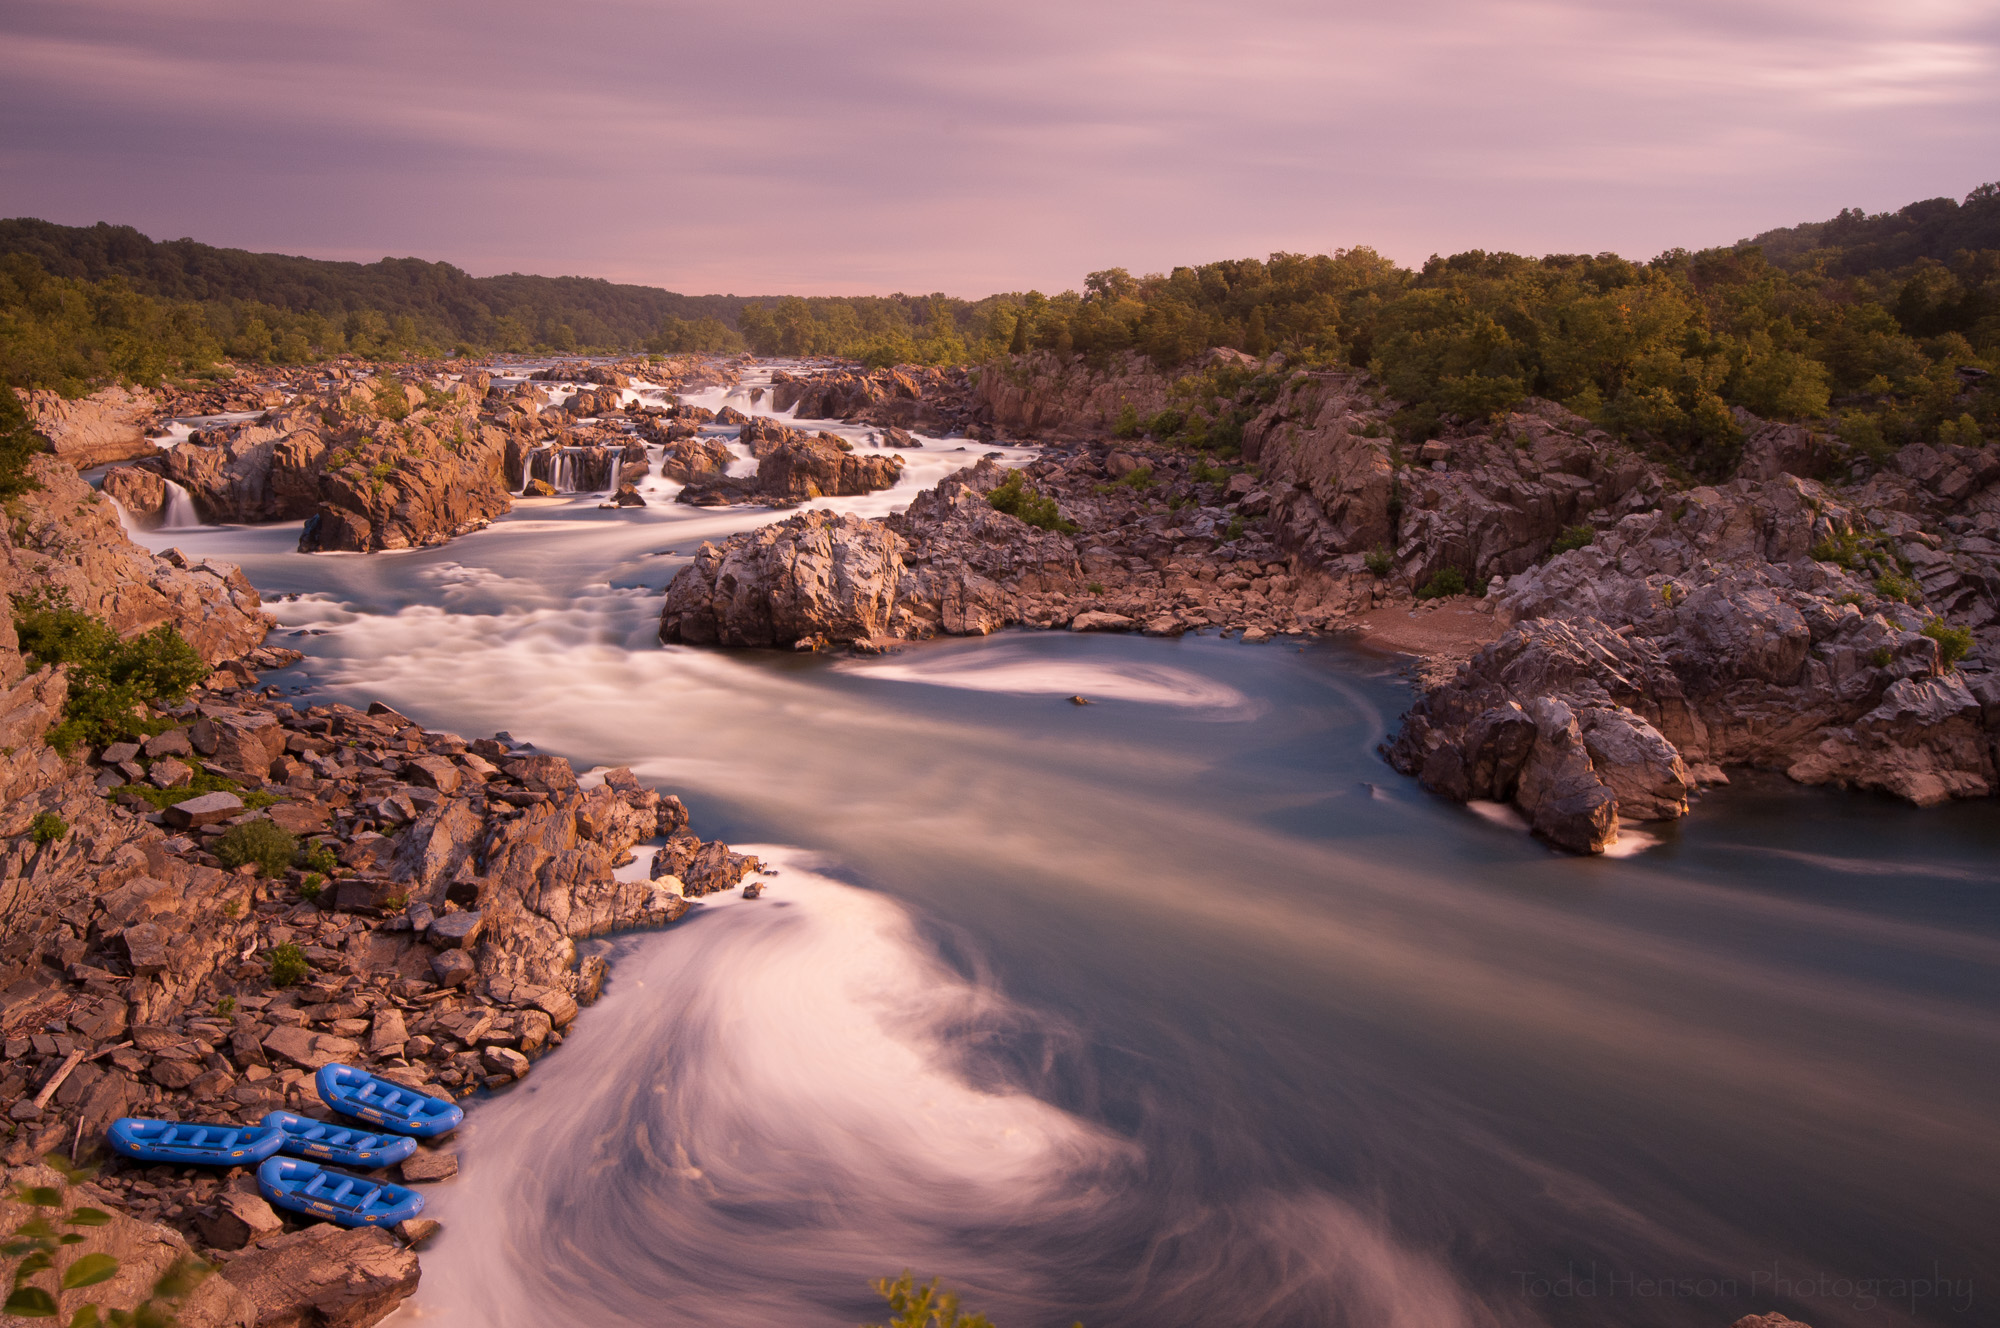
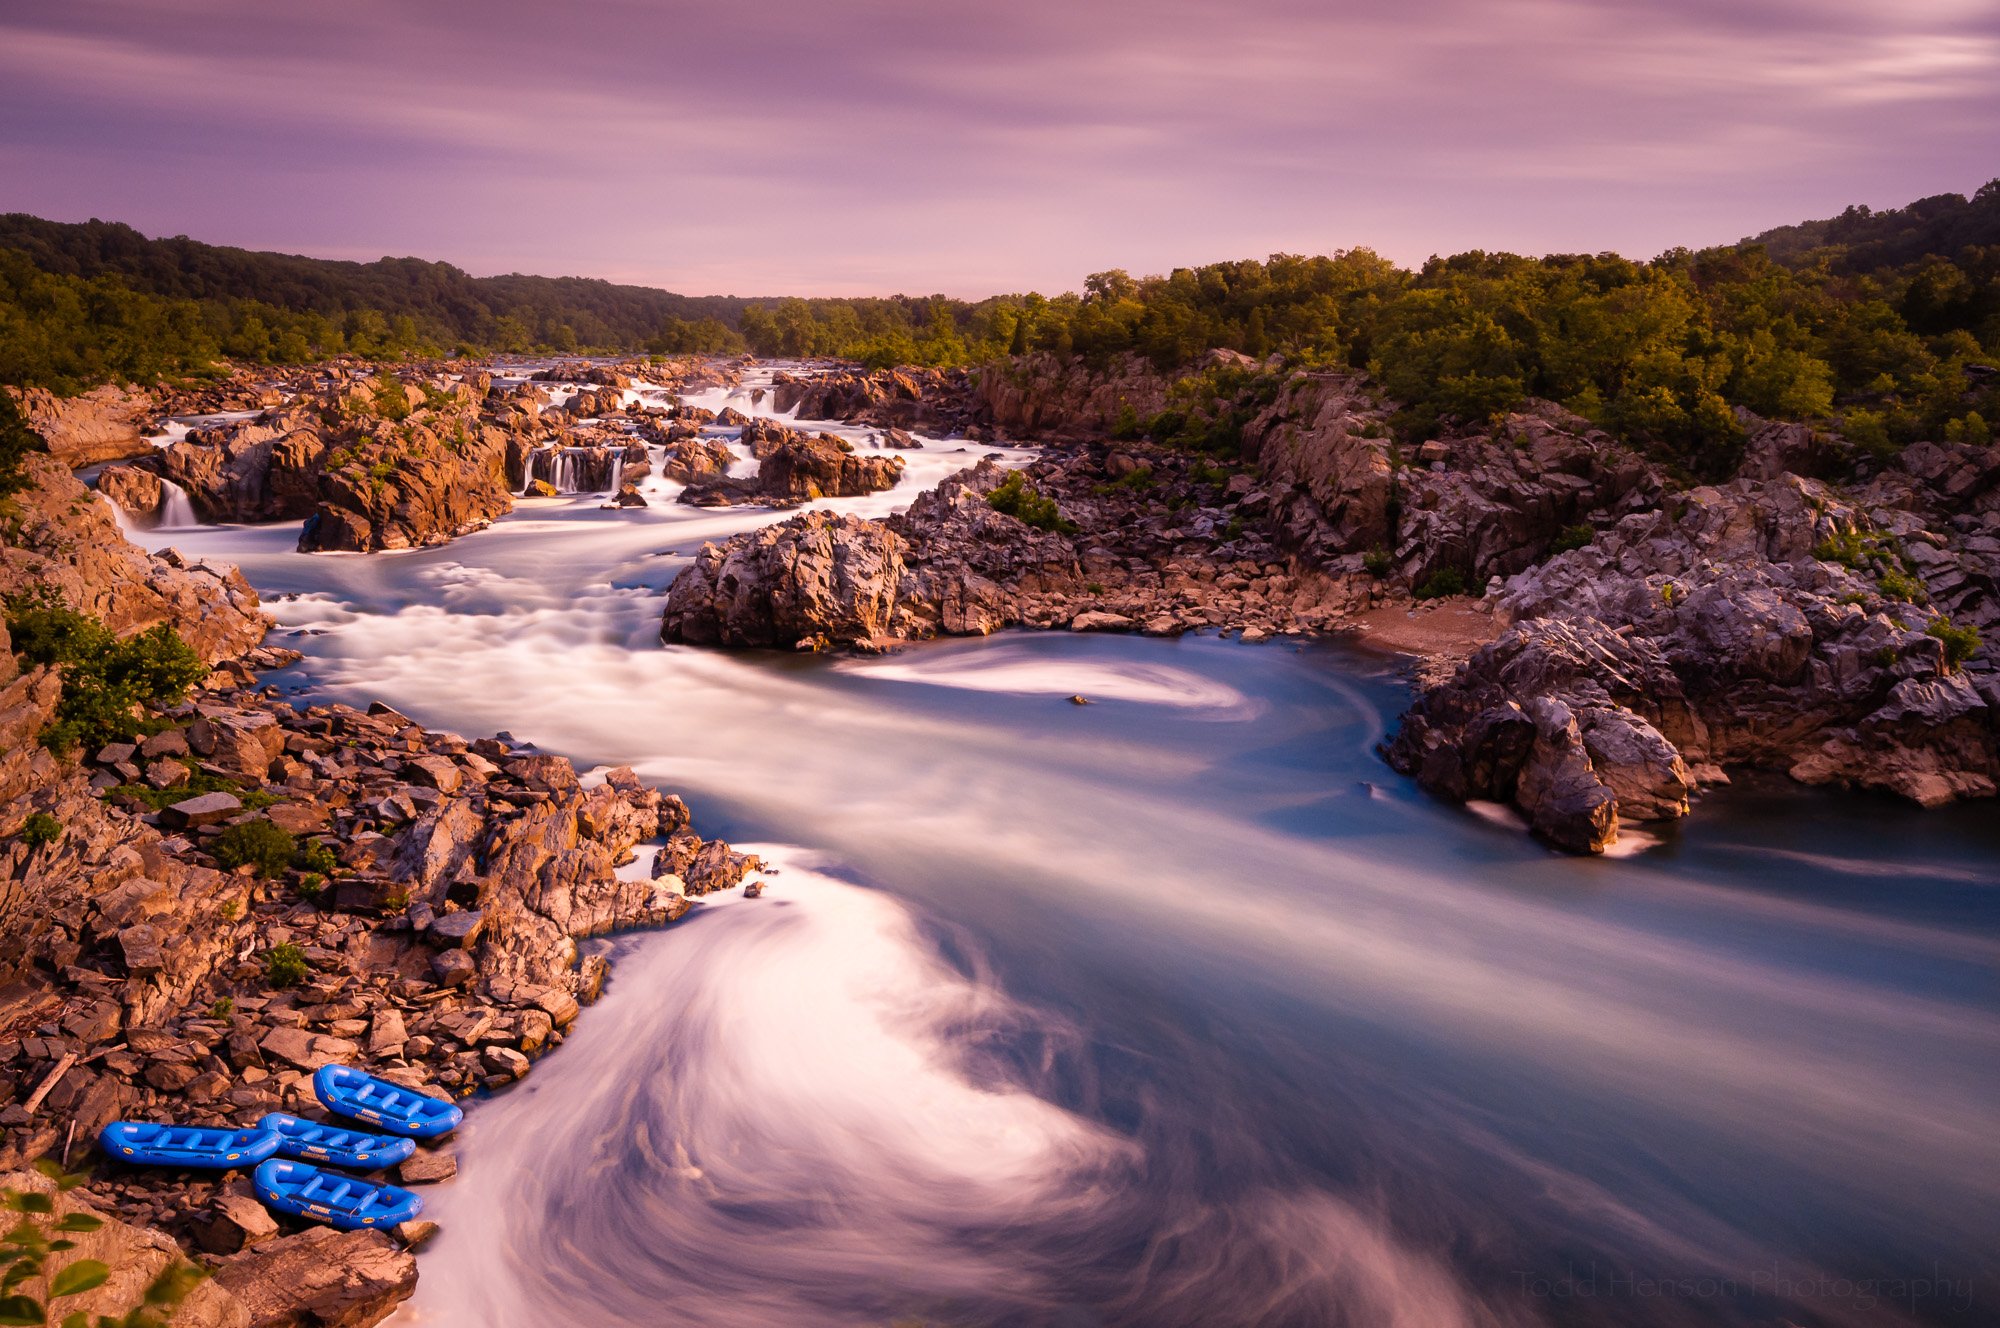
Prelude to Rafting. Great Falls Park, Virginia.

The Story

I love Great Falls Park, a national park located in northern Virginia along the Potomac River. Who would think such a beautiful and wild location would be located just outside Washington, D.C.? Just across the river is the Chesapeake & Ohio Canal National Historical Park, which also gives some great views of the falls and the river.

I was on the Virginia side when creating this particular photograph. I had arrived to the park just before sunrise, both because it’s far less crowded this time of day, and because it’s such a great time to photograph. Not only do you have great light, but you also don’t need to worry as much about blowing out highlights in the waterfalls, which is very easy to do if you wait until the sun is high in the sky on a cloudless day.

This photograph was created from the overlook just south of Fisherman’s Eddy. It provides a nice view of the falls, and also looks down on the rocks below, where you will sometimes see people fishing, rafting or kayaking.

The rafts were not in the scene when I first began photographing. I was focusing on the falls and the scenery. This is a beautiful landscape I never tire of. But then a rafting crew brought their blue rafts to the edge of the water and began setting up for a trip downriver. I realized there might be a story here, so I started focusing on the rafts, integrating them into the photograph. The rafting crew left the rafts and went back up the hill to bring down the rest of their gear. I liked the idea of these empty rafts sitting by the river. I thought it added that slight bit of tension, anticipation, or longing. Empty rafts so close to the water, waiting for people to take them out. Of course, this led to the title of the photograph, Prelude to Rafting.

During one specific exposure, the one that would result in the final image, the sun peaked out from behind a cloud and, like a spotlight, illuminated the rafts, rock face, and part of the river with a beautiful warm glow. I was so pleased this happened just as I started an exposure. It didn’t last long, but it lasted long enough. I was very happy with the exposure. None of the others had quite the drama as this one. Light is everything in photography.

I had arrived on the scene around 6:54 AM, and created my favorite exposure at 8:06 AM. I continued photographing until after 10 AM, but none of the other photos came close to this one. But even when I think I have a great image, I almost always continue photographing. You just never know what might happen. Perhaps the light will surprise you. Maybe something or someone will move into a position that makes a better image. And it’s hard to leave these sorts of beautiful locations.

The Technique

My plan that morning was to create some long exposure images that would blur the movement of the water and turn the scene into something we can’t see in reality. I did this with my Singh-Ray Mor-Slow 10-Stop Neutral Density filter. Think of a neutral density filter as sunglasses for the camera lens, blocking some light from entering the lens. In the case of this filter it blocks 10 stops of light.

I was also experimenting with my Singh-Ray Gold-N-Blue Polarizer, a great creative filter that lets you play with color in the scene. I don’t use this filter all that often, but it’s a lot of fun to work with and can help create some really striking images. It’s just like a normal polarizer in that you turn the filter to adjust the polarization effect. The difference is that as you turn the filter it also affects the blues and golds in the scene. This can provide a very subtle effect that enhances the natural colors in a scene, or it can radically alter the colors and create very unnatural looking images. And like all polarizers, it also blocks some light from entering the lens, which allowed me to use even slower shutter speeds.

Because I was working on long exposures having the people around the rafts didn’t do much for the photos. They turned into blurred streaks, which can be nice in some images, but just didn’t seem to fit in this one. So I waited until the people went back uphill and out of the scene. Then I started really experimenting with the Gold-N-Blue polarizer, turning it a little at a time, creating exposures as I went. Each exposure was a little over a minute in length due to the 10-stop neutral density filter and the polarizer.

Two pieces of gear are necessary, or at least highly recommended, when creating long exposure images:

  • Tripod

  • Remote shutter release

I had the camera mounted on a sturdy tripod to keep it steady and prevent blur caused by camera movement. There’s just no way I could hold the camera steady for over a minute without a tripod. I used a remote shutter release instead of pressing the shutter release button on the camera. This helps reduce the chance of moving the camera when pushing the shutter button. Once you press the shutter release be careful not to touch the camera, lens, or tripod during the exposure. If you do accidentally touch anything you may get a blurry image.

The Processing

Before processing images comes the editing phase. This is where you go through all the photos from the day and decide which are worth further work. This can be a difficult process, but in this case it was pretty easy. I was most interested in the one long exposure that had caught that beautiful spotlight of sunshine.

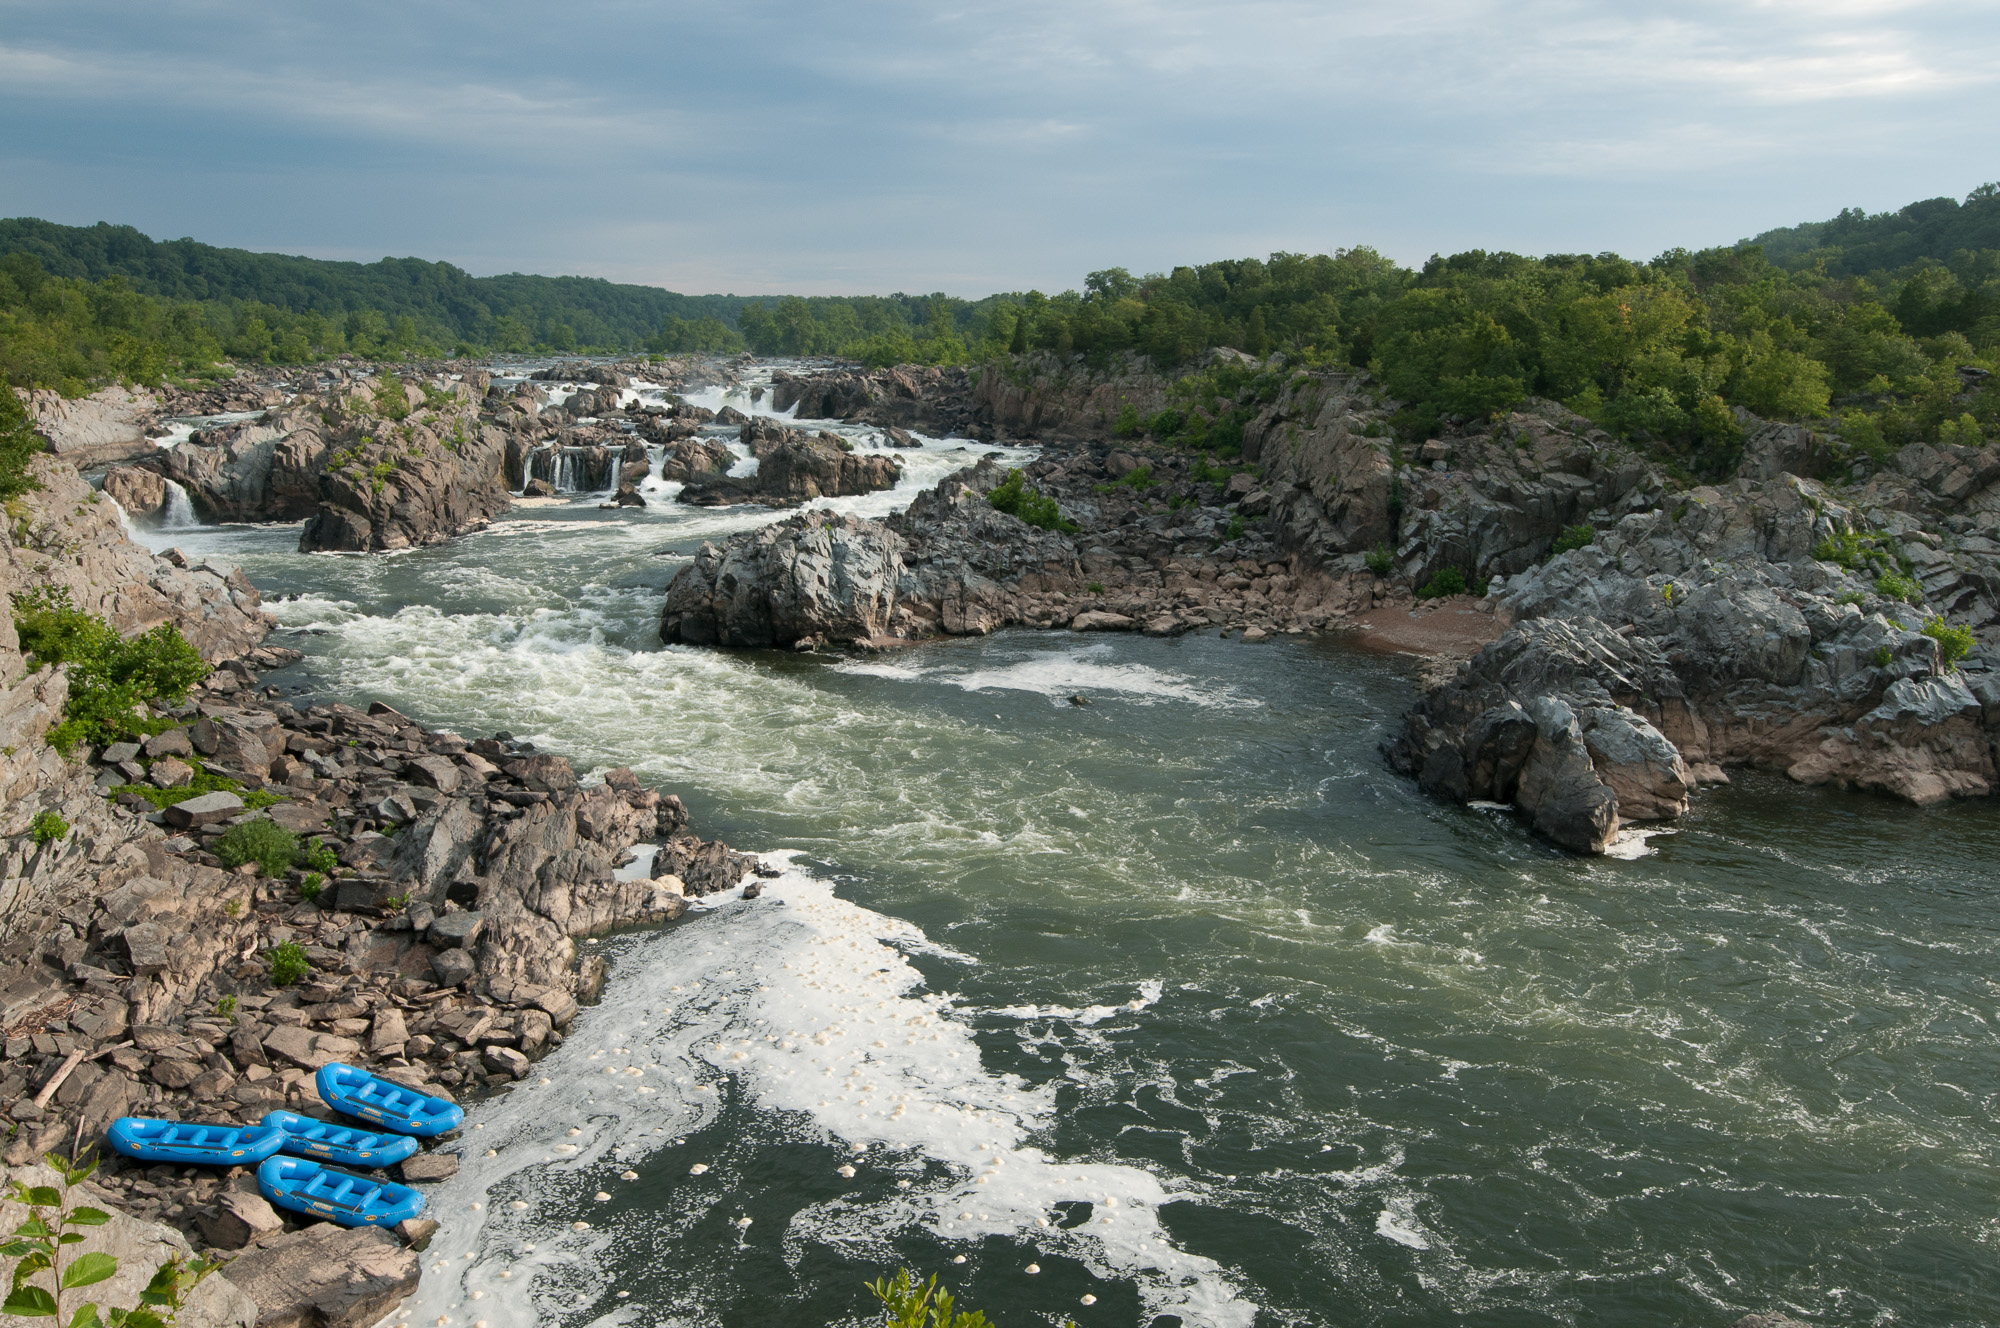
I’ve pulled out a few other photographs for this post to show the different versions of the scene. The first image is an unprocessed raw file without any filters. It gives a more accurate representation of the colors in the scene that day, though being a raw file it is lacking in contrast and punch.

Unprocessed raw image without any filters on the lens.

In the next photograph I’ve put on the 10-stop neutral density (ND) filter, which blocks light from entering the lens. This allows me to slow the shutter speed down significantly. I also put on the Gold-N-Blue polarizer to affect the colors, but this filter also blocks out a couple more stops of light, allowing an even longer exposure. By way of example, the version without any filters had a shutter speed of 1/80 second, whereas the versions with the filters had shutter speeds of between 60 - 90 seconds.

Unprocessed raw image with 10-stop ND filter and Gold-N-Blue polarizer (more toward the gold side).

You can see the effects of the ray of sunlight in the next photograph, which is the unprocessed raw version of the final image. I still have both filters on the lens. I have adjusted the Gold-N-Blue polarizer, which changes the color balance in the image. You can see this most easily in the color of the water. In the previous image the water had a more gold tone, almost muddy, whereas in this image it has a bluer tone.

Unprocessed raw image with both filters (Gold-N-Blue more towards the blue side) and a little help from the sun.

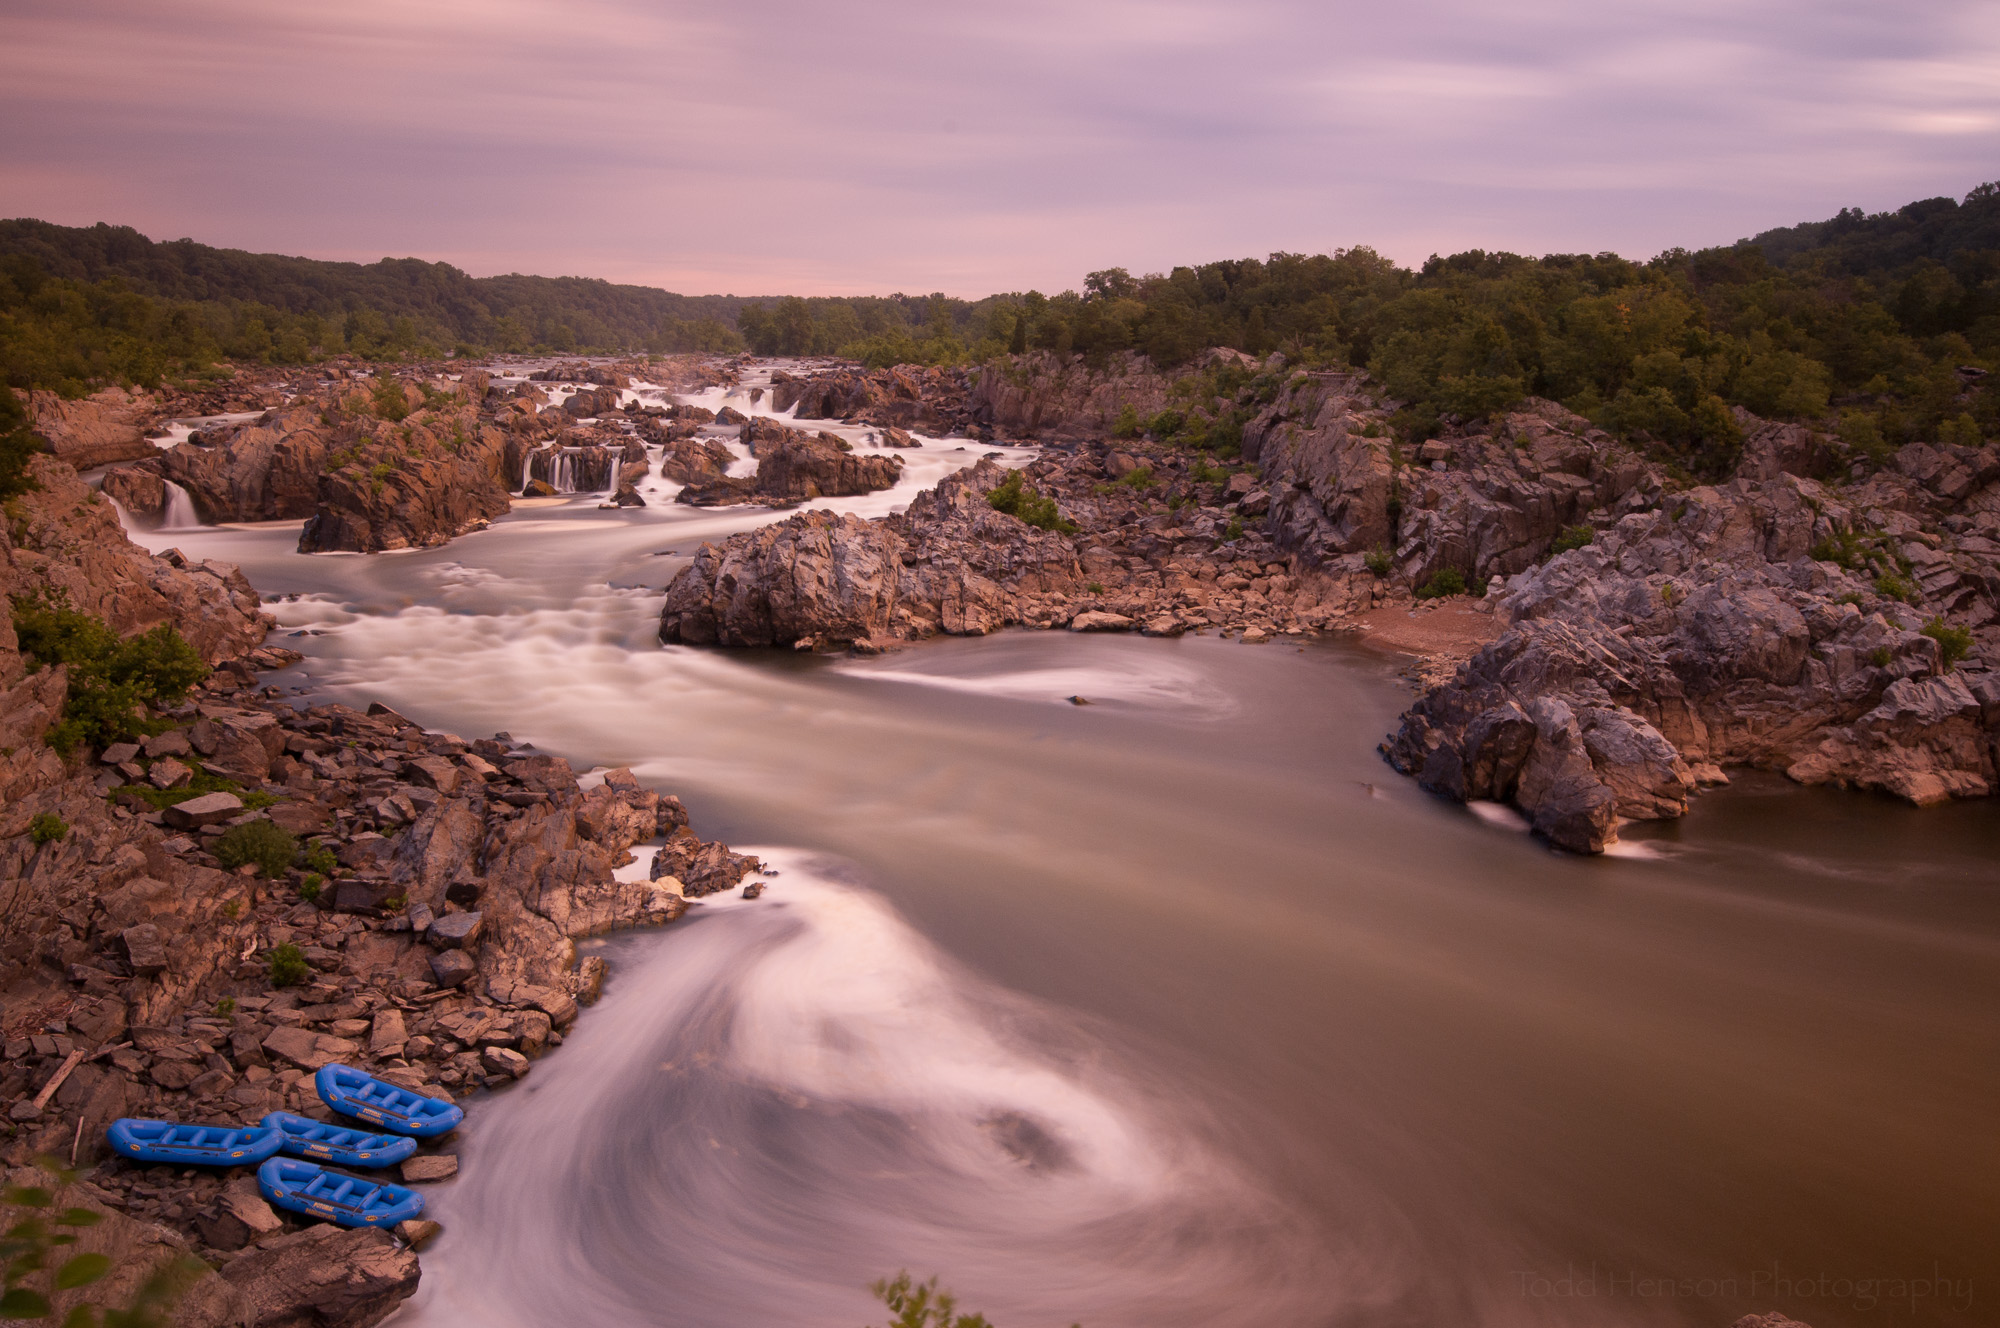
The final photograph is the processed image. I applied lens corrections, which undo some of the warp caused by the wide angle lens. I adjusted the color balance to keep the highlights of the water as white as possible. I adjusted whites and blacks and the tone curve to provide some contrast. I dodged and burned (lightened and darkened) some select areas to help draw the eye through the scene.

The final processed image. Includes use of 10-stop ND filter and Gold-N-Blue polarizing filter on the lens, the sun peaking through the clouds, and post-processing in Adobe Lightroom.

I also cloned out a few distractions. If you compare the images you’ll see I removed a small patch of leaves in the bottom center, a small rock extending into the lower right, and a tiny patch of brown leaves in the upper right that I found distracting. As I’ve discussed in the past, I would not have done these things if this was intended to be a documentary photograph, but I’m ok making these kinds of tweaks when creating a more artistic representation of what I saw. I want to keep the core reality of the scene, but add in the wonder and excitement I felt that day.

Click on the images below to step through each version of the photograph. I hope you enjoy it. Let me know if you would have done anything differently.


Do you enjoy these posts?

Sign up to receive periodic emails with updates and thoughts. Don’t worry, I won’t spam you. And please consider purchasing artwork or products from my online store, and using my affiliate links in the sidebar to the right when shopping online.

I appreciate your support!


Facing the Storm - The Story Behind the Image by Todd Henson

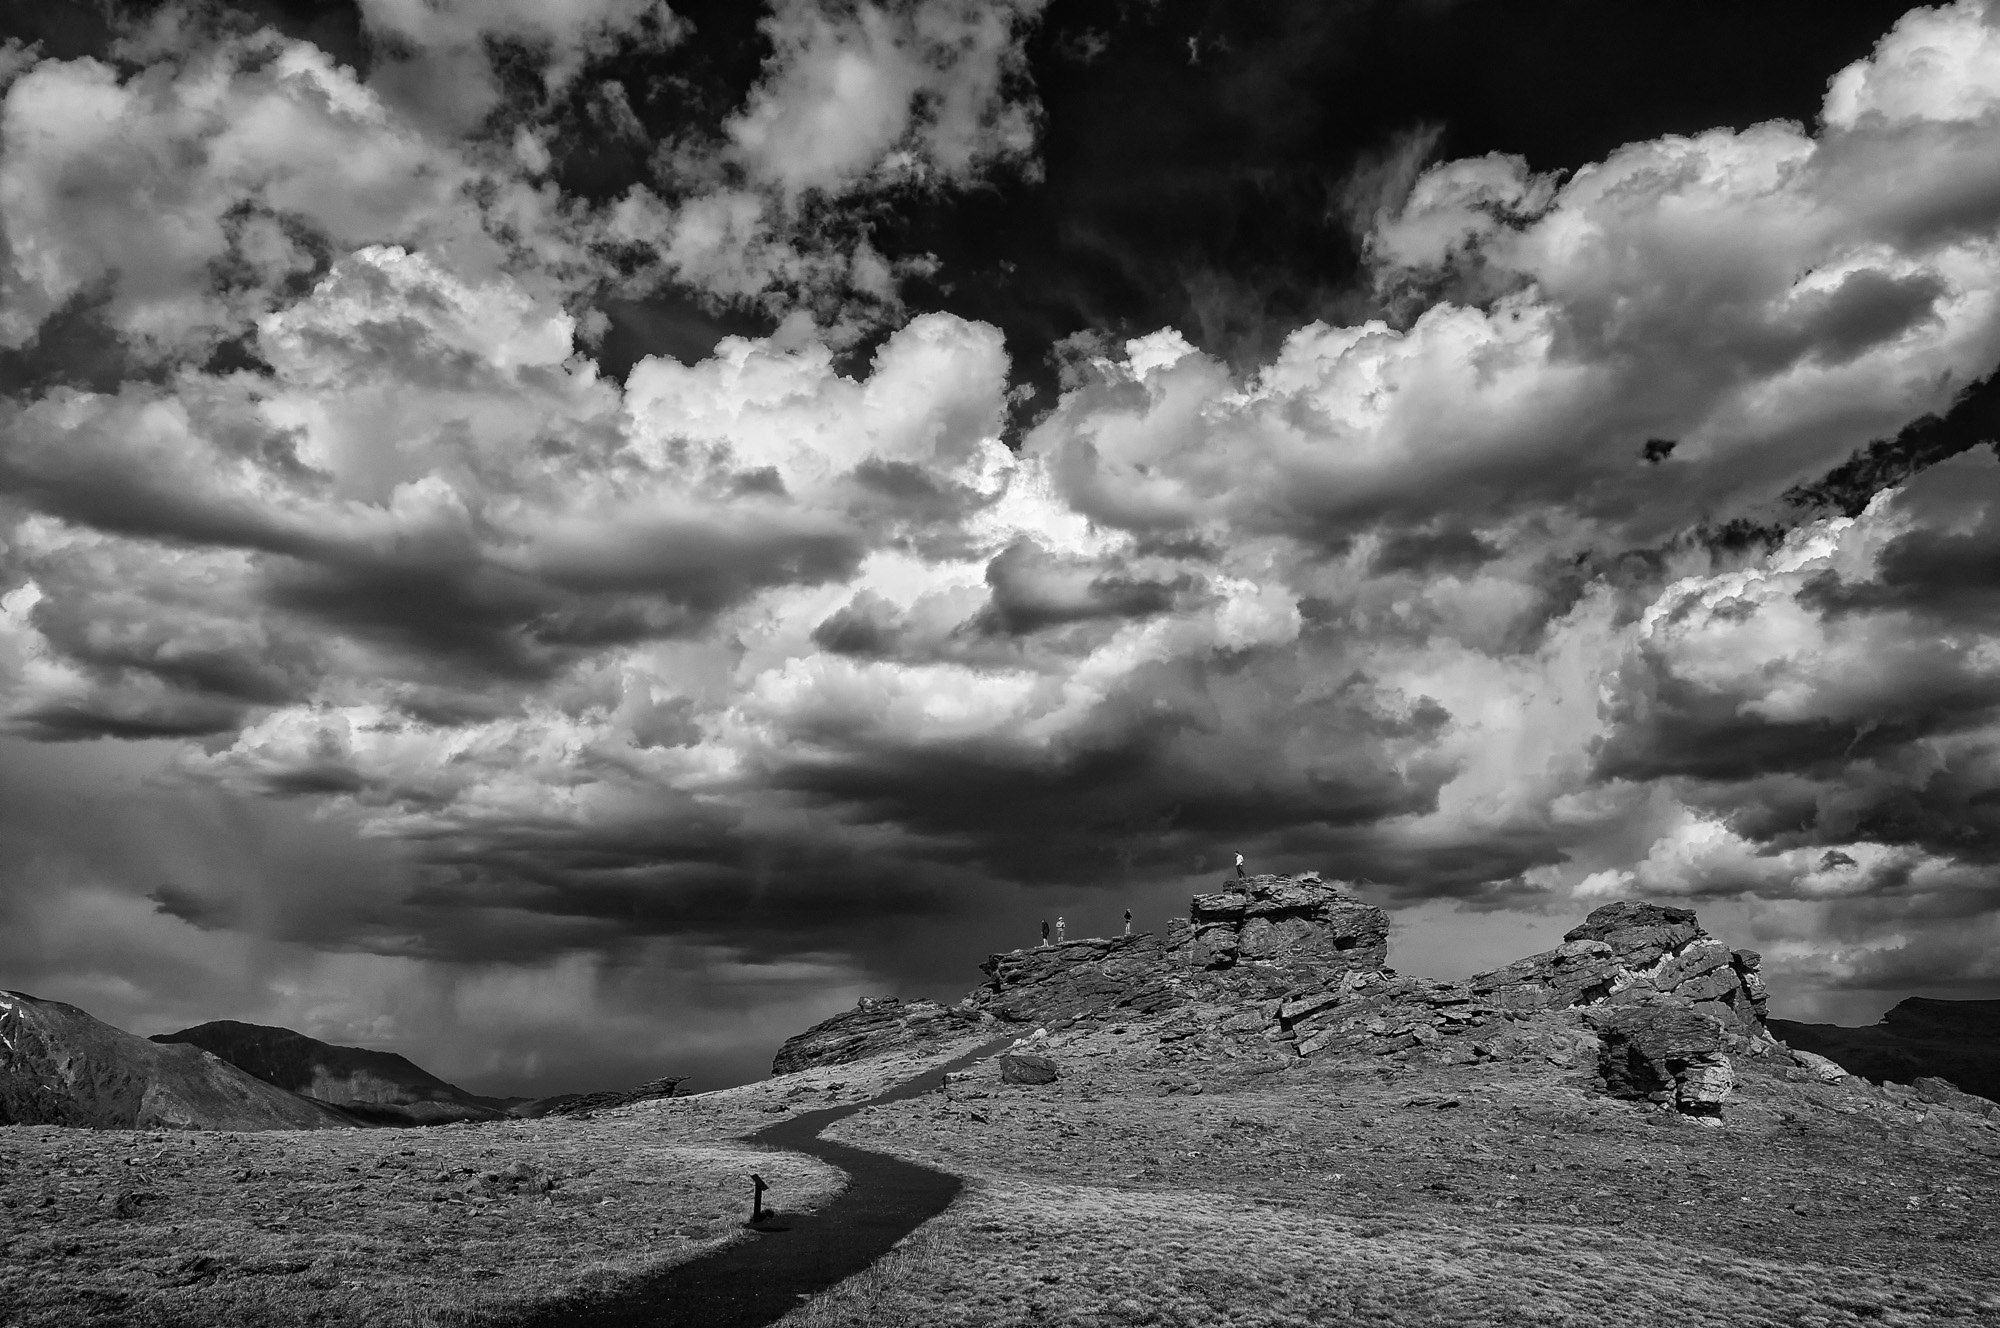
Facing the Storm, Rocky Mountain National Park (black and white)

Story

Facing the Storm is an image I created while on vacation in Rocky Mountain National Park. The location is the end of the Tundra Communities Trail, which starts at Rock Cut just off Trail Ridge Road. The entire trail is paved and is a one-way in and back trail. The rock formations seen in the image are the end of the trail.

Tundra Communities Trail is a reasonably short trail, only 1 mile round trip to the rock formations and back. And the elevation change is only 200 feet. But I have to admit this trail completely wore me out. I spend most of my time on the east coast at sea level. This trail is at an elevation of over 12000 feet. That’s more than 2 and a quarter miles above sea level. I knew the air was thinner at those elevations, but not having been at them very often I’d forgotten just how much of a difference it makes. I was constantly stopping and catching my breath on the half mile hike up the tundra. This was a reminder I could use a little more exercise in my routine.

It was a beautiful trail surrounded by tundra, with flowers of various kinds blooming here and there. I could have spent far more time here than I did, but I only had one day, so I had to keep moving. I was fortunate the sky was full of interesting cloud formations, and storms could be seen in the distance. Rain was expected in this area, but it held off for the time I was there.

When I had almost reached the end of the trail, I stopped to take in the fantastic view and create a few photographs. I was most drawn to the sky and the storms in the distance. I loved the look of those storms against the rock formations. There were several people on top of the rock formations, and I was ok with that. Sometimes having a person in an image can help create a sense of scale.

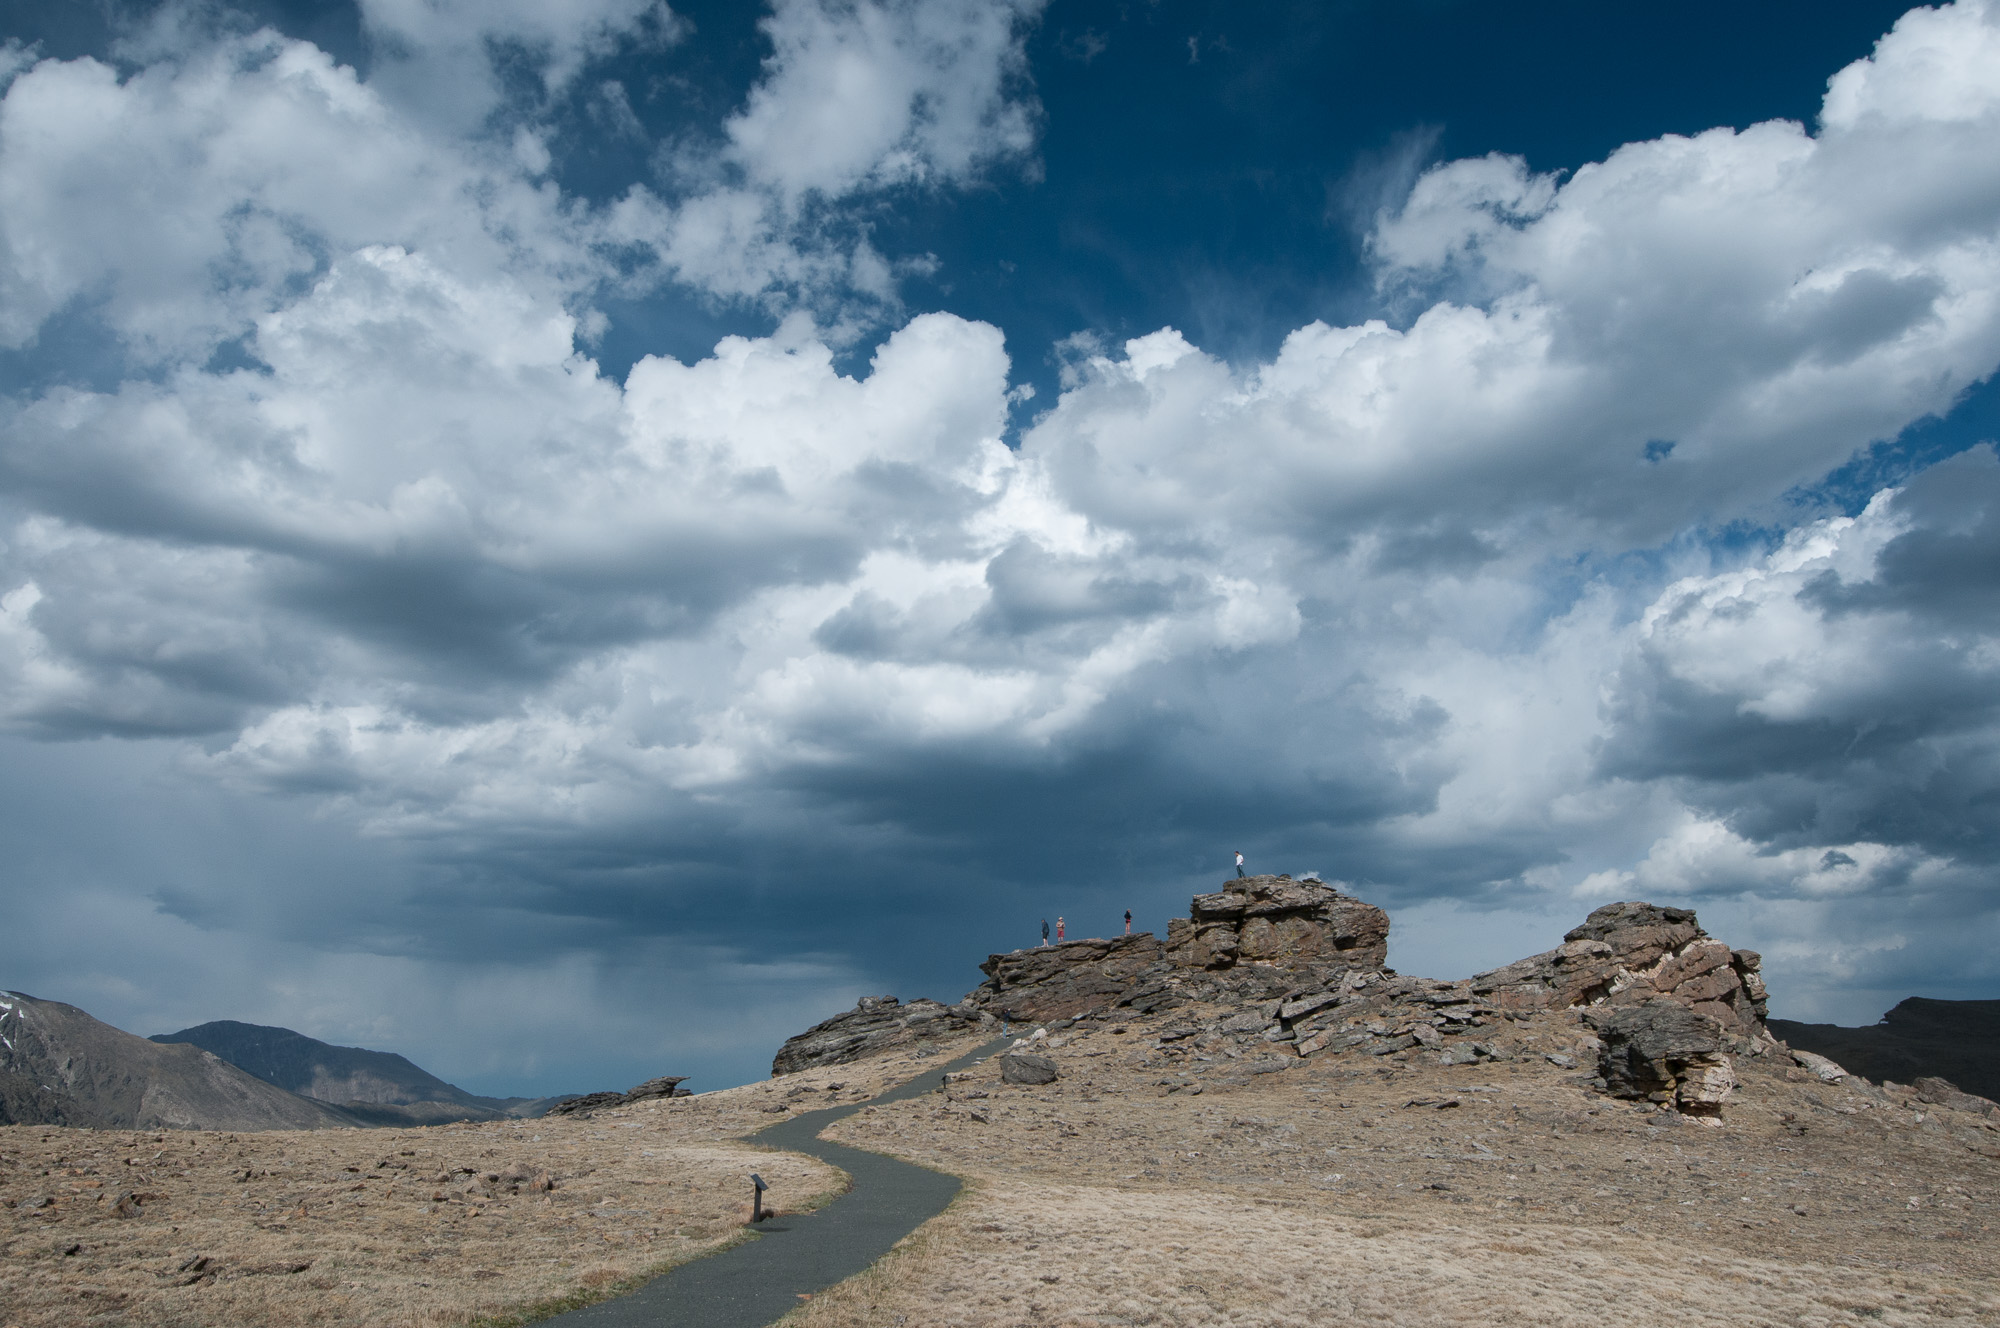
Facing the Storm, unprocessed raw color photo, straight out of camera

The unprocessed raw color image gives a good indication of how the scene looked to my eyes. Unprocessed raw images straight out of the camera are often a little flat and this image shows that. It hasn’t yet had the processing applied to it that cameras automatically apply to JPEG images. That’s why we import raw images into software, to allow us to control how the image is processed instead of allowing the camera to do it for us.

I knew I would try converting many of the images I made to black and white, so I was most focused on the light, the texture of the rocks, and the tonal values of the scene and how they would translate to different values of grey. I smiled when the person with the white shirt climbed to the top of the rocks. I knew the white shirt would stand out nicely in a black and white conversion, and I loved how he was facing the direction of the storms. I imagined this lone individual, standing alone on the rocks, facing the storm and contemplating his life. Of course, there were other people on the rocks, but their clothing was darker and wouldn’t stand out quite as much. I’d have to wait and see how the photo looked after converting it to black and white.
After creating a few images I continued my hike to the rock formations, climbed to the top to see the view from there, and then slowly wandered back down to the car. The focus of this story is on this specific scene, but the location has much more to offer. As I mentioned earlier, the tundra can be covered in little flowers depending on the time of year. And I was fortunate on the hike back down to watch and photograph a group of elk walking along the ridge line very near by, close enough to get good images with my 70-200mm lens. Back at the trailhead, just across the road, is a sharp rocky drop off that is home to American pika and yellow-bellied marmots.

This is a location and a hike I highly recommend to anyone visiting Rocky Mountain National Park. The entire park is just stunningly beautiful. It’s difficult to find words to convey just how remarkable this park is. And I was only there for one day. I could have spent weeks wandering through the park. Go visit if you have the opportunity.

Post-Processing

When I finally returned home it was time to open and process the raw images. I was looking for something bold, something that really showed off the texture of the rocks and the foreboding storm in the distance. I had captured the person with the white shirt facing towards the storm, so Facing the Storm seemed an obvious title for the image. I liked having the person standing atop the rocks, giving a little scale, with the winding curve of the trail leading right to the formation he’s standing on.

I usually do all my processing in Lightroom (or Aperture back in the day), but occasionally I will use a plugin package. For this particular image I used Silver Efex Pro from the Google Nik Collection. The collection contains a large number of plugins for a variety of situations, and Google has made the entire collection free, so check it out if you use Lightroom, Photoshop, or Aperture (though Apple has discontinued Aperture). Silver Efex Pro, used for black and white conversions, is my favorite tool from this collection. It contains a number of filters that affect the image in various ways. You can apply multiple filters, and each filter is fully adjustable, giving you endless control over how it affects the image.

Facing the Storm, initial black and white conversion using Silver Efex Pro

I was very pleased with my initial black and white conversion. I was able to capture the texture I’d wanted, and I brought out the drama in the sky. The person on the rock was easy to see with his white shirt (though it is much easier to see him on a larger screen). There were 3 other people on another portion of the rock, but they didn’t stand out quite as much and were secondary to the individual standing alone.

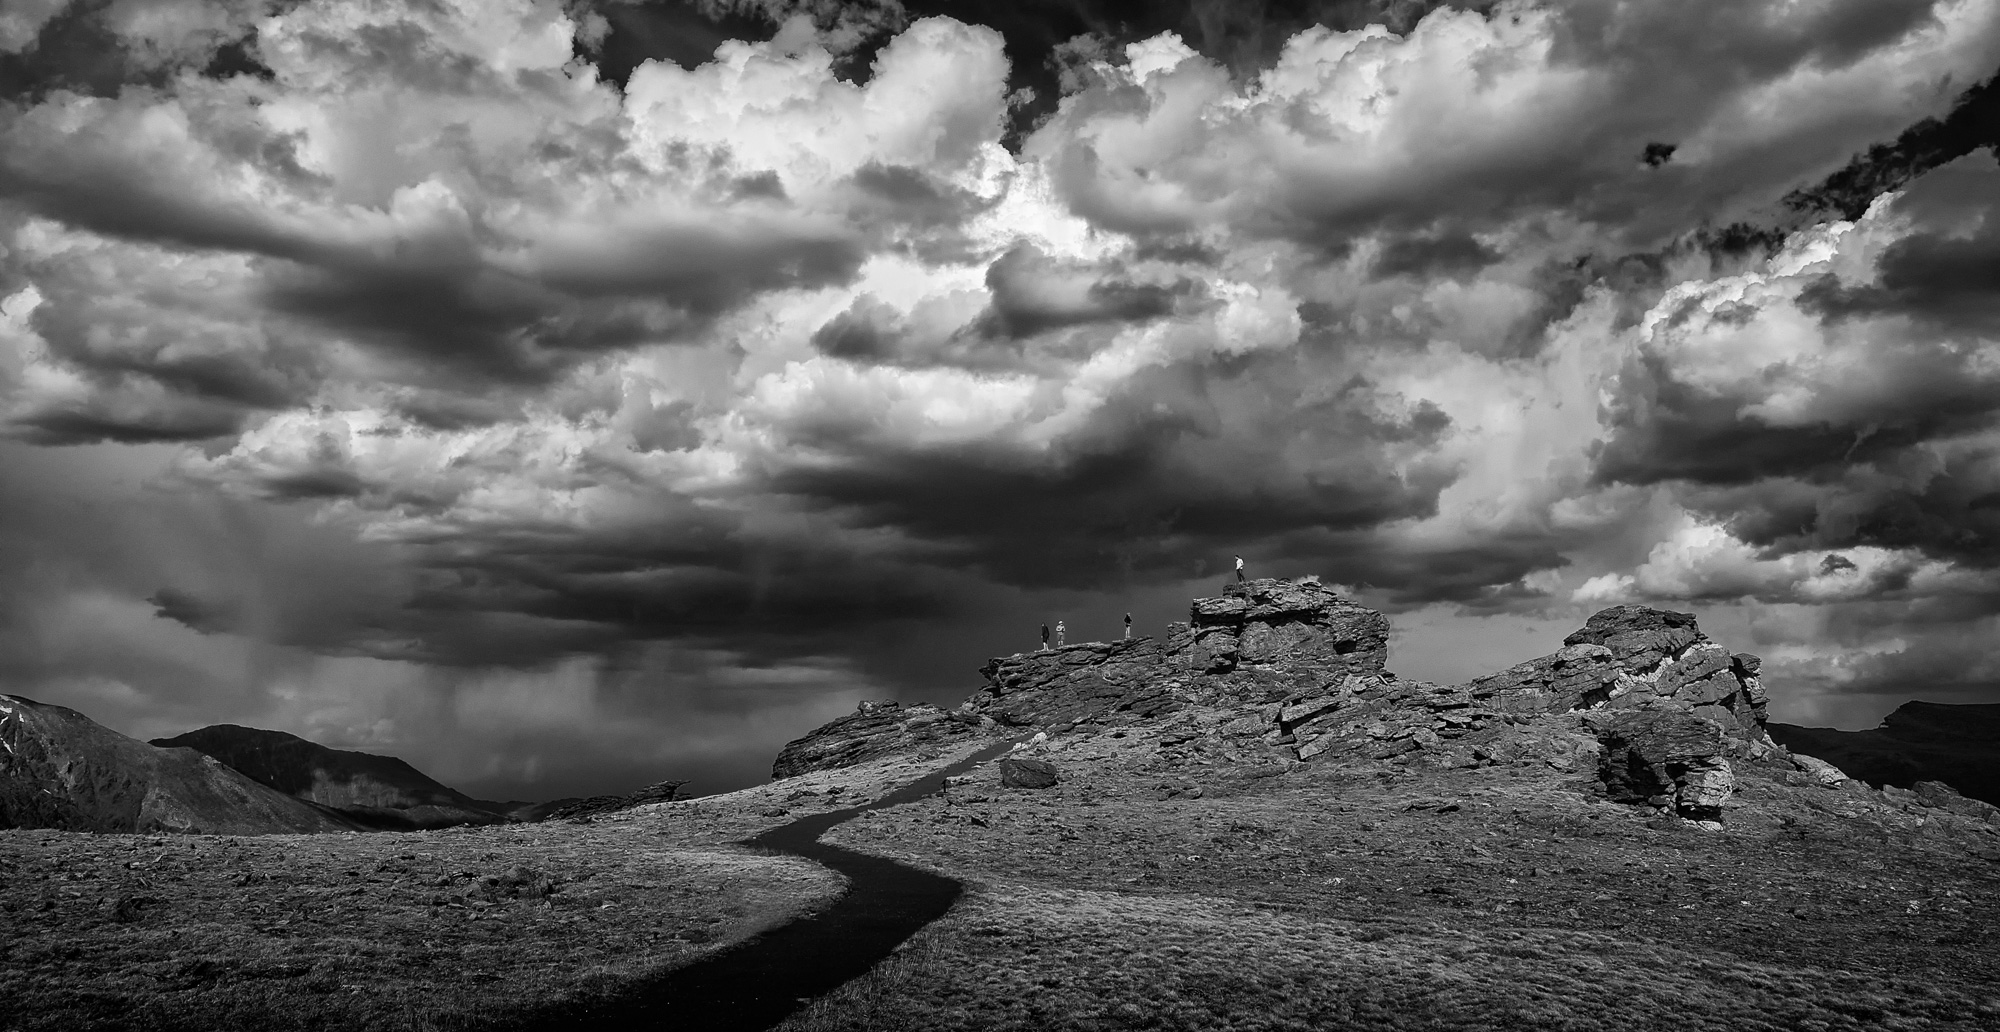
After Silver Efex Pro I took the image back into Lightroom to perform some final processing. I thought the dark cloudless region of sky at the top of the frame was distracting, so I decided to crop the image into a panorama format. After this I dodged and burned (lightened and darkened) portions of the image to bring out more texture in the landscape and to help direct the eye up the trail towards the rock formations. This is something that was often done in the darkroom with film, with one of the masters being Ansel Adams. I’ve been heavily influenced by his work.

One of the final steps was the removal of distracting elements. This has become much easier in the digital darkroom than it would have been in the film darkroom. And there is sometimes controversy surrounding this sort of digital manipulation. If I had created this image as a photojournalist, or to appear in a guidebook, I would have skipped this step. But because my focus here is creating an artistic image I have no problem removing distractions, though I am still very hesitant to add anything to an image. In this case I removed the sign post towards the bottom of the trail.

Facing the Storm, after further processing, dodging and burning, and removing distractions

While writing this post I began to look more closely at the image, and wondered if I might be able to make the message stronger. The title is Facing the Storm, and for me it’s about that single individual in the white shirt standing alone and facing the storm. So I thought removing the other 3 people on the rocks might bring this more into focus, might add that element of being alone in this wide open landscape facing the oncoming storm. And this resulted in the following image. I feel this image best captures my vision of the scene.

Facing the Storm, final version

Below is a slide show of each step. Click on the image to step through each version.

Let me know your thoughts. Would you have processed it differently? I ask myself this question all the time and will occasionally return to an image and refine or reprocess it. Do you ever reprocess your own images?


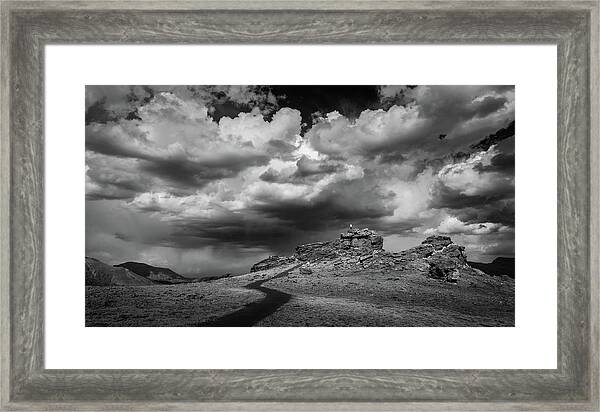
Photography Prints by Todd Henson


Do you enjoy these posts?

Sign up to receive periodic emails with updates and thoughts. Don’t worry, I won’t spam you. And please consider purchasing artwork or products from my online store, and using my affiliate links in the sidebar to the right when shopping online.

I appreciate your support!