rapids

Sketches Along the Creek by Todd Henson

A photographic sketch along the creek, exploring possibilities

Sometimes I find a new location and think it has some real photographic potential so I’ll look over the scene, consider angles and compositions, and begin making images. Of course I hope one of those images will end up being a winner, but I know that often they’ll just be sketch images helping me get a feel for the location. It can take many trips before I create an image I really like, one I can’t wait to show.

When I create these sketch images I’m trying to craft something great, so I do focus in on what I think might be a final image. But I also try to remember to zoom back out a bit, either with a zoom lens or with my feet, so I can capture some images of the larger scene. This can be immensely useful for planning out potential future shoots when I return to the location. I might have missed an angle in person that I notice in one of the photos. So next time I return I’ll have more of a plan than on the first trip.

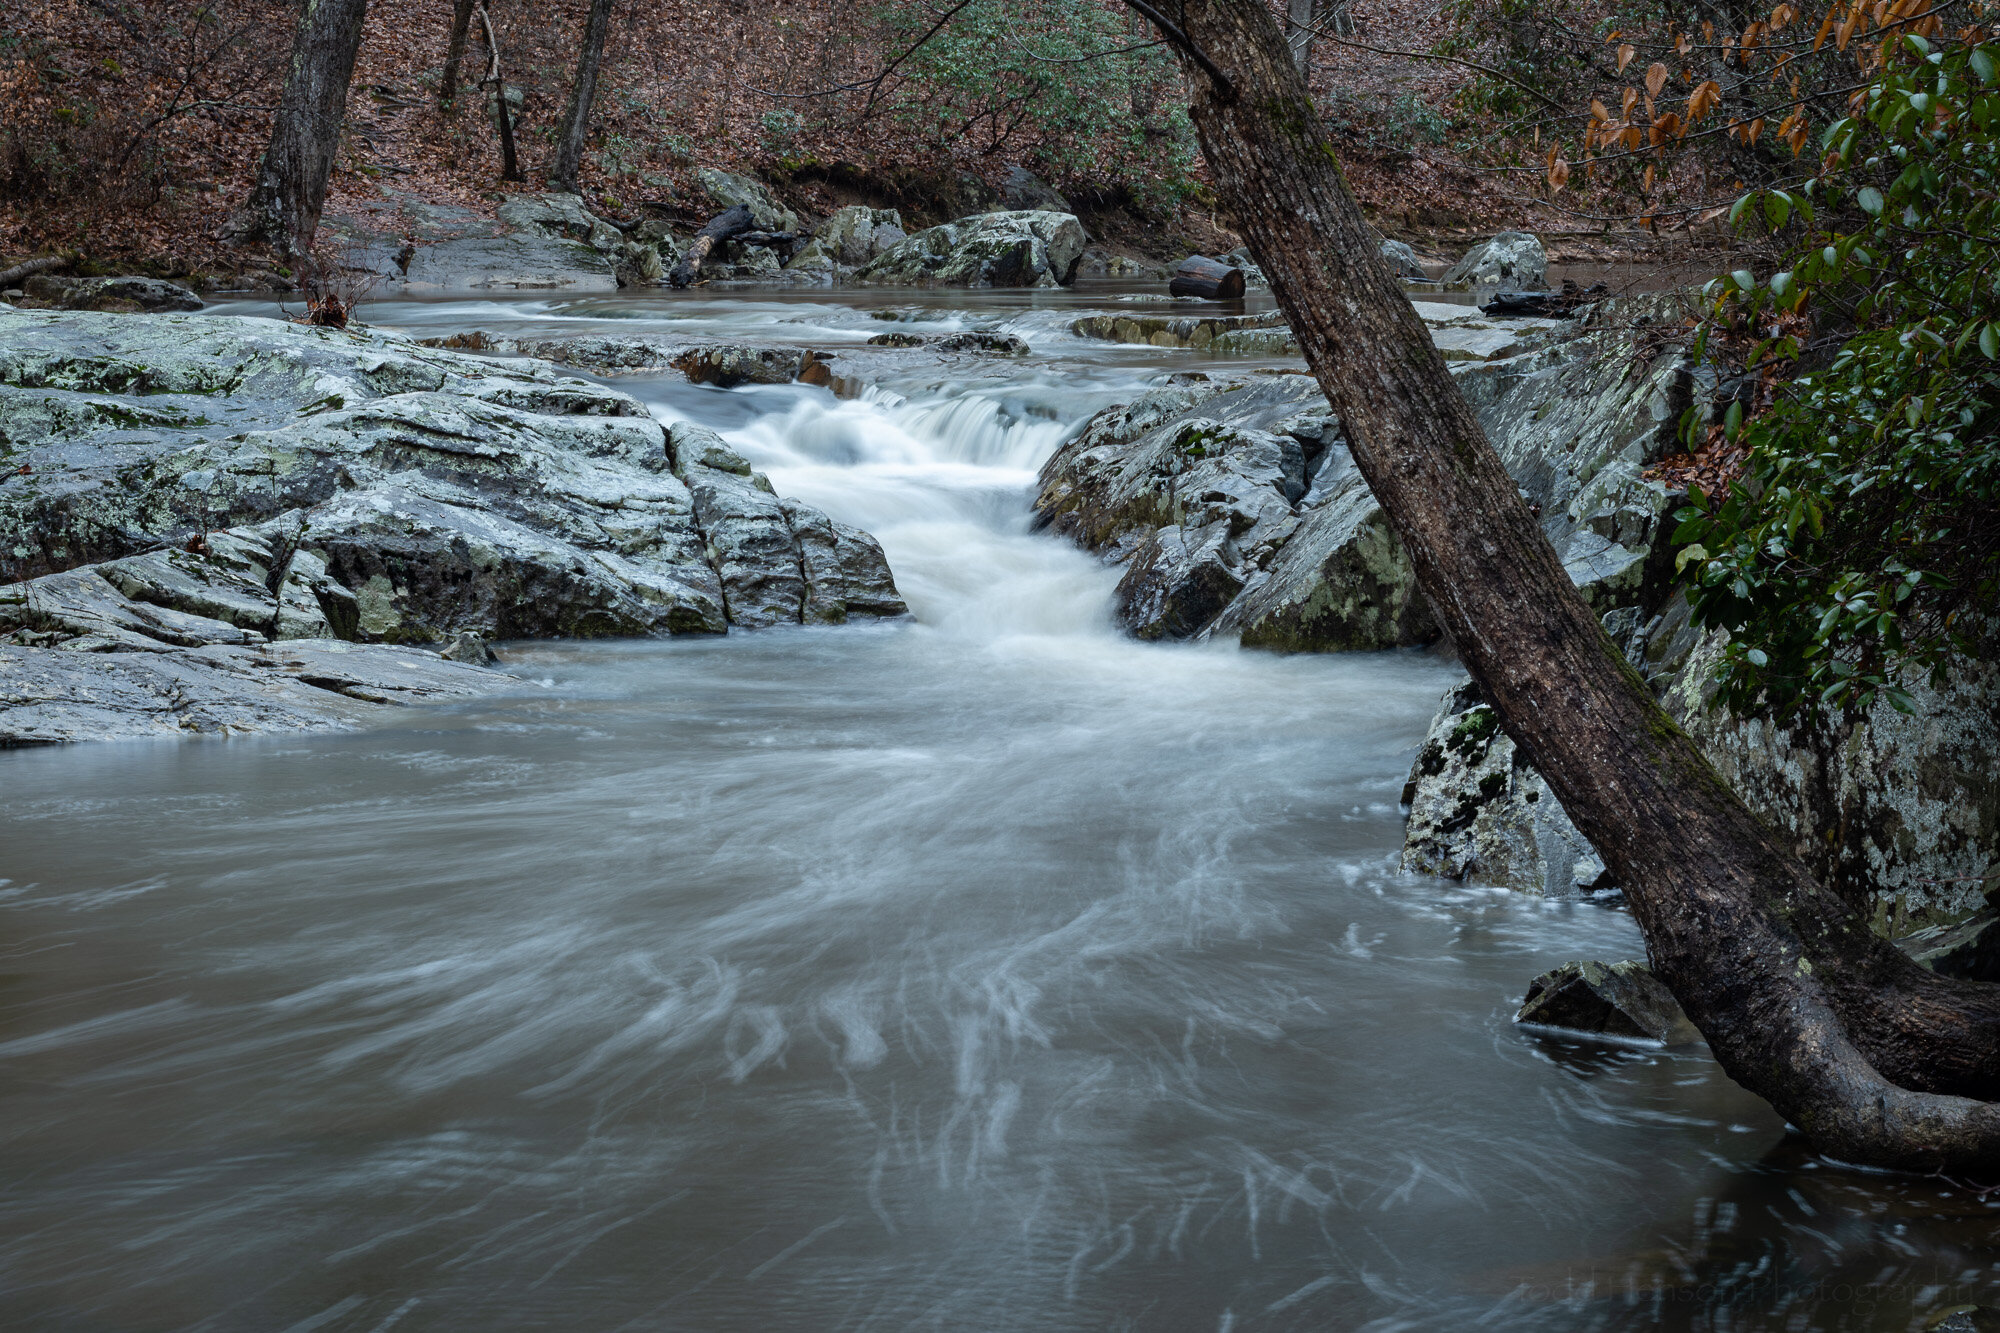
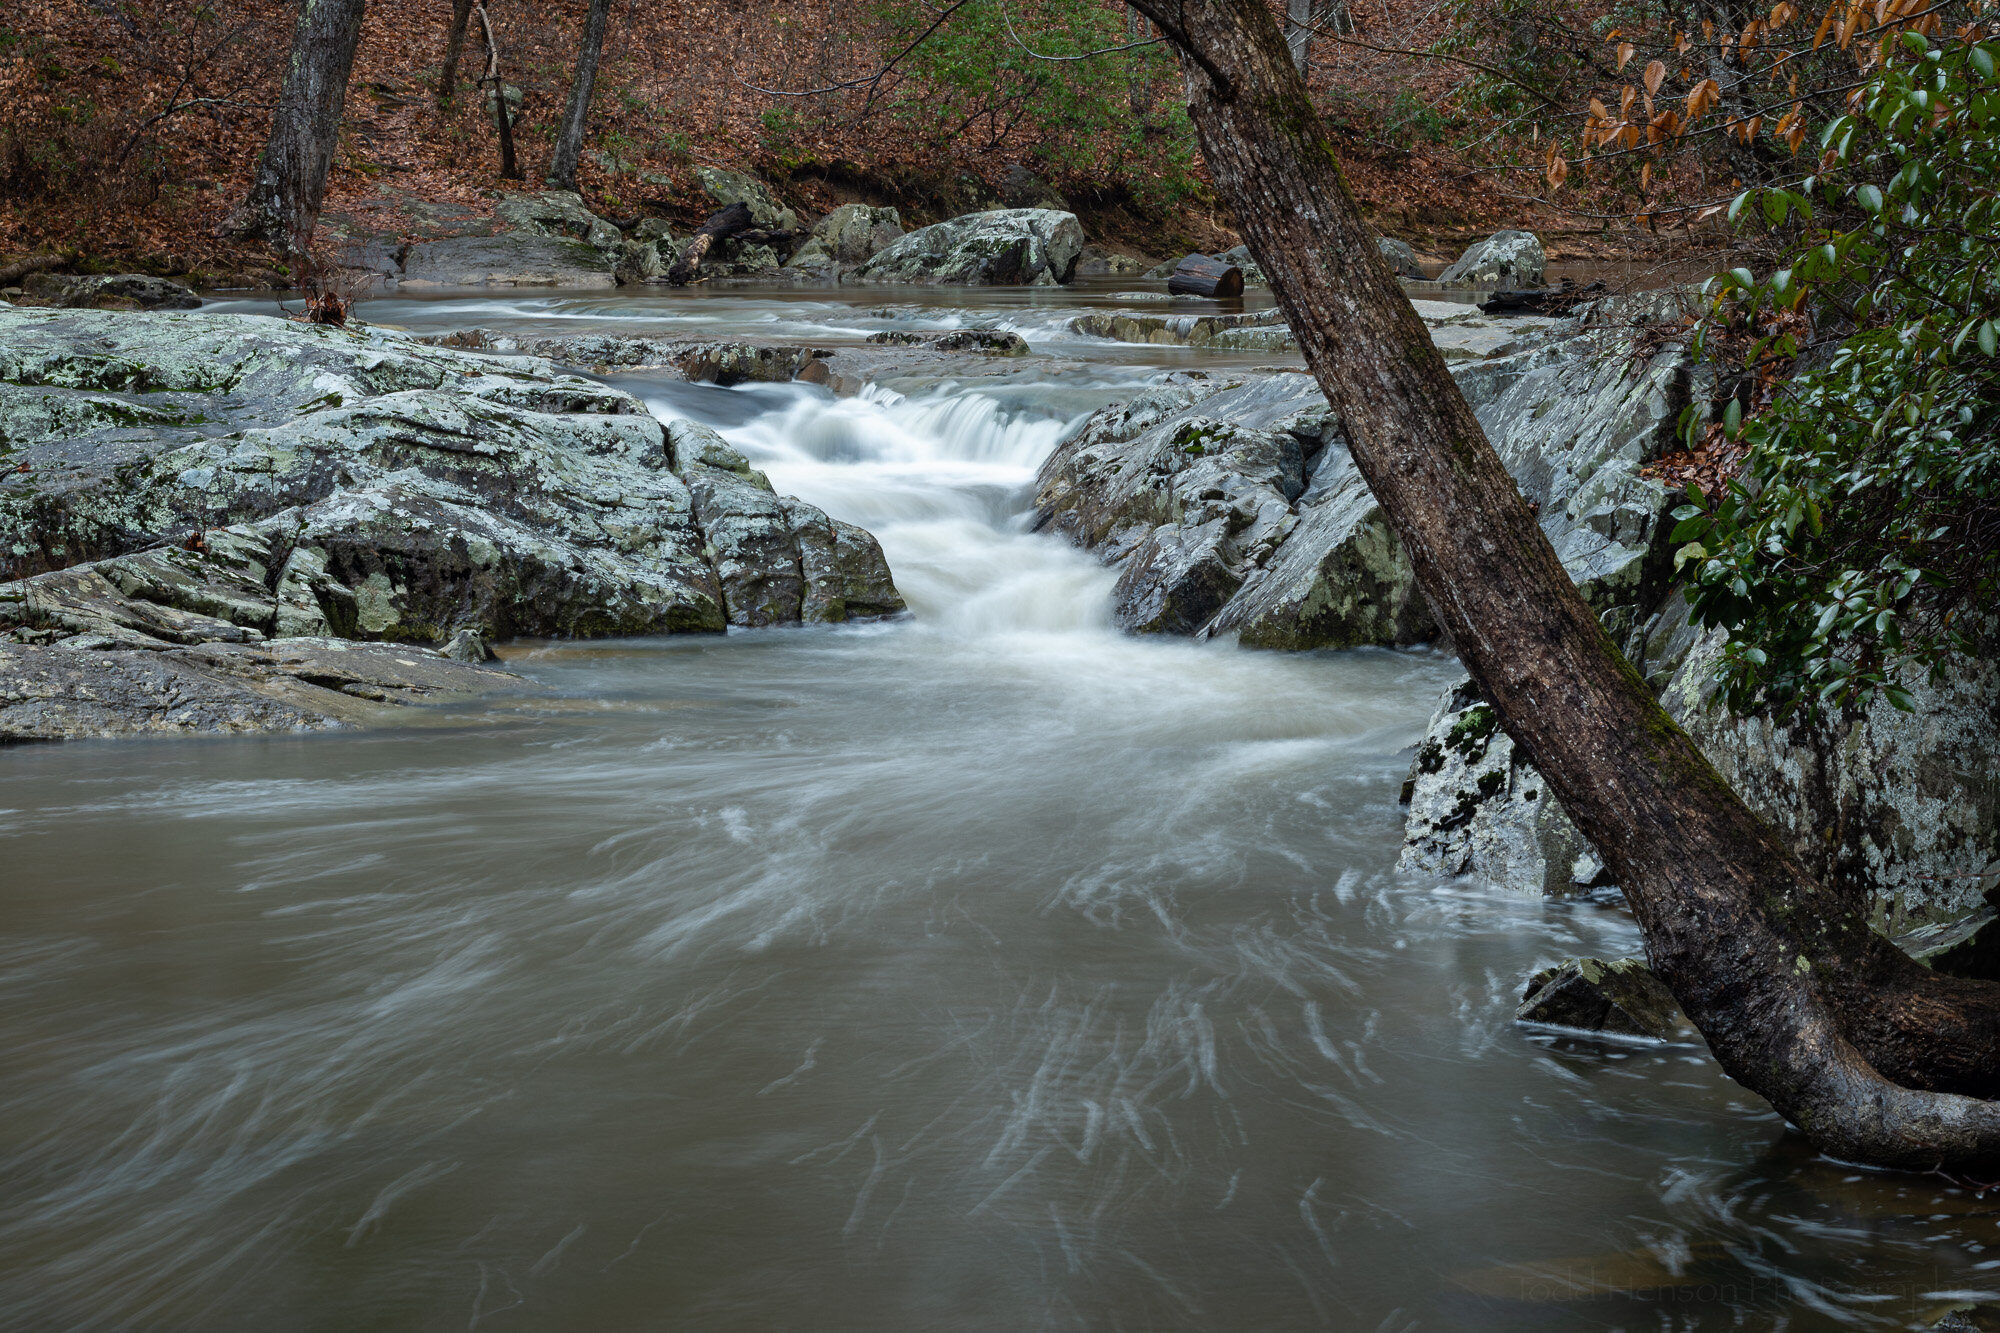
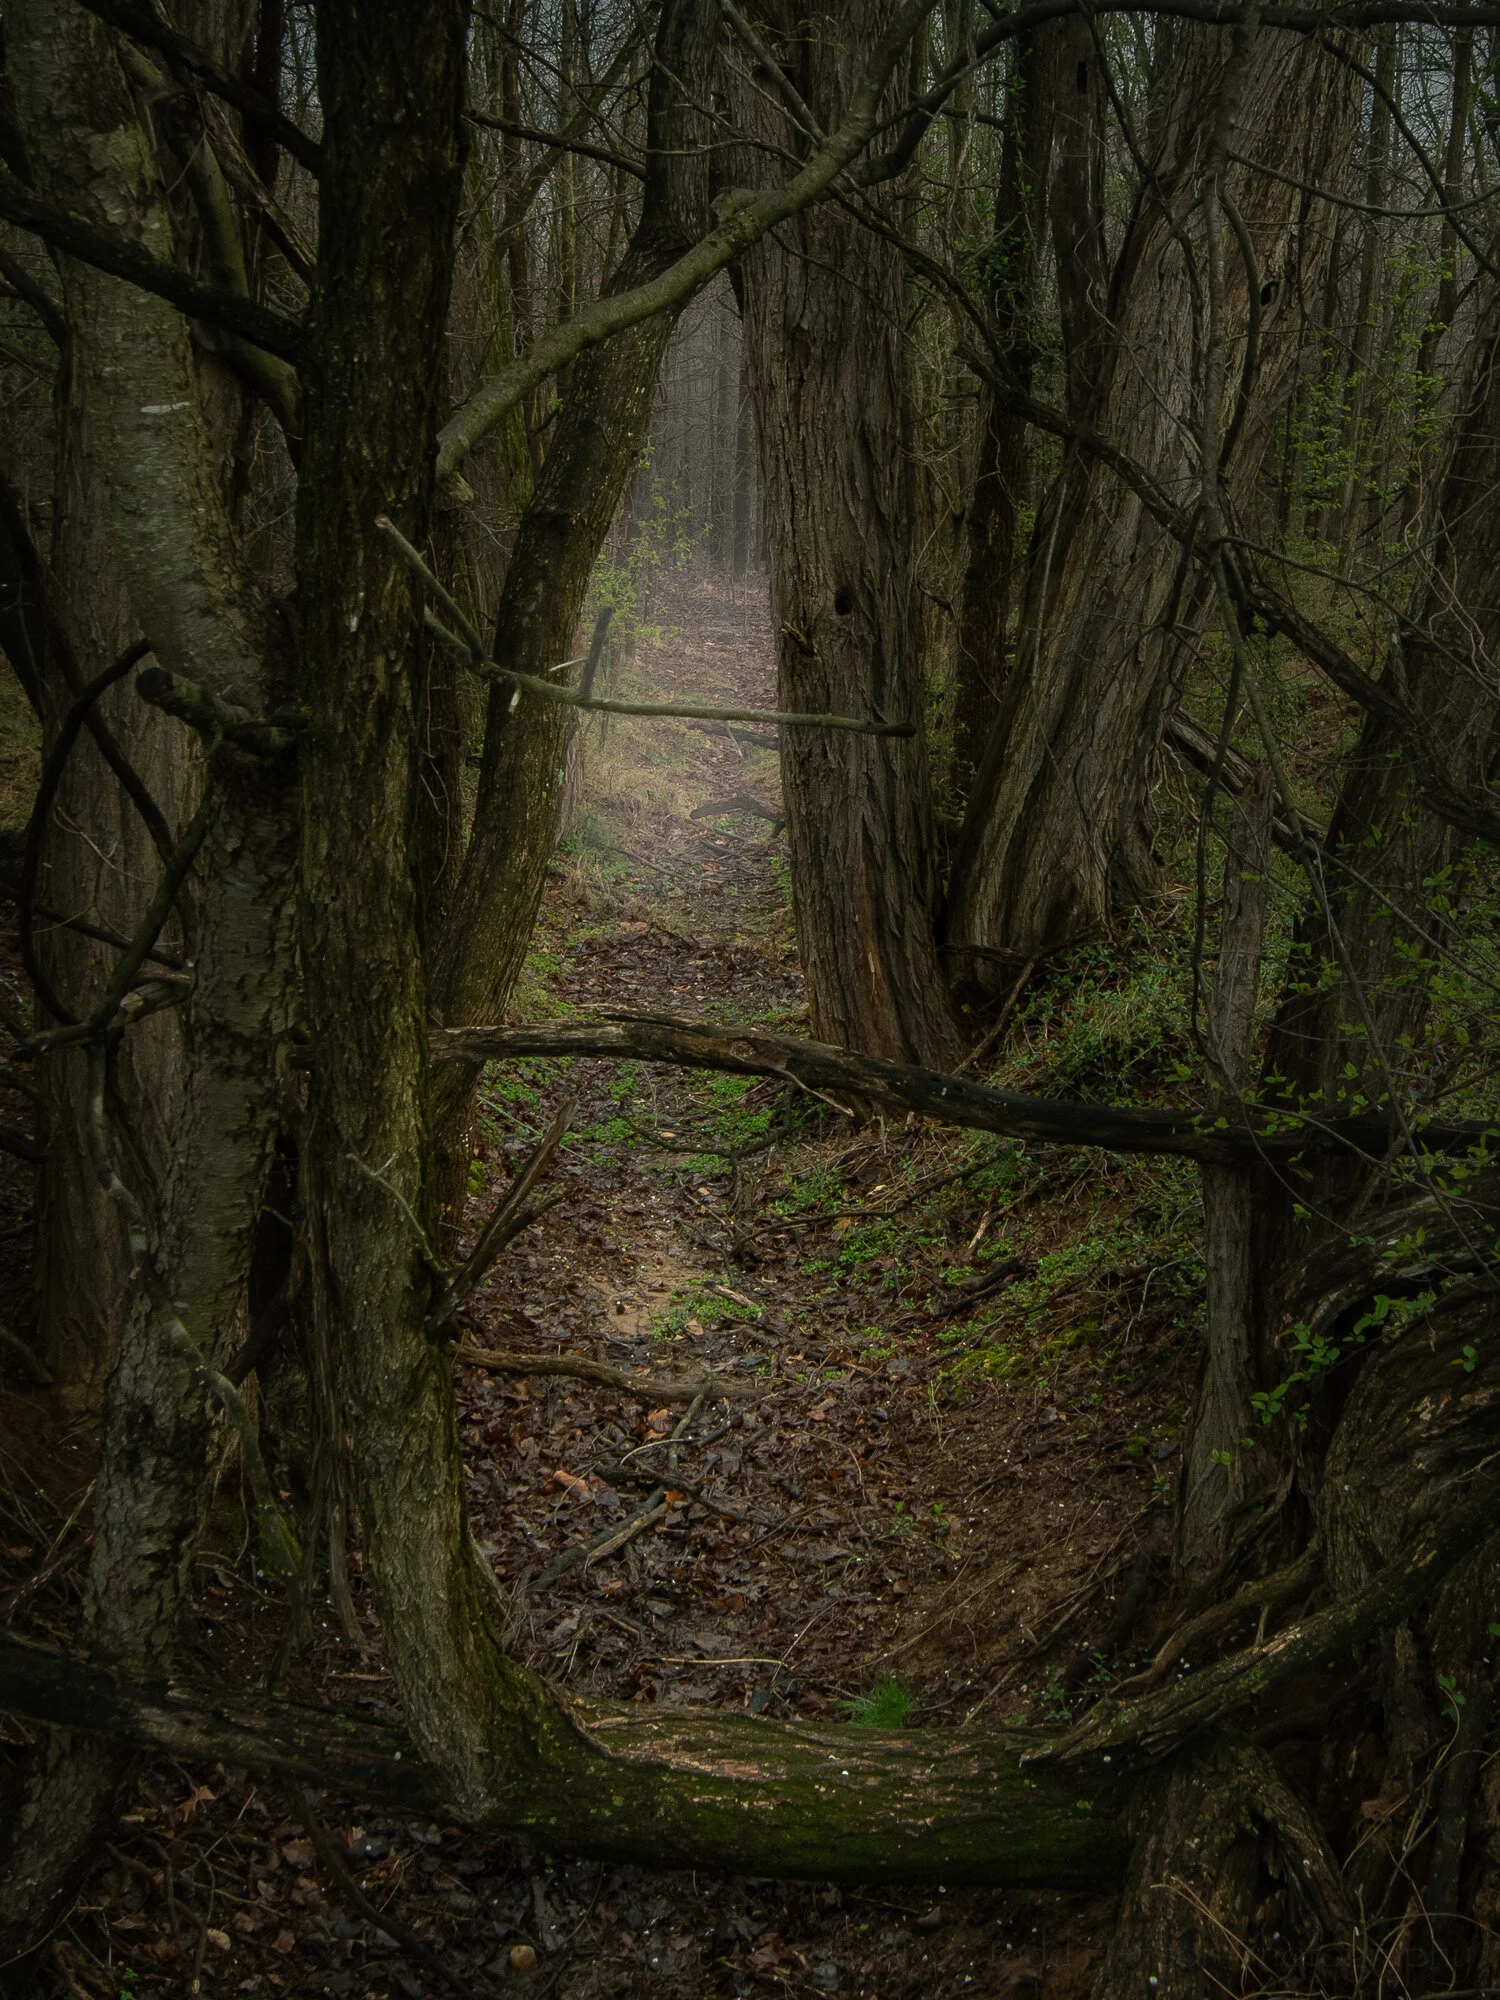
These two photos are examples of sketch images from my first visit to this little patch of waterfalls. We noticed the falls from way up top of the hill and saw a small footbridge across the creek just down from the falls. I walked all the way around the scene, hiking upstream just a bit and crossing the creek where it was shallow (not sure why I didn’t just cross at the bridge on the opposite end).

The upper group of falls seemed more interesting to me with the current water levels. And it was an interesting little pool the water emptied into before going over more rocks just below. I found an angle I thought might work and climbed down the small leaf-covered incline and setup the tripod on a grouping of rocks at the edge of the pool. For the first shot I wanted to capture that pool and the upper falls. I needed to zoom out as far as the lens could, to 16mm. And I used a polarizing filter to control reflections and to add some saturation. I found the fallen log on the lower-right corner a bit annoying at first and tried to block it out, but then decided to use it to frame in the pool. I’m reasonably happy with this shot. I feel like there’s more there, but I’ll have to return to look for it.

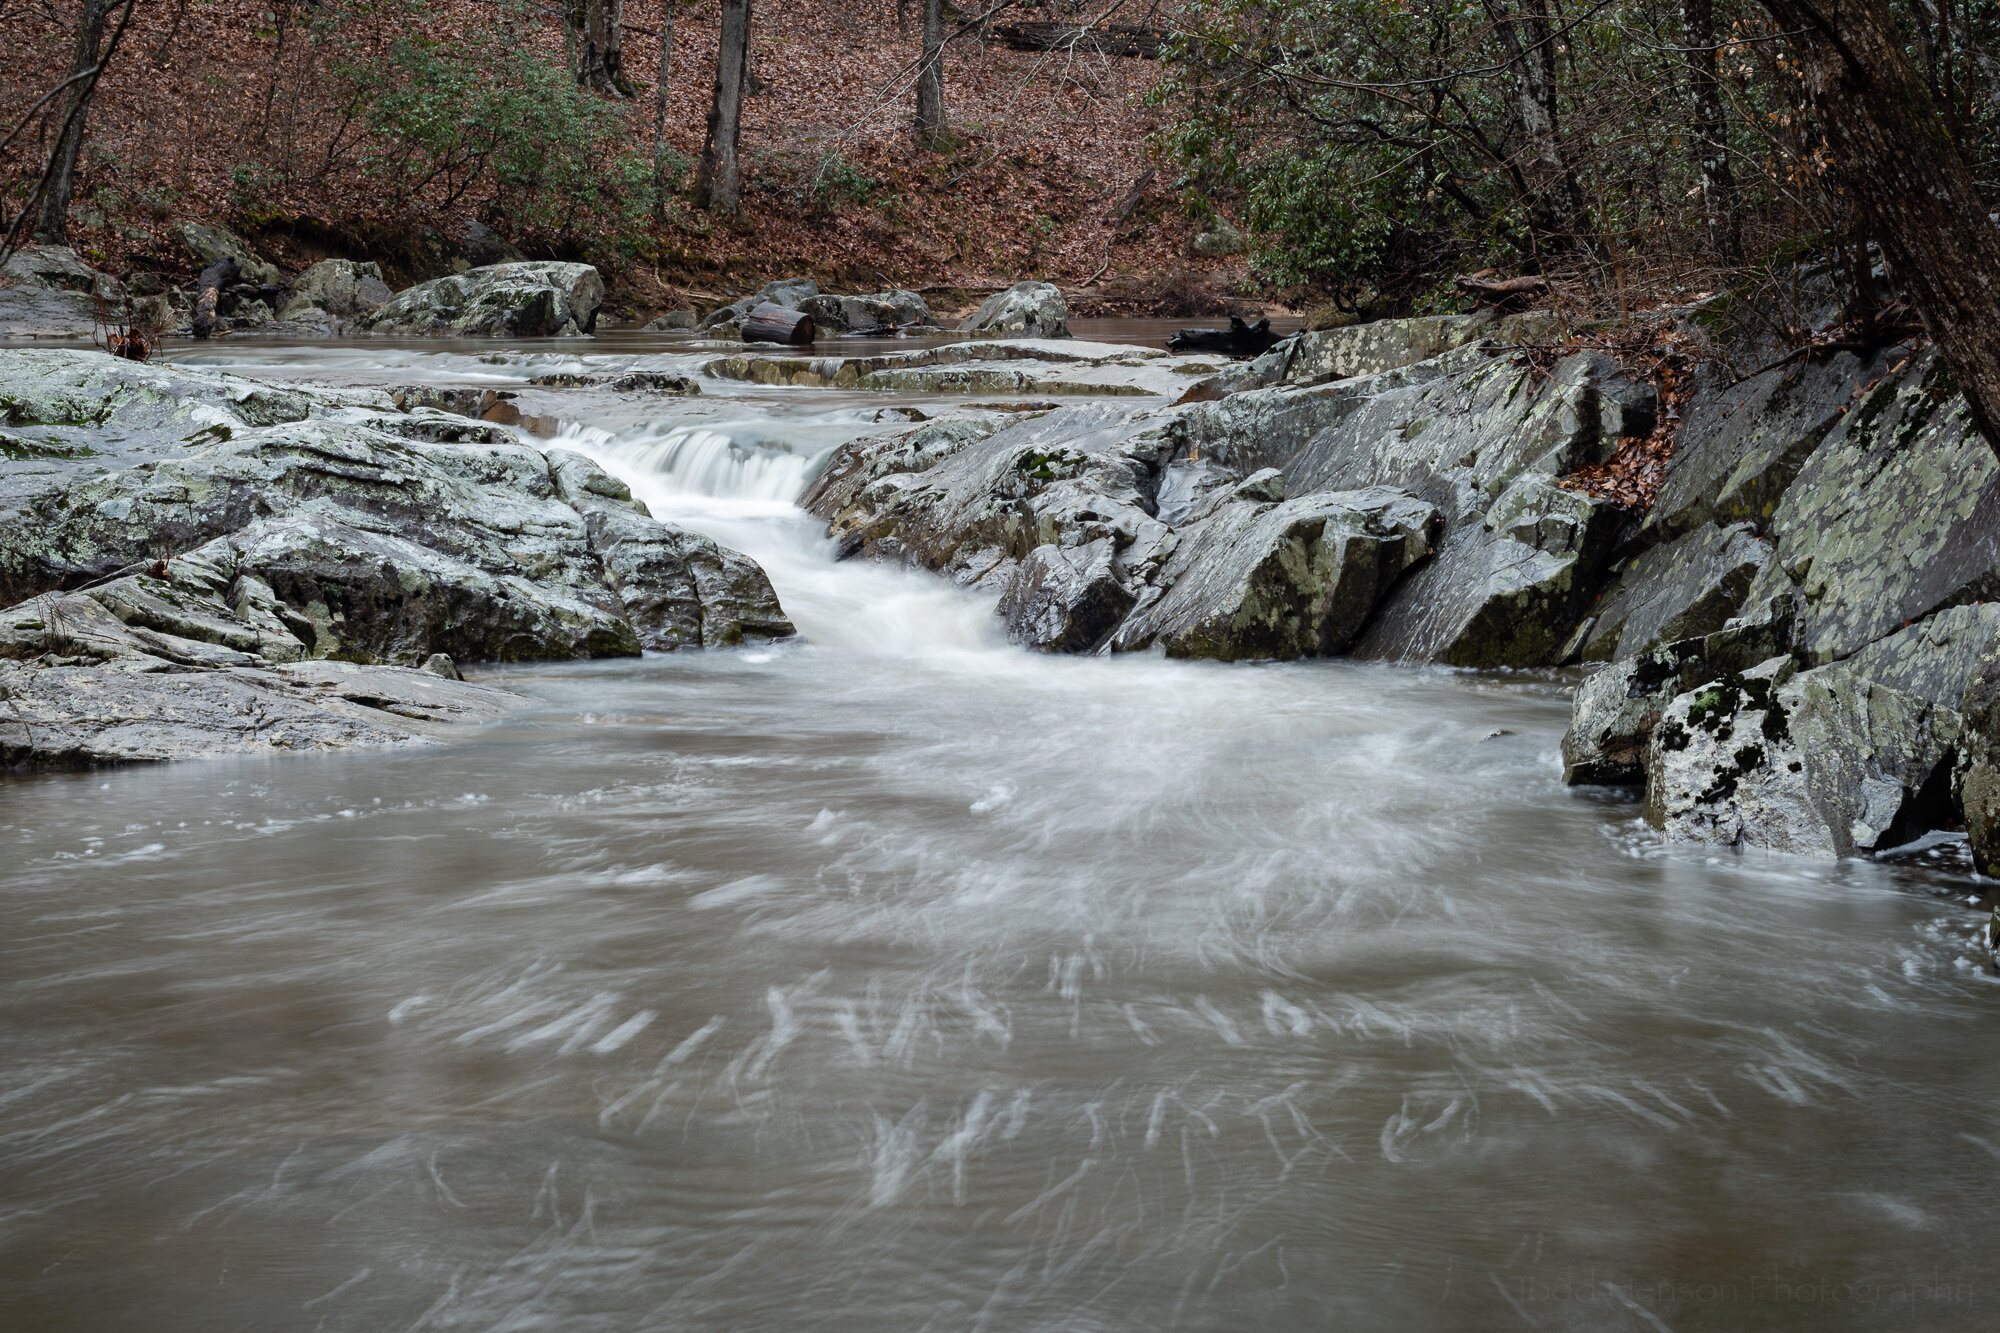
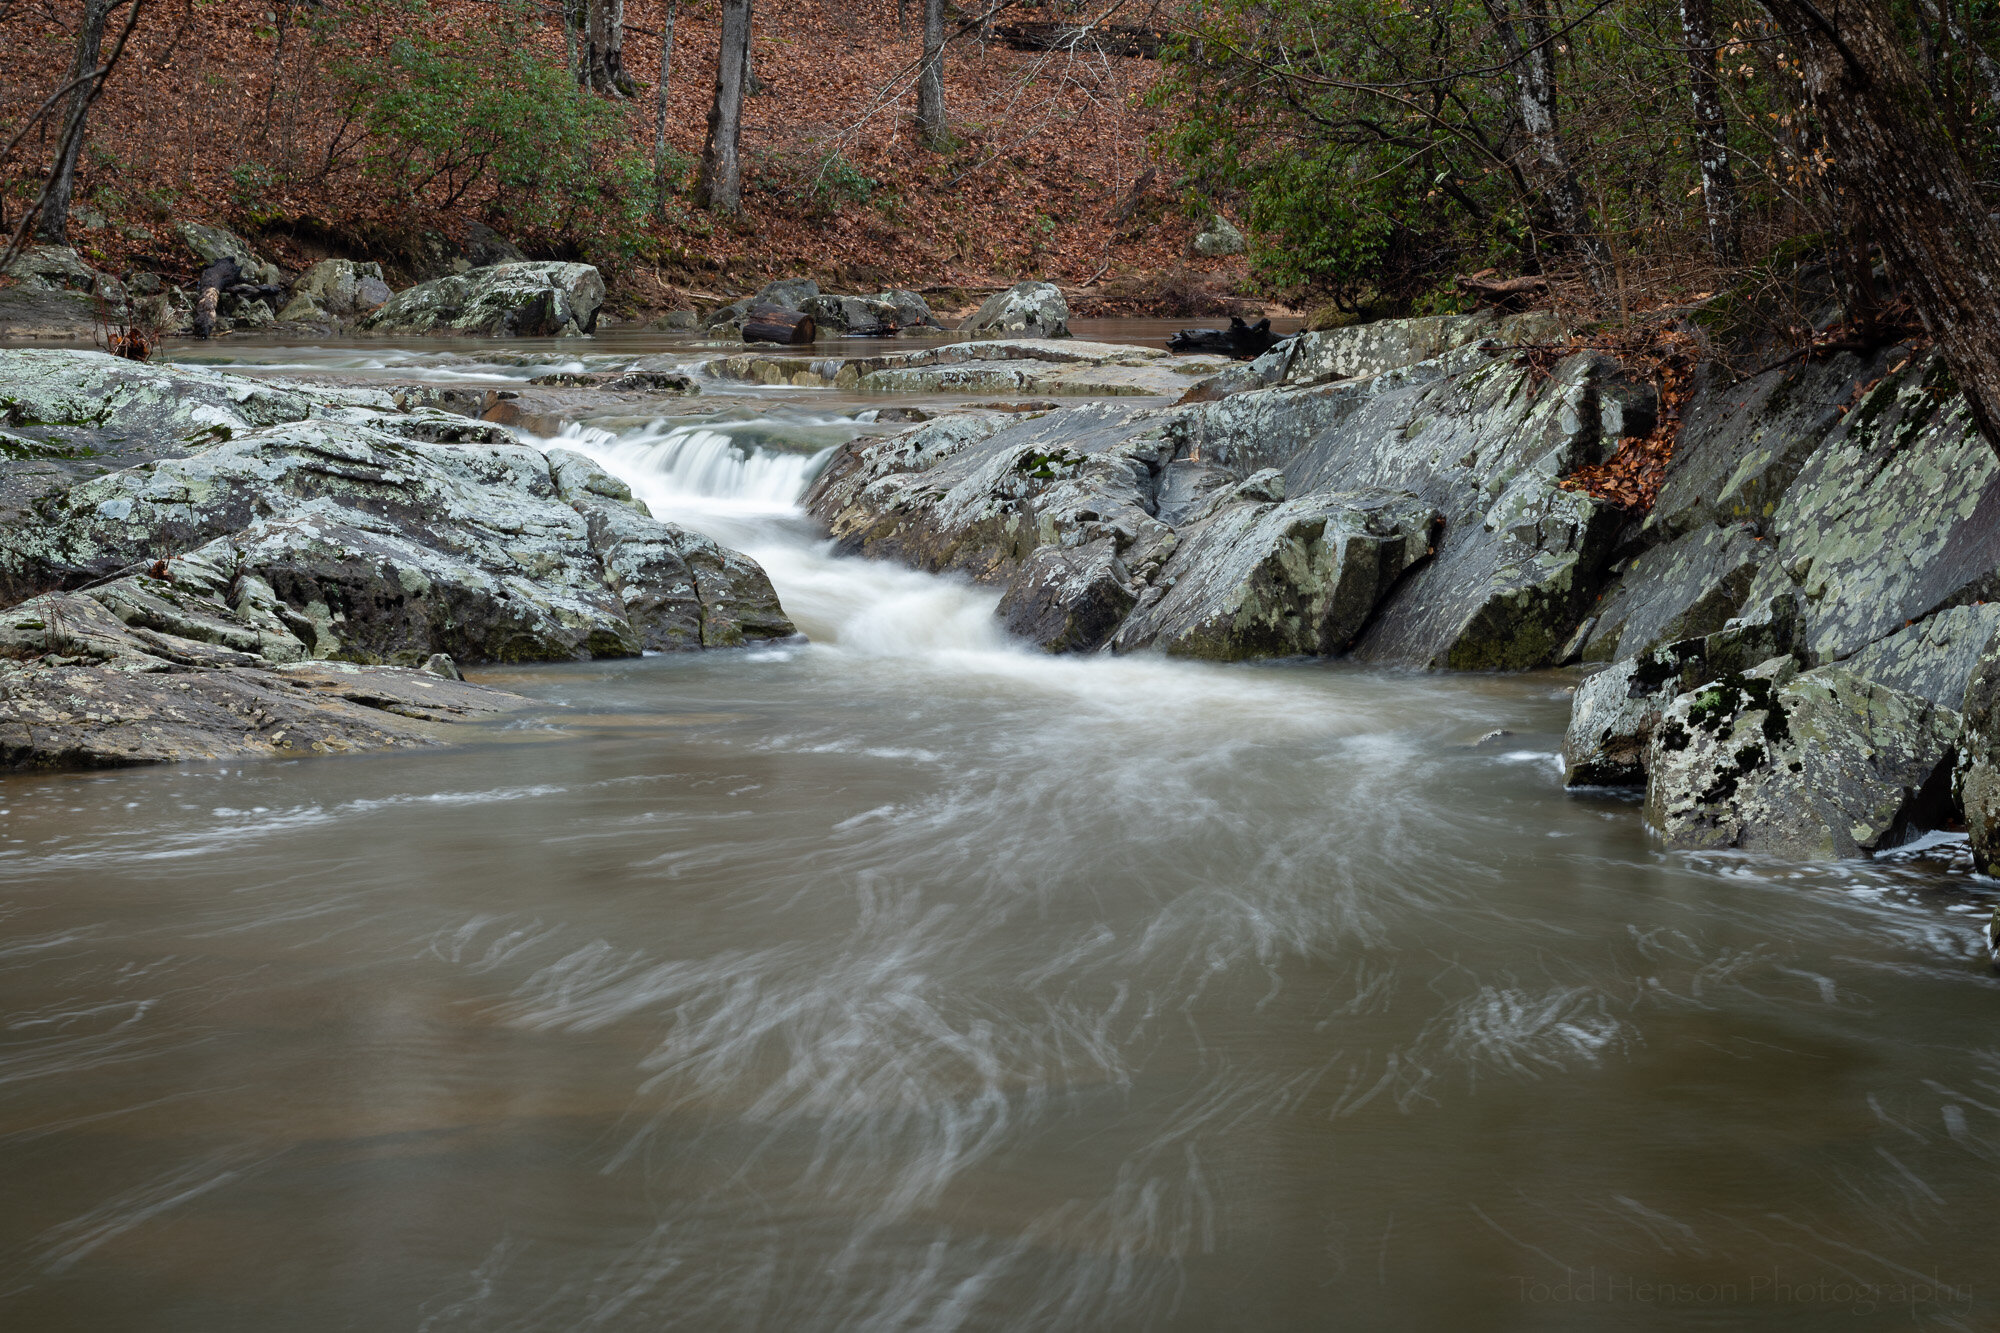
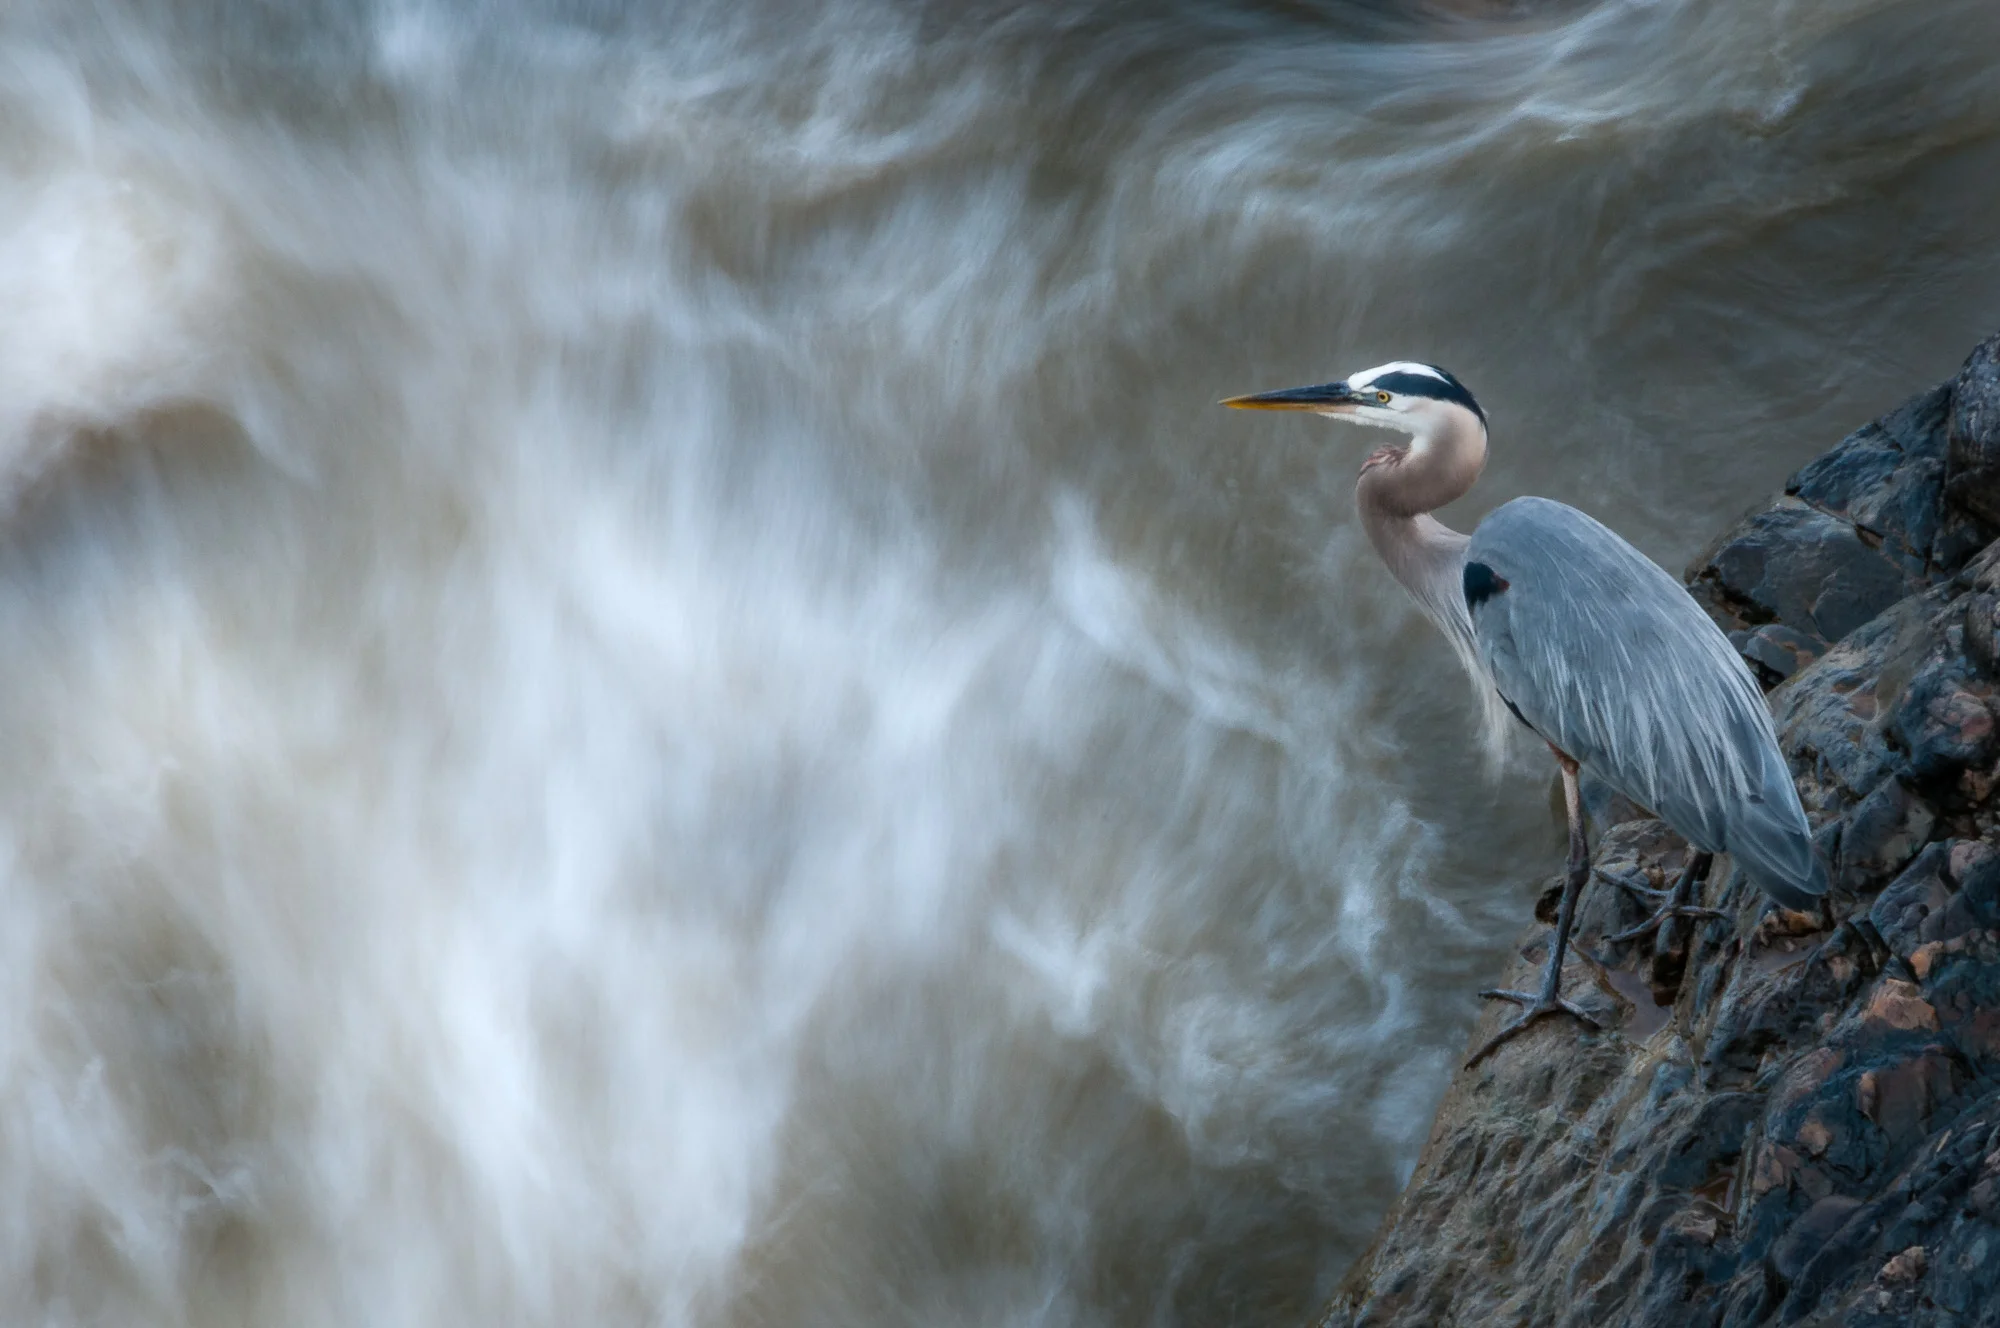
Stepping back I captured a wider view of the scene

After I created several versions of the tighter image I climbed back up and stepped back so I could capture the entirety of the sequence of waterfalls. You can see the small incline covered in leaves on the lower right where I slid down to the rock at the edge of the pool. Capturing this wider view let me record a little more of the scene which might help me find other places to stand, especially at times when the water level is higher. It’ll also be interesting to see how much of the debris stays put and how much gets swept away.

Ever since creating these images I’ve felt the pull to return to this location and further explore it. Perhaps the next trip will result in more sketch images. Or perhaps I’ll manage to create something I feel a little more strongly about. Only time will tell, but I can’t wait to find out.


Do you enjoy these posts?

Sign up to receive periodic emails with updates and thoughts. Don’t worry, I won’t spam you. And please consider purchasing artwork or products from my online store, and using my affiliate links in the sidebar to the right when shopping online.

I appreciate your support!


The Effects of a Polarizing Filter on Waterfalls and Woods by Todd Henson

Look at the color of the green and brown leaves, the rocks and the water. The polarizing filter is allowing more reflections in the example on the left and reducing reflections in the example on the right.

The polarizing filter is perhaps one of the most common filters for your camera lens. Some folks put one on their lens and never take it off. Others use it in specific situations. One of the reasons we’re often told to use one is that it will darken the sky in landscape images and make for more drama. And while this is true, the polarizing filter is capable of much more.

Personally, I only put on a polarizing filter when I think it will be useful for the images I’m creating. If it’s not useful I don’t see the purpose of putting it on as it reduces the amount of light reaching the camera which can force me to use longer shutter speeds, raise the ISO, or open the aperture more.

So when is a polarizing filter useful? As mentioned above, it can darken the sky, though you have to be careful using this with a wide angle lens as it doesn’t affect all parts of the sky equally and can create dark and light areas which sometimes look strange.

As also mentioned, a polarizing filter will reduce the amount of light entering the camera. This can be useful if you want longer shutter speeds and you’ve already closed down the aperture as much as you can and lowered the ISO as low as it’ll go. The only option then is to reduce the amount of light entering the camera. And I will use it for this, but I’d rather use a neutral density filter for this specific purpose if I have one with me.

The polarizing filter is adjusted to allow many reflections. This is similar to not using a polarizing filter. The colors of the leaves, green and brown, are less saturated, the rocks and water have a bit of a blue sheen from reflected light from the sky.

The polarizing filter is adjusted to reduce reflections. Look at the green and brown leaves on the far hillside, how they are darker and have more saturated colors. Notice the look of the rocks has changed, they are darker and look a little less blue. The same can be seen with the water, it’s less blue because the filter helps filter out some of the reflected blue light from the sky.

So now we come to the main point of this post, the benefits of using a polarizing filter when out photographing waterfalls in the woods. Besides allowing a slower shutter speed, the big benefit is how it can reduce reflections from water, stones, leaves, anything really. By rotating the circular polarizing filter you can adjust how much light reflects off various surfaces, and reducing the reflections and glare increases the saturation of the underlying colors. And the great thing is you can see the results in the camera since the filter is over the front of the lens.

Click on the slideshow below to cycle back and forth between the images, one showing an example where the polarizing filter is set to allow reflections and the other where it’s set to reduce reflections. Study the differences. They can be subtle, but they can make a big difference in the final look of your photograph.

Take a close look at the sample photographs in this post. There are two versions of each image. Both are using a polarizing filter but one has it adjusted to allow more reflections and the other has it adjusted to reduce the reflections. I’ve presented each by itself, combined into a single image, and as a slideshow you can click on to switch back and forth between versions. This will let you see how the polarizing filter is affecting the scene. Each of the photos was processed exactly the same, so the only differences should be from the filter (note, the shutter speed does change slightly as the filter is adjusted because of how the filter reduces the amount of light entering the lens).

In this example there’s more of the brown and green leaves in the background to compare. Notice those on the left, where the polarizing filter is reducing reflections, are more saturated than those on the right, where the filter is allowing more reflections.

Look closely at the water, notice how it darkens in some areas. This is because the filter is reducing the reflections of light off the water, allowing us to see more of the color of the water or what’s below it instead of the reflections from the sky.

Look at the leaves in the scene, both the green ones on the trees and the fallen brown ones. Notice how they darken, and when they darken how the color looks more saturated. This is because the filter is reducing the reflections off the leaves, letting us see their color instead of that reflected by the sky.

Look also at the rocks. The same thing happens with them. Reducing the reflections off the rocks changes how they look, often darkening them, and giving a more saturated look.

Here the polarizing filter has been adjusted to allow more reflections. The colors aren’t as saturated. The leaves have a lighter tone to them as light from the sky is reflected from them.

Here the polarizing filter has been adjusted to reduce reflections. The colors are more saturated. The leaves, rocks and water show less reflection. You can begin to see some detail under the surface of the water.

One thing you might also notice when switching between photos is how the ones with more reflections appear more blue. The white balance is set the same between them so this is caused by the bluer light from the sky reflecting off all the surfaces, even though it was a very overcast day. When we reduce this with the polarizing filter it reduces the blue cast to the image and in this case shows more of the browns and greens actually in the scene.

Click on the slideshow below to cycle back and forth between the images, one showing an example where the polarizing filter is set to allow reflections and the other where it’s set to reduce reflections. Watch the rocks as you flip between them, see how it changes. Notice the surface of the water down below, how in one you can’t see much below the surface but in the other you begin to.

I hope you’ve enjoyed this look at the usefulness of polarizing filters. These specific examples are of waterfalls in the woods but everything we’ve seen here can be applied to other scenes, as well. And many of these features, such as reducing reflections, are ones that would be difficult to duplicate in software. So consider carrying a polarizing filter with you. Experiment with it, try it in different situations, and get a feel for how it affects the look of your photographs.

The specific polarizing filter I used on these images was a Singh-Ray LB “Lighter, Brighter” Warming Polarizer.

Curious to see more? Check out some examples of using a polarizing filter with water lilies.


Do you enjoy these posts?

Sign up to receive periodic emails with updates and thoughts. Don’t worry, I won’t spam you. And please consider purchasing artwork or products from my online store, and using my affiliate links in the sidebar to the right when shopping online.

I appreciate your support!


South Fork Rapids, January 2021 by Todd Henson

South Fork Rapids, January 2021

I continue exploring South Fork Quantico Creek, both looking for new sections and returning to previously visited sections in search of something different than I’d seen before. And I’ve not been disappointed.

This photograph was created January 3rd, so it’s one of the first photographs of the new year. We’d had some rain in the days prior so the water levels were high and the trails were muddy. It was fun watching backwoods joggers navigating the trails from a distance, how they had to slow way down in very muddy sections to keep from slipping. It was also somewhat cold, even with the thin gloves I sometimes carry. But I often took the gloves off so I could better control the camera. Granted, these gloves have slits in the fingers but I guess I’ve not gotten used to using them yet.

For this expedition I did as I’ve been doing a lot lately, bringing a single lens and perhaps a selection of filters and forcing myself to find compositions within the constraints of that focal length (or range of focal lengths if using a zoom lens). In this case it was an old 50mm f/1.4 lens, the kind without vibration reduction and where autofocus requires a motor in the camera instead of being located inside the lens, which is far more common these days. On the front of the lens I attached my Singh-Ray LB Warming Circular Polarizer. All this was mounted atop my tripod and I had on my water proof boots letting me get out into the creek just a bit.

I love this section of the creek and I continue looking for new ways of capturing it, and opening myself up to the lessons nature’s willing to teach. Framing a scene with a fixed focal length lens can be a challenge as you can’t always move closer or further back to get in less or more of the scene or to avoid that branch that keeps jutting out into view. And being a fixed focal length means there’s no zoom. So you have to make do, moving as you’re able, angling as you can, taking advantage of the height of the tripod to get down lower or higher. Using a 50mm lens contracts the scene more than the 16-35mm lens would, bringing more distant parts of the scene in closer, making each part of the scene seem closer together. The wider angle of a 16-35mm can stretch things out a little more. Those are some of the tradeoff and benefits of using different focal lengths.

I’d extended the tripod up fairly high to let us see as much of these rapids as possible and how they extended into the background a short ways. I chose an angled view of the creek, focusing on a section of rapids, only showing one shore, and standing as close as I could to the stronger flow without drowning my boots. I took advantage of the polarizing filter to reduce some of the reflections on the water, helping give portions of it the nice dark brown tone picked up from the rocks below. This also helped reduce reflections on the rocks and leaves, creating darker more saturated colors. I’m working on a future post that will better demonstrate the effects a polarizing filter can have on these sorts of scenes.

Regarding exposure, the primary concern here was shutter speed. I wanted one slow enough to show the motion of the water but not so slow as to completely smooth it out. So I experimented with a range of times and settled on just under half a second (0.4 sec). I liked the patterns this created. The browns in the water, especially the lighter ones reminded me of root beer (which I love) and some of the strongly moving sections reminded me of stretching taffy (maybe root beer taffy). Yes, I have a bit of a sweet tooth.

As for post-processing, I did my usual edits in Adobe Lightroom with the majority of the work being a fair bit of dodging and burning to darken and lighten various sections. I wanted to keep many of the whites fairly bright and I wanted some of the darker areas nice and dark creating a rich contrast between different sections and showing off the beautiful patterns of the flowing water and the rocks over which it flowed.

In the end I’m pleased with the results. But, as always, I look forward to returning and trying to do better, learning from each of these shoots and hoping to apply those lessons in the next one. And of course, just bringing along a different lens and all the options and constraints that come with it. Every outing is something new to look forward to, even if I don’t bring a camera or create any photographs. It can be both relaxing and exhilarating being out in the woods and along the creek. I hope I never tire of it.

Thanks for reading, and let me know your thoughts in the comments below.


Do you enjoy these posts?

Sign up to receive periodic emails with updates and thoughts. Don’t worry, I won’t spam you. And please consider purchasing artwork or products from my online store, and using my affiliate links in the sidebar to the right when shopping online.

I appreciate your support!