intentional blur

Motions of A Great Blue Heron at Great Falls by Todd Henson

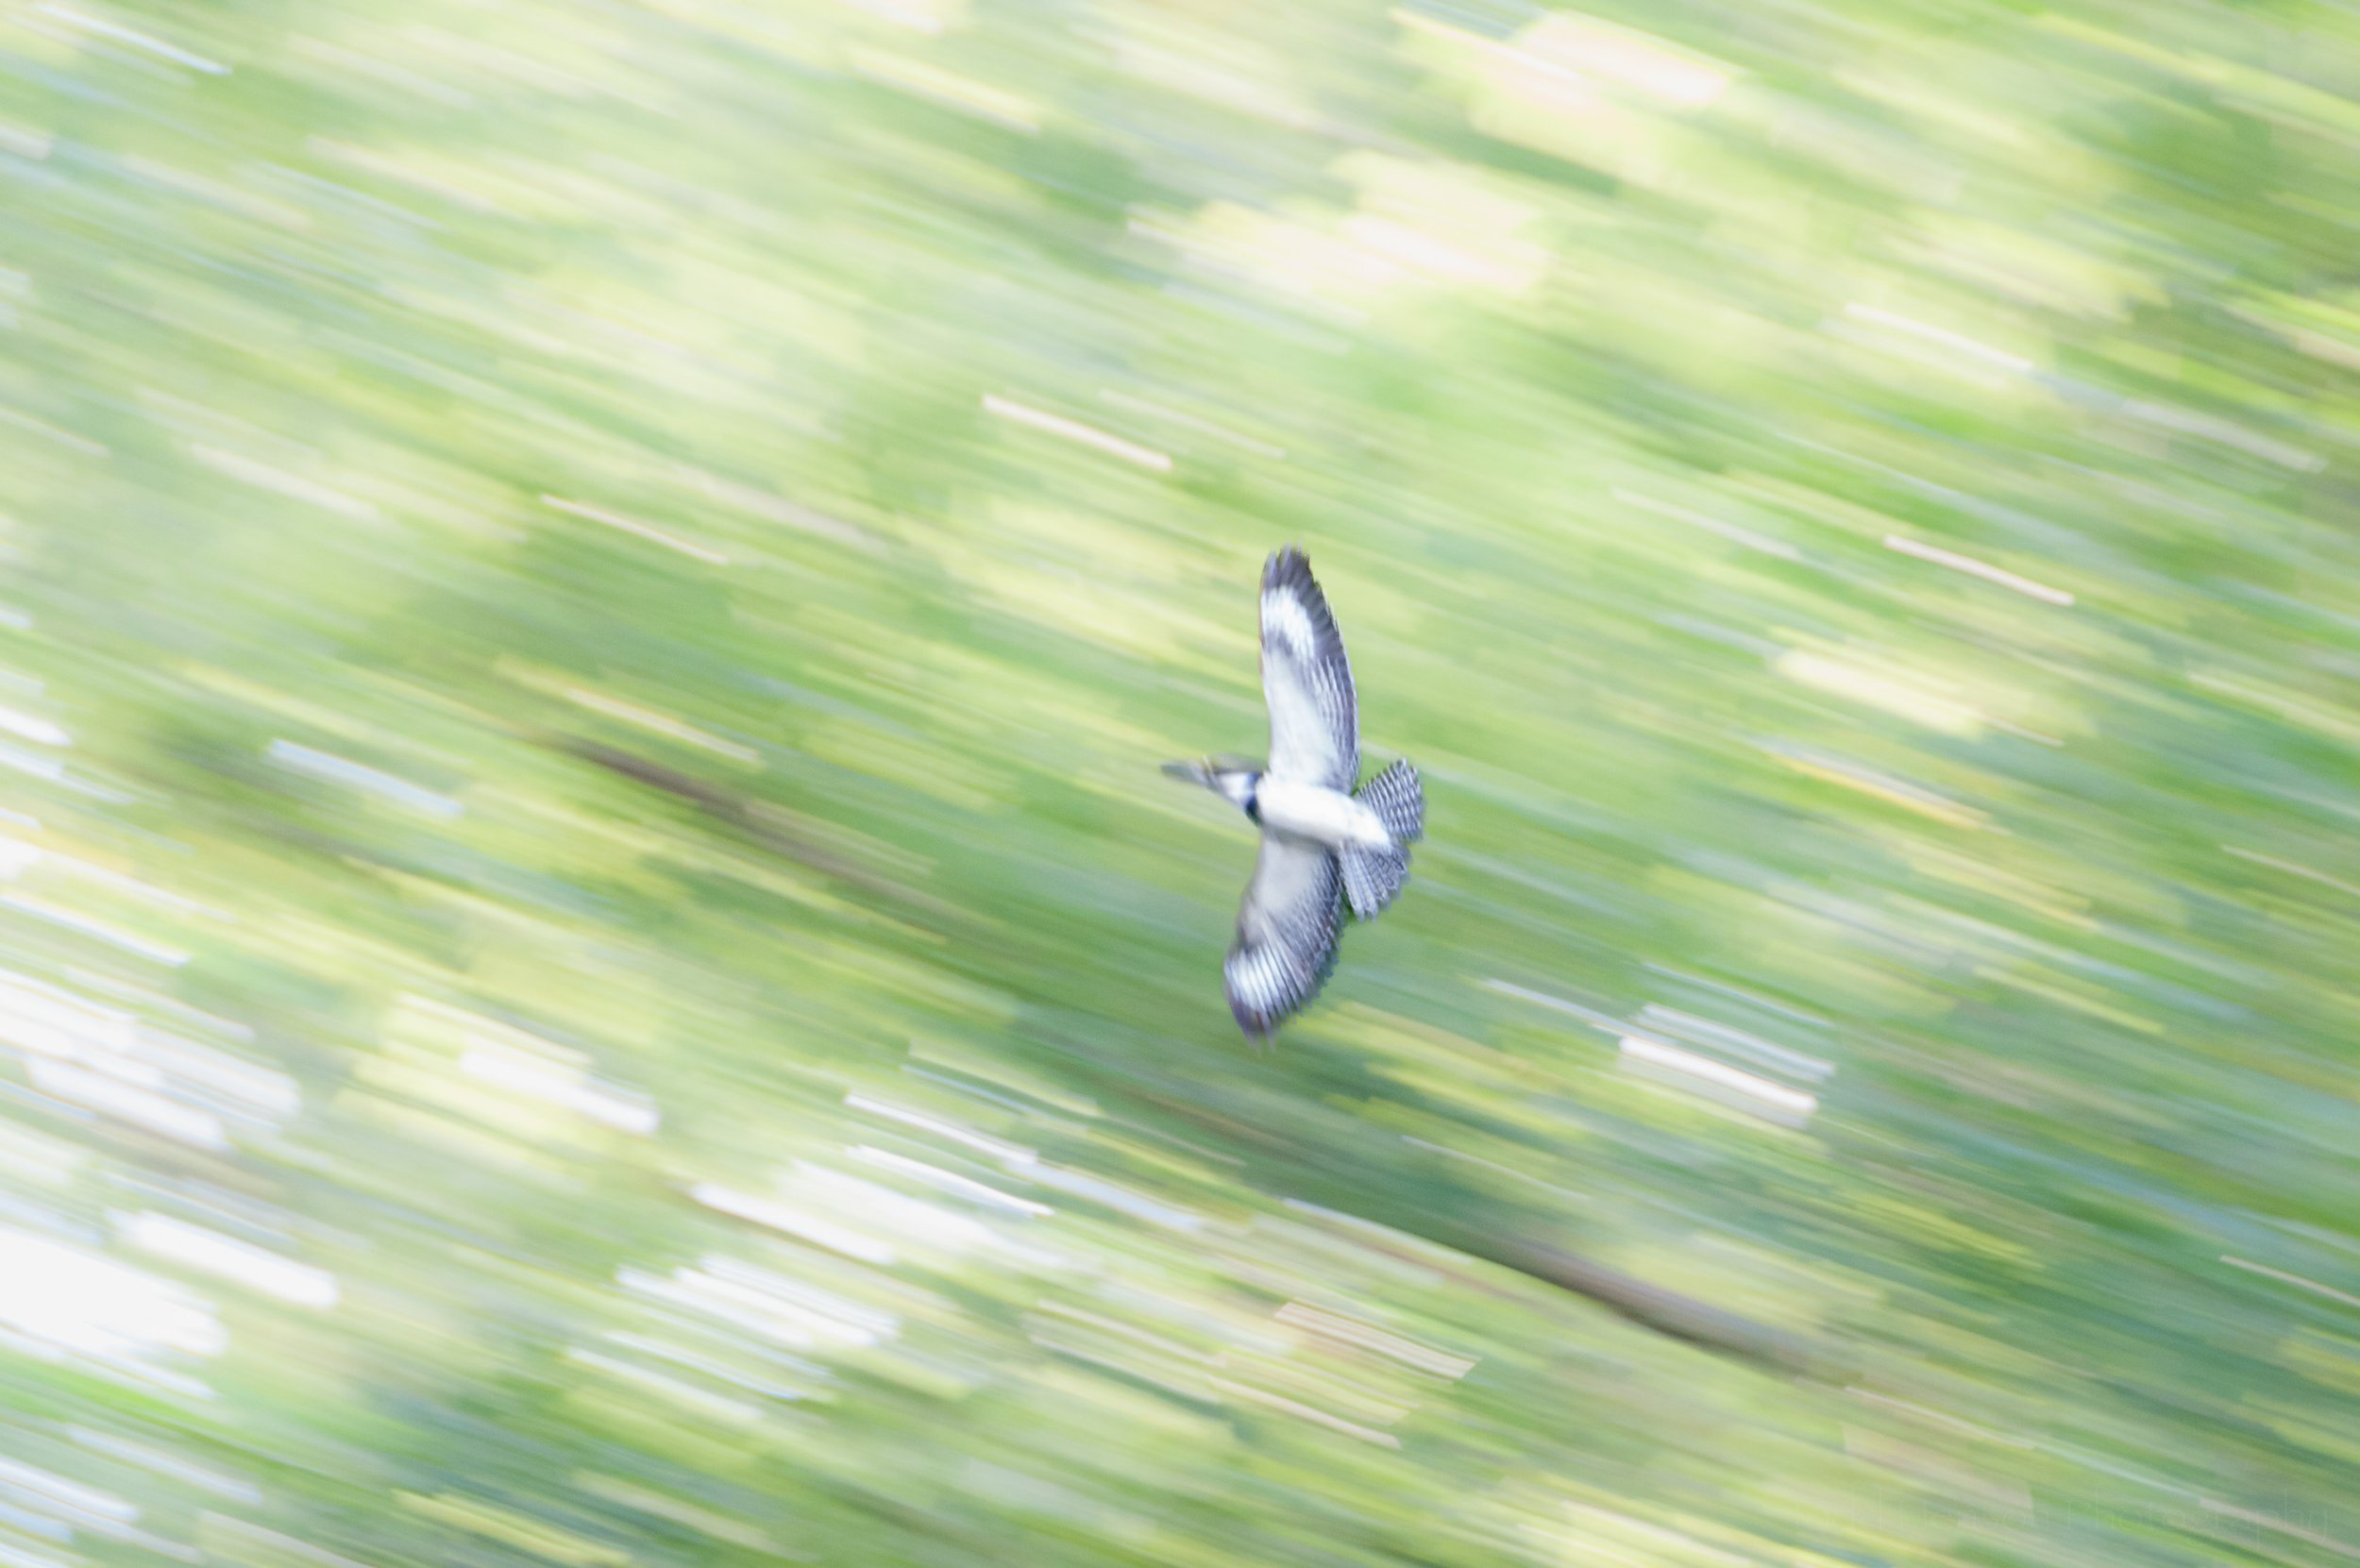
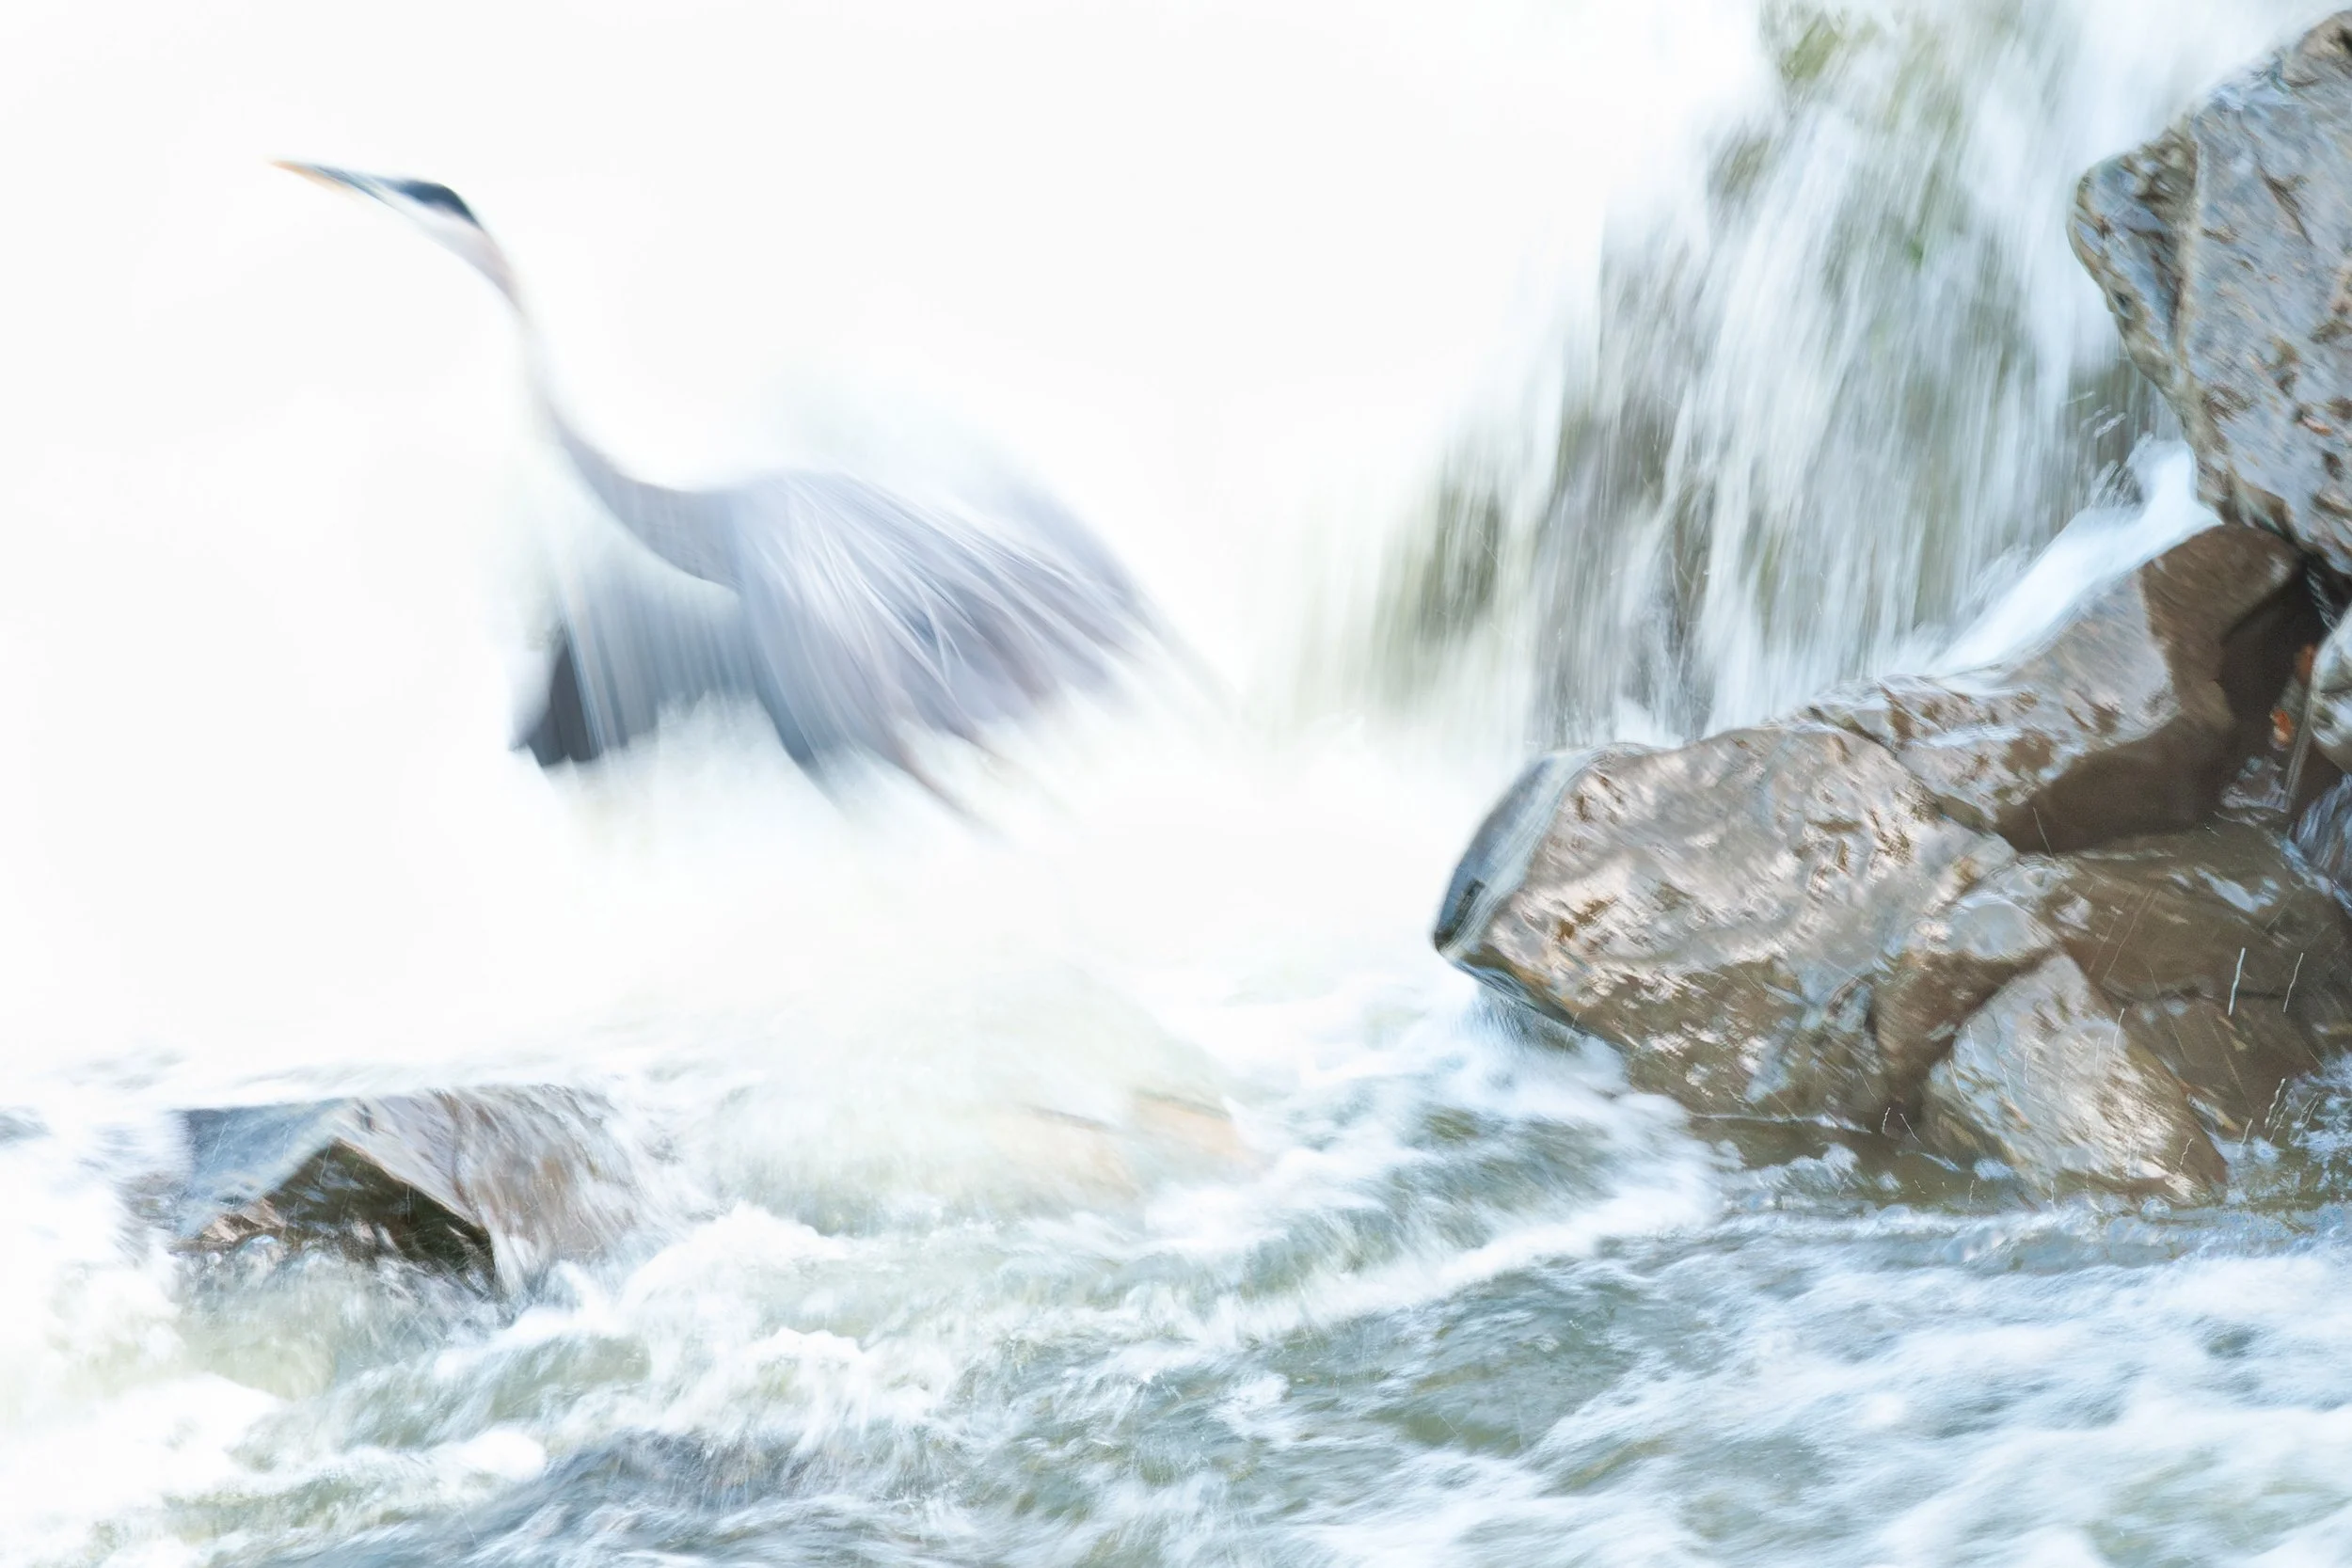
A flurry of colorful motion as a great blue heron takes flight, as seen with a slow shutter speed.

Most times I’ve photographed birds, and birds in flight, I’ve opted for fast shutter speeds to capture as much detail as possible. But sometimes it’s fun to slow everything down and allow motion blur into the finished photograph. The two photos in this post are examples of this. They were created at Great Falls on the Potomac River as viewed from the Maryland side. Both were at 440mm and a fairly small aperture of f/16, giving me a shutter speed of 1/30 of a second. This allowed a very nice amount of blur when the great blue heron took flight.

With a slow shutter speed, a flying great blue heron can take on a ghostly appearance.

In one case I held the camera fairly still, keeping the rocks mostly in sharp focus. But in the other the tripod head was more loose and the camera moved, making the rocks look softer and out of focus, though not as much as the heron. I love the beautiful gradations of blue and gray, and the bright whites and dark blues resulting from the different colored feathers of the heron. It’s also interesting seeing the bits of blurred yellow and orange from its feet.

I think there’s a lot of potential in this style of photography to create some interesting and pleasing images. And it could easily be applied to many different genres, not just wildlife photography, but to anything that moves. Have you ever intentionally used slower shutter speeds to capture motion blur? How did it turn out? And if not then give it a go one of these days.


Do you enjoy these posts?

Sign up to receive periodic emails with updates and thoughts. Don’t worry, I won’t spam you. And please consider purchasing artwork or products from my online store, and using my affiliate links in the sidebar to the right when shopping online.

I appreciate your support!

Make Time For Playtime by Todd Henson

They’re Here!

Putting a lot of serious effort into crafting intentional and meaningful photographs is a worthy pursuit. But sometimes it’s a good idea to just relax a bit, to let go, have a little fun. Make time for playtime.

A shaky drive down 95

The photos in this post may not be spectacular in any way. But they’re an example of not taking what I’m doing too seriously, of just experimenting a little, having fun, trying things I doubt will work and sometimes realizing I’m right but still trying it anyway.

Being light painted by passing cars

Stitches in the sky

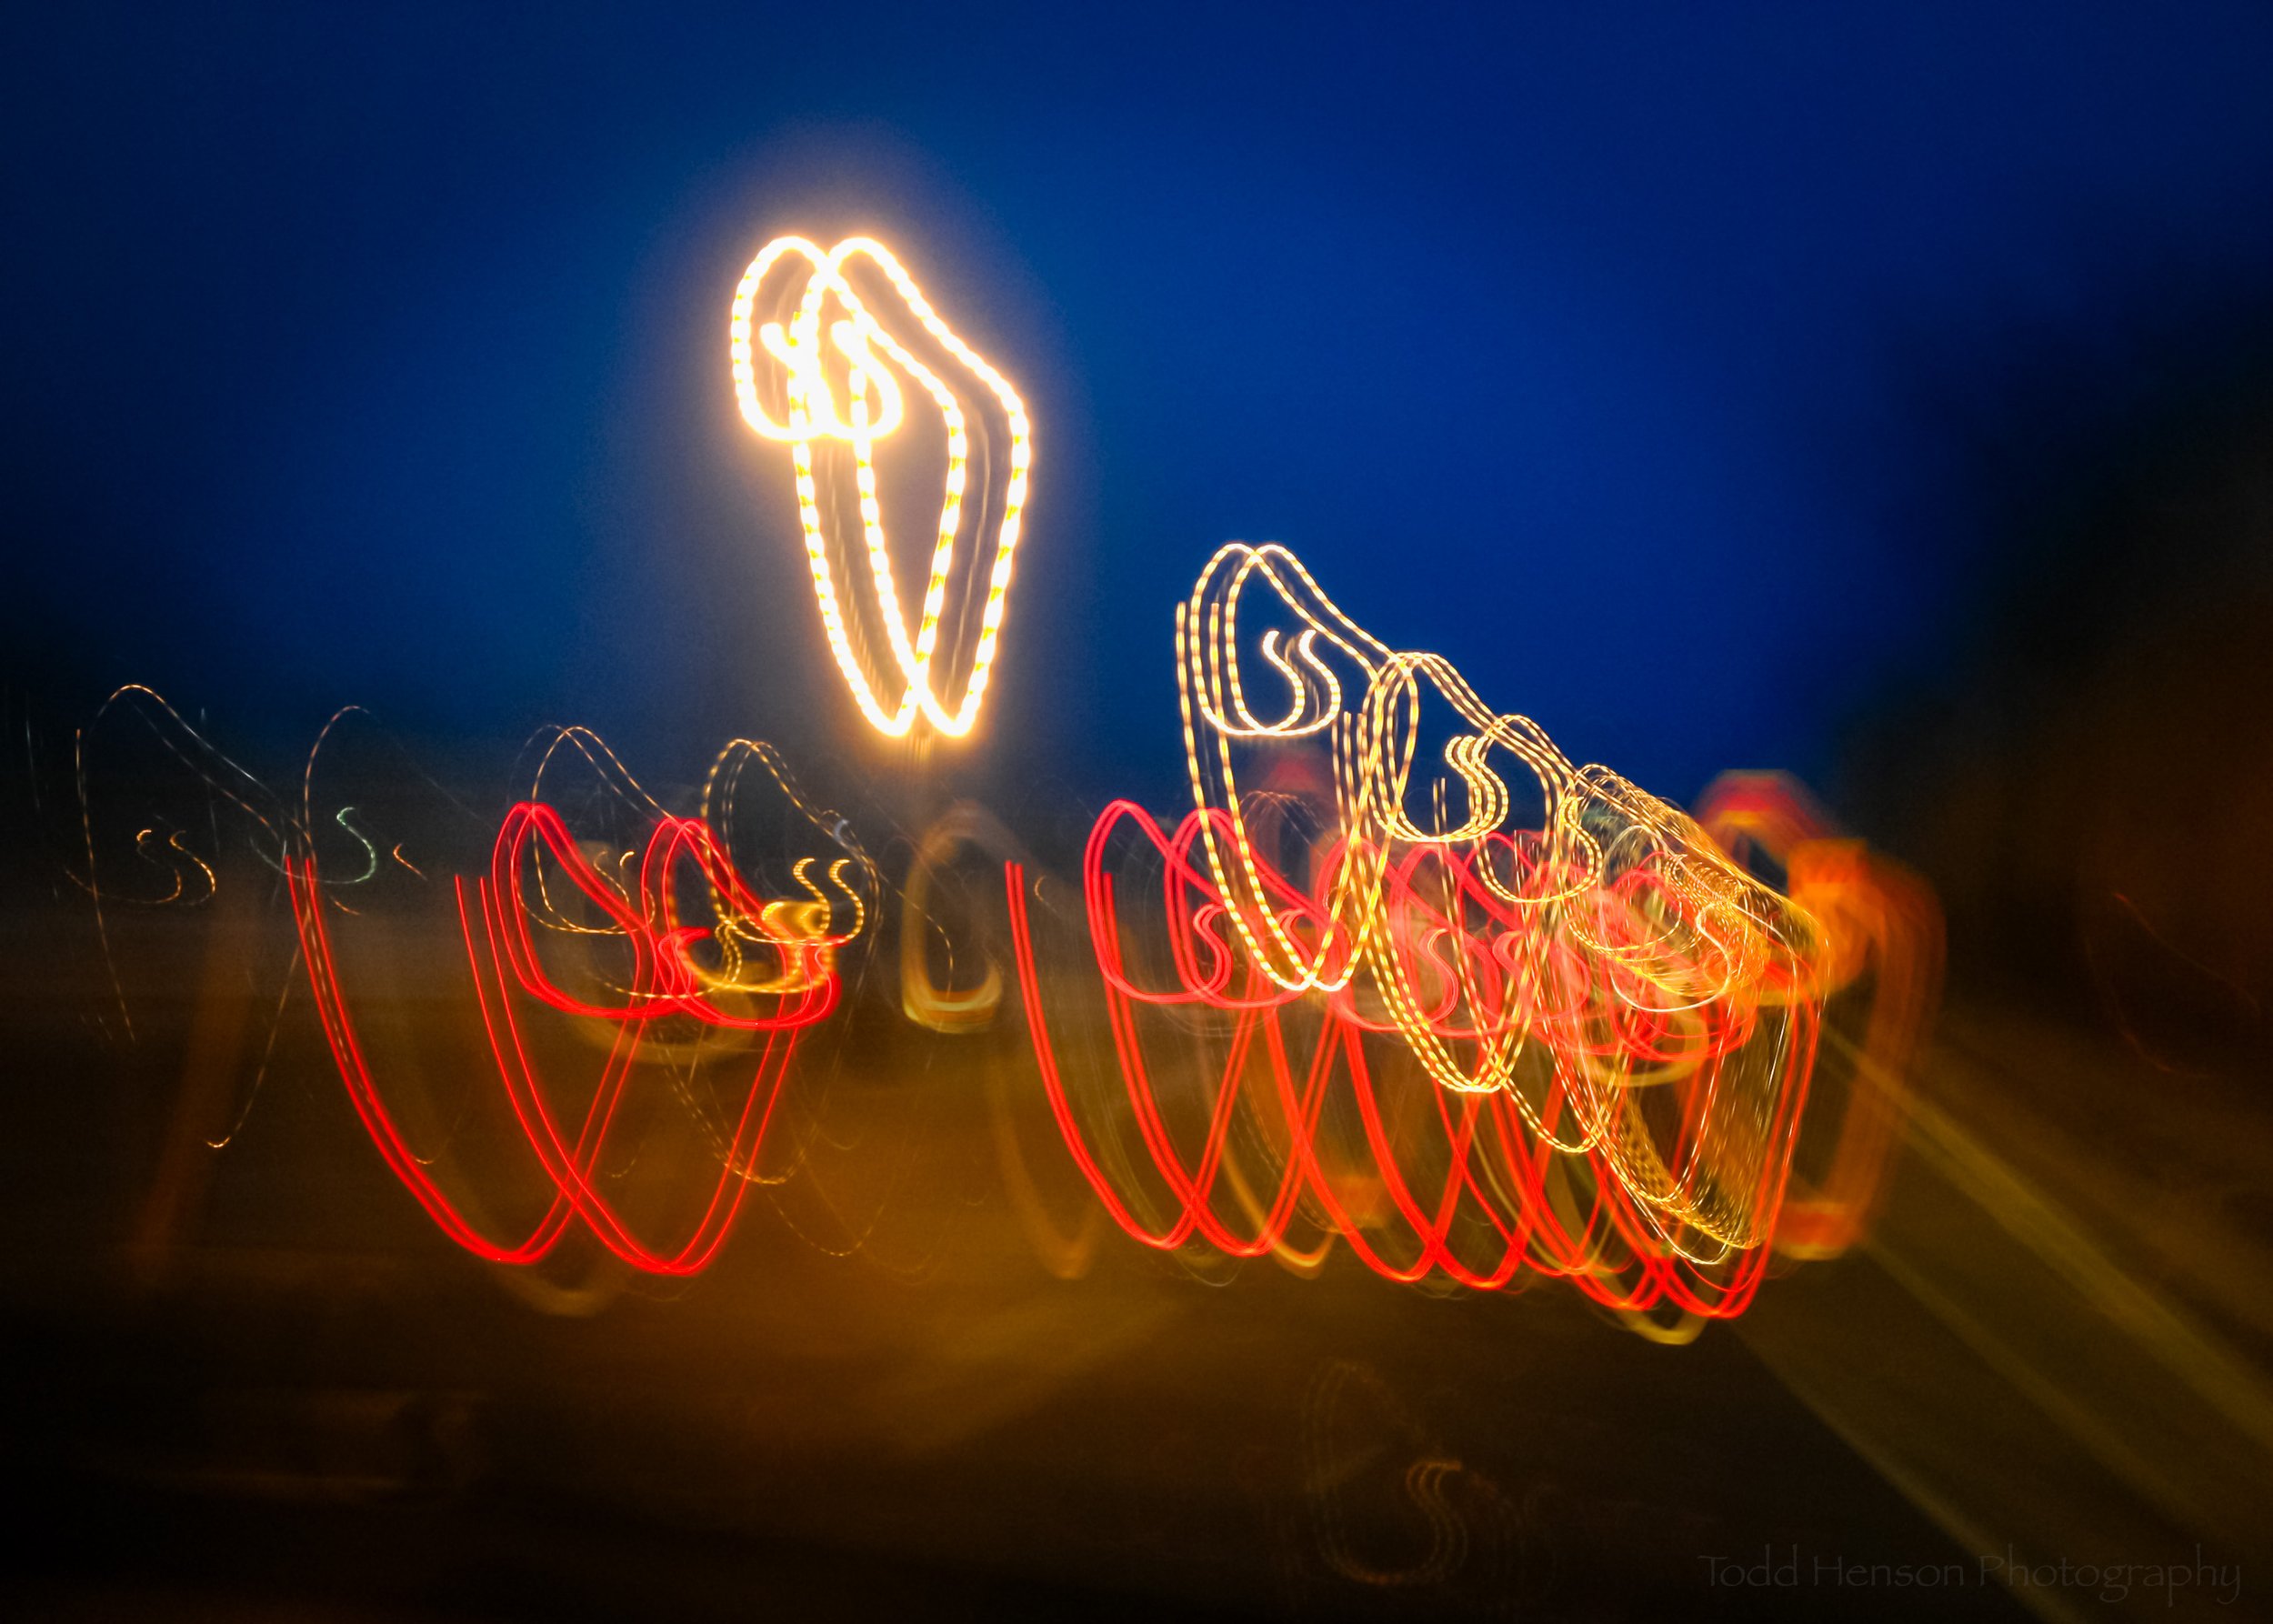
Specifically, each photo is part of a drive south on Interstate 95 after dark (yes, I was a passenger, not a driver). They are each from a phone using an app that allowed for longer exposures, most between half to a full second. Then I moved the phone/camera around during the exposure. Because of this each photo will be unique and unlikely to be duplicated (of course the question stands whether anyone would ever want to duplicate them! 😅)

The glow below the overpass

Though it was almost 13 years ago I still fondly remember creating these that night. And I still wonder what some of the people in nearby cars thought of the crazy guy moving his phone all around as he drove by? Or were they too absorbed in their own phones to notice? 😊

Ribbons of light


Do you enjoy these posts?

Sign up to receive periodic emails with updates and thoughts. Don’t worry, I won’t spam you. And please consider purchasing artwork or products from my online store, and using my affiliate links in the sidebar to the right when shopping online.

I appreciate your support!

Color Fringing Fungus: An Example of Chromatic Aberration by Todd Henson

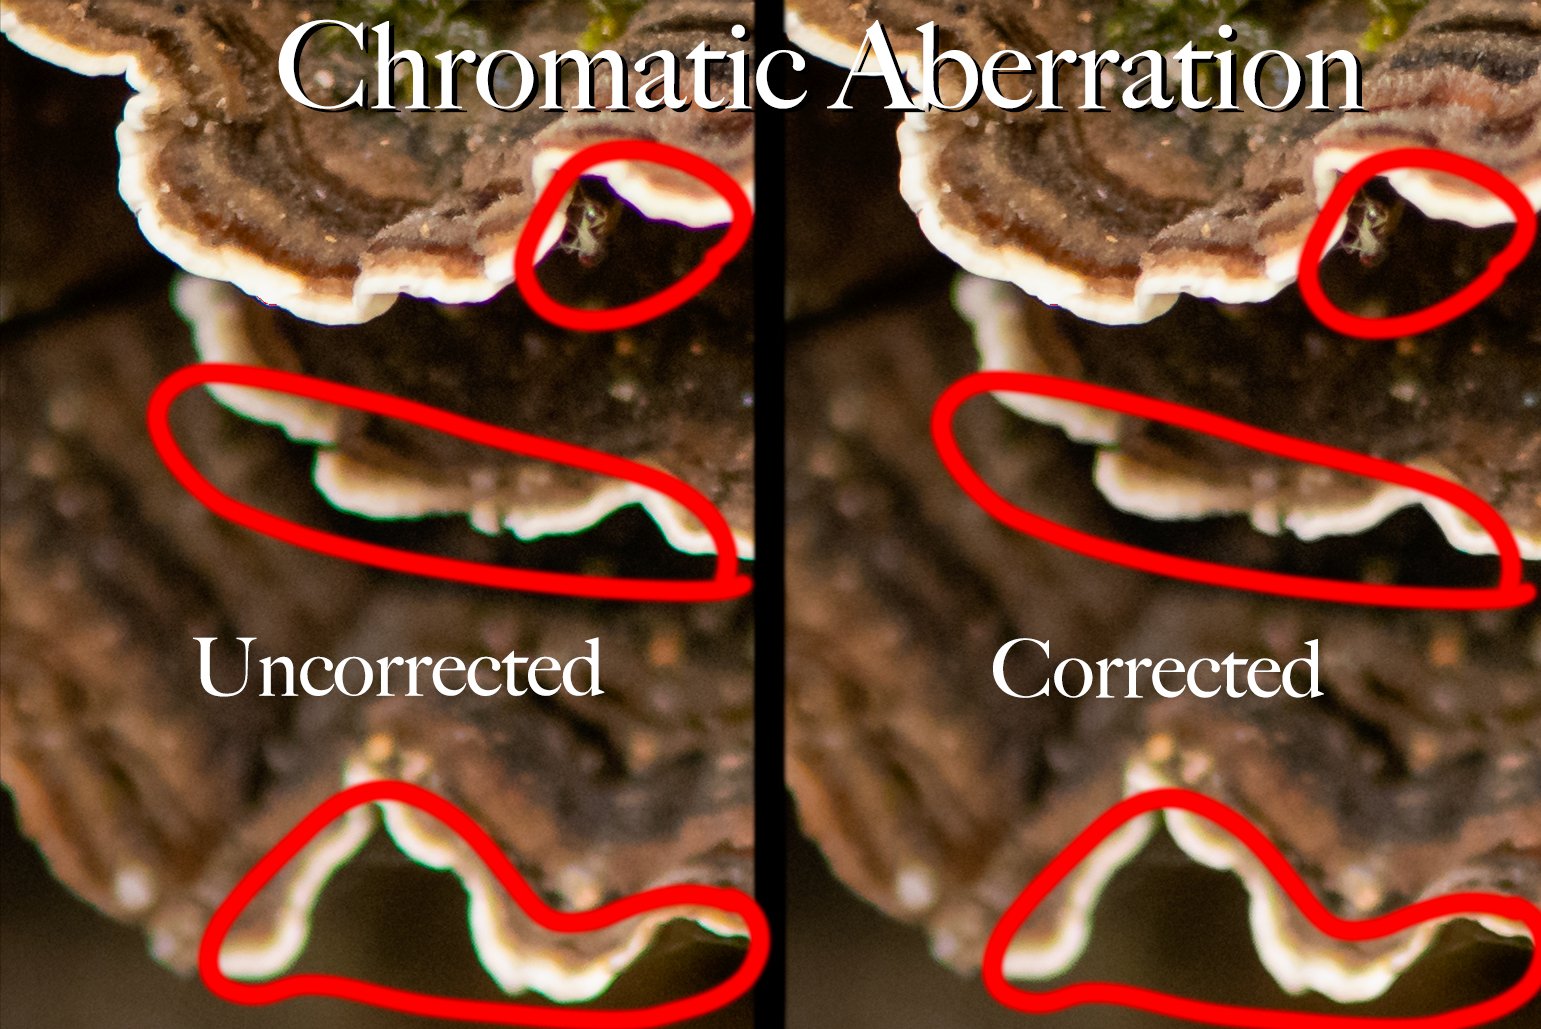
Side by side example of chromatic aberration

Today I wanted to tackle the topic of chromatic aberration, what it is, and how to attempt to correct it. Please click on all the photos in this post to see larger versions.

What is Chromatic Aberration?

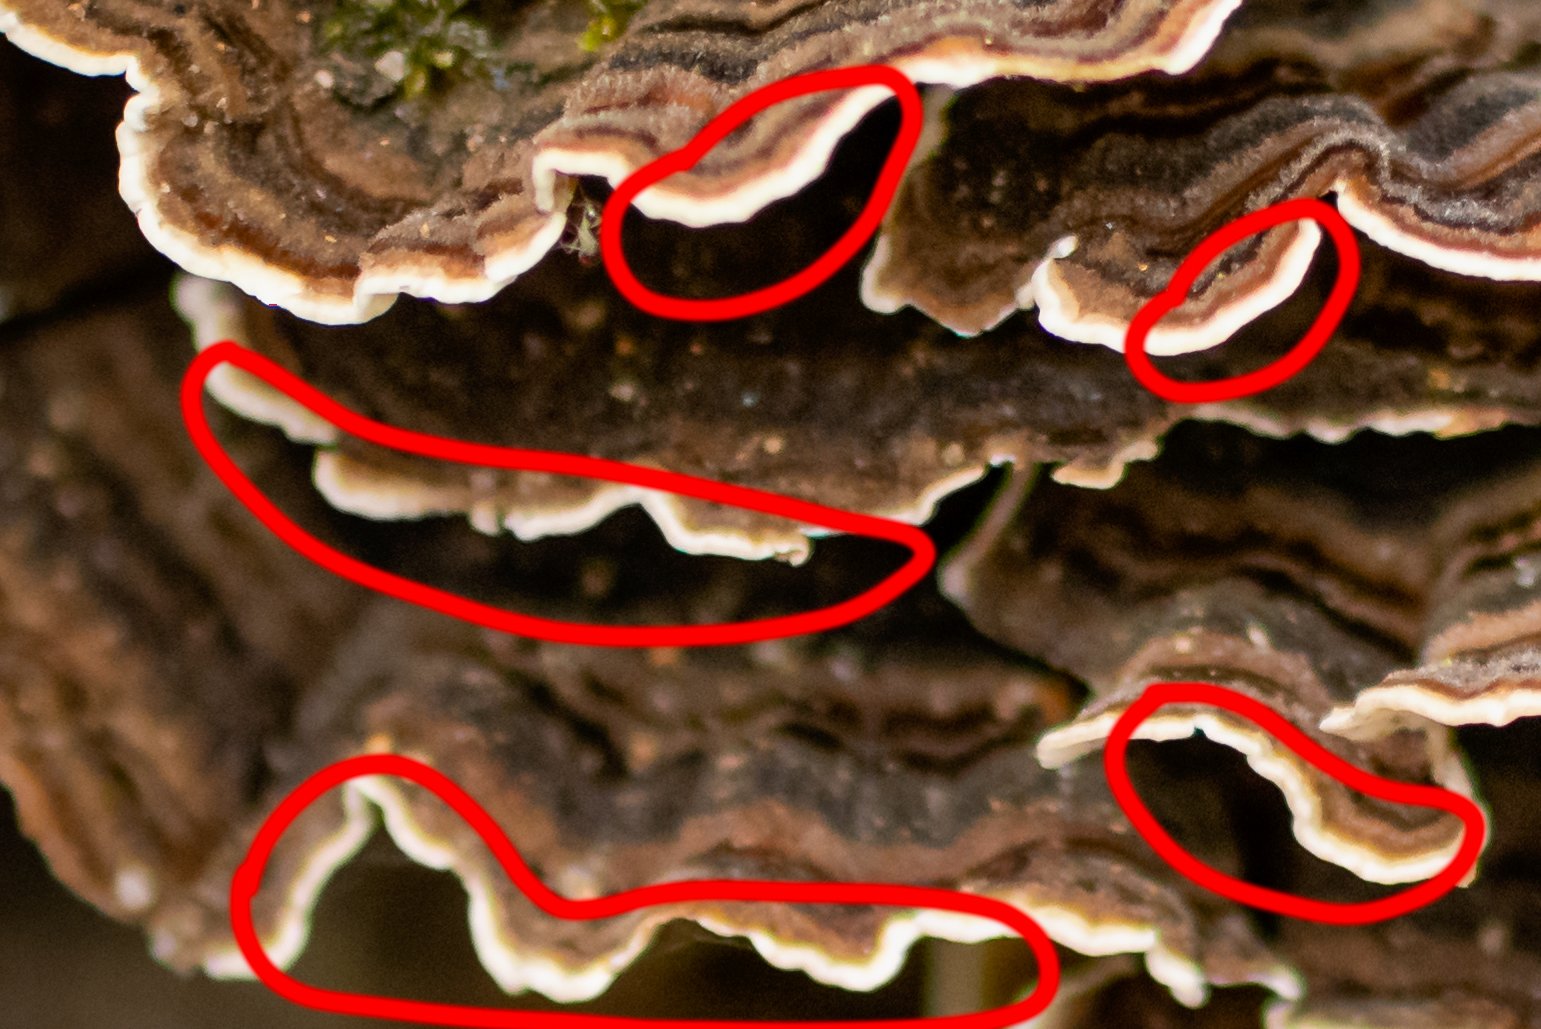
This topic has the potential to get very technical as chromatic aberration, also called color fringing, is something caused by the optical physics of lenses. But I don’t want to get too technical, so a simple description is that chromatic aberration is unwanted bands of color, most often along the edges of objects in the photo and often when there is strong contrast between light and dark areas. It’s best to start with an example, so look at the closeup photo below of some fungus where I’ve circled the areas showing chromatic aberration.

A closeup showing chromatic aberration in regions where light and dark meet

See how the top section has a band of magenta color along the lower edge of the light band on the fungus, right where it transitions from light fungus to dark background? In the middle and lower sections the fringing is in the form of bands of green color. Neither the magenta nor the green are a natural part of this scene. They are distortions caused by imperfections and limitations in the lens.

Chromatic aberration is generally more likely to occur when using wider apertures, so you can reduce or eliminate it by stopping down to a smaller aperture. But sometimes this won’t create the photo you’re trying for and you need to use a wider aperture. In those cases you may end up with some color fringing. Thankfully, today’s software provides methods to correct this.

Auto Correcting Chromatic Aberration

I used Adobe Lightroom for these examples. This is from an older version so it’s possible the options may look different on the version you have but the concept is the same.

Shows I’ve checked Remove Chromatic Aberration and Enable Profile Corrections under the Profile section of Lens Corrections in Lightroom.

Lightroom provides a means of automatically correcting chromatic aberration, and in this case it was done by checking a checkbox labelled Remove Chromatic Aberration within the Profile section of Lens Corrections. I also check Enable Profile Corrections to correct other sorts of lens distortions. Sometimes Lightroom does a great job and this is all I need to do. But as we’ll see, sometimes it doesn’t correct as much of the color fringing as I’d like.

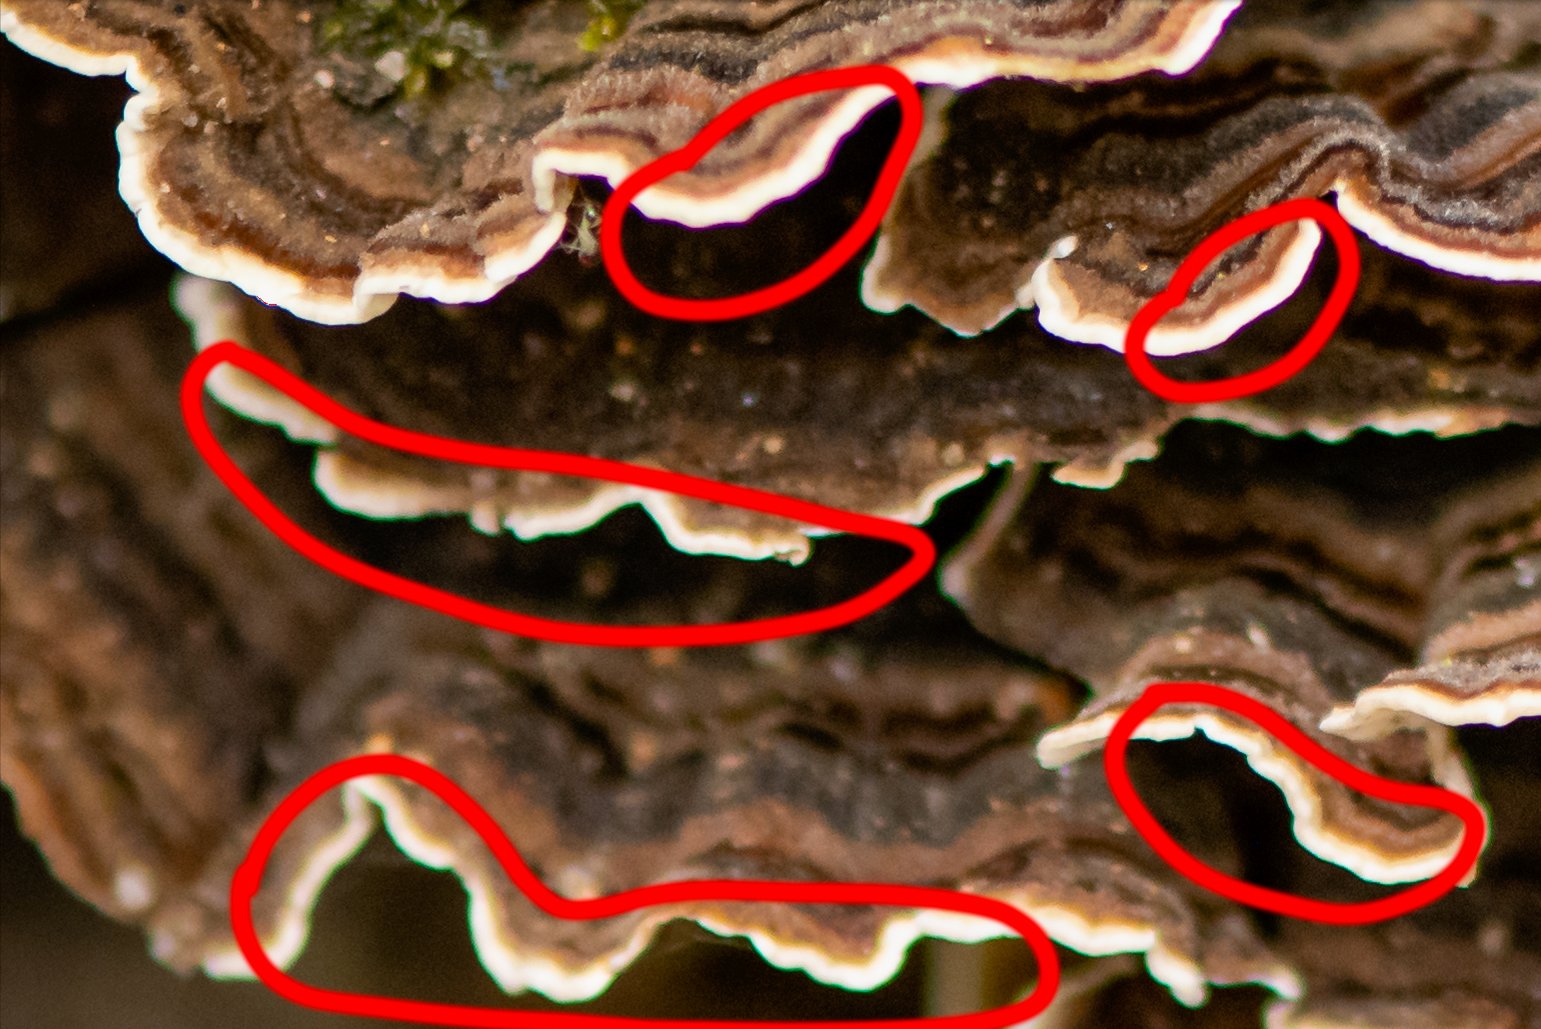
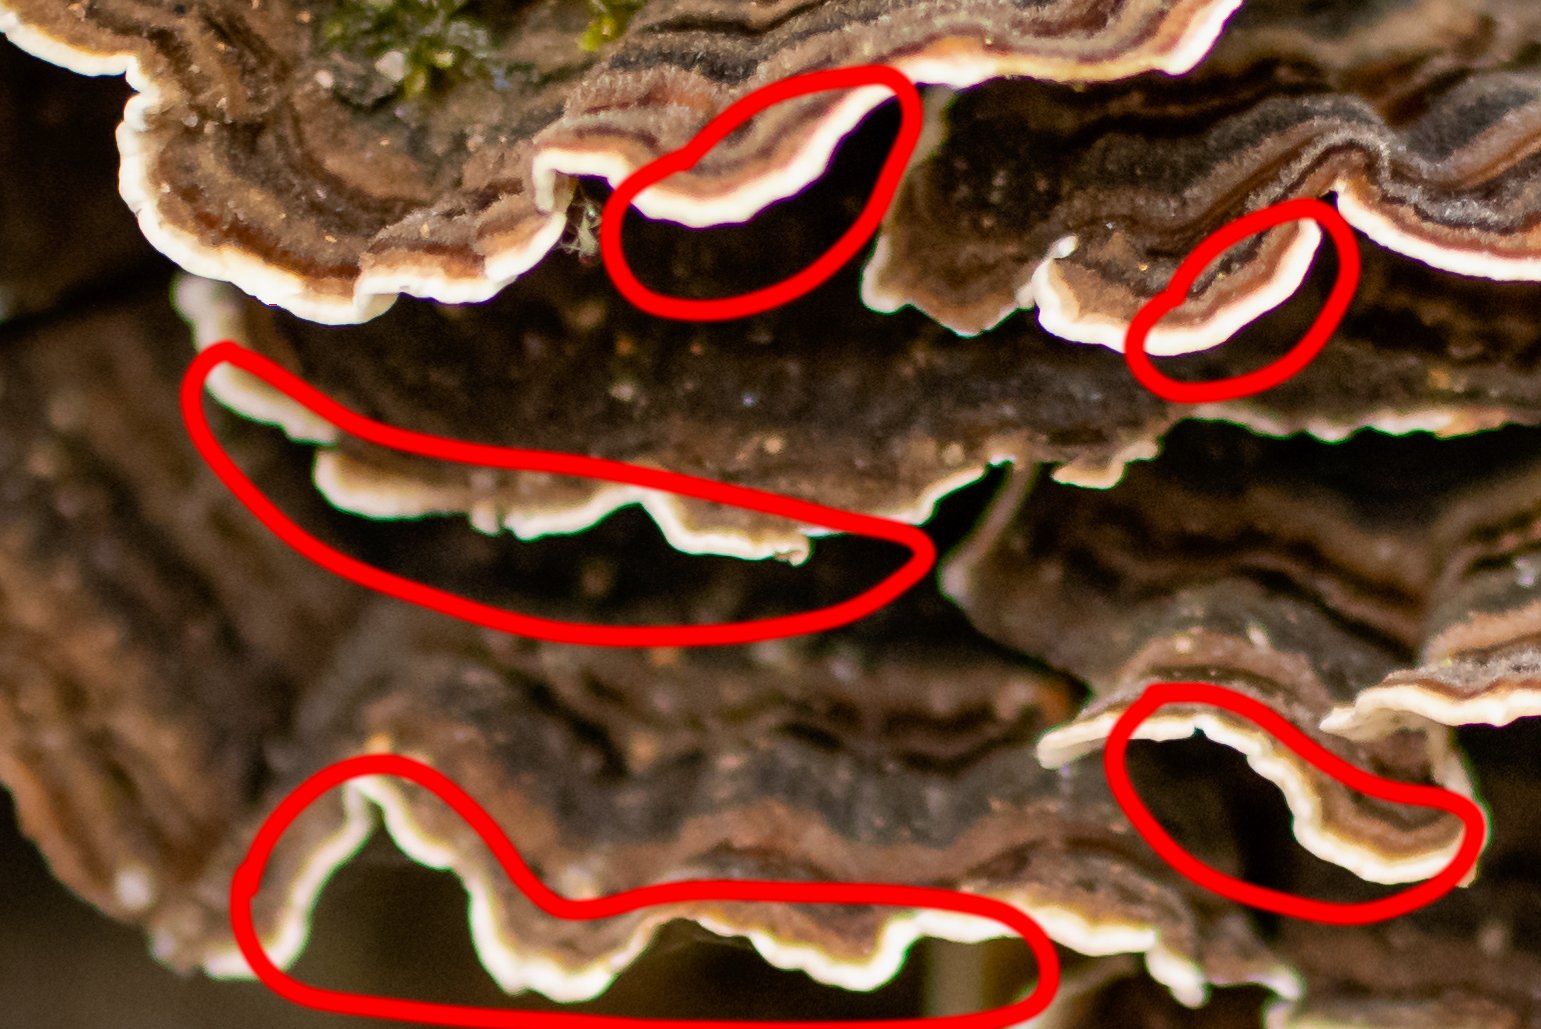
Below are examples showing the uncorrected closeup followed by an attempt at Lightroom’s autocorrection of chromatic aberration with specific sections circled in red to show the color fringing. Notice, even after the correction there still is a fair bit of color fringing.

Shows the uncorrected sections with chromatic aberration

Shows the autocorrected sections. Note, there is still noticeable color fringing.

Below is a slideshow of the above two images. Click on the photo to cycle between uncorrected and autocorrected.

Manually Correcting Chromatic Aberration

I wanted to remove more of the color fringing than Lightroom did when I checked the Remove Chromatic Aberration box. So I clicked on Manual and used the dropper tool to specifically select the areas of the photo that were showing the strongest color fringing. I did this multiple times, over both the magenta and the green fringing. This told Lightroom the specific color fringing it should attempt to correct.

Shows the default settings for the Manual section of Lens Corrections in Lightroom.

Shows the settings after manually using the dropper tool to select regions with strong color fringing.

Below are examples showing the uncorrected closeup followed by my attempt at manually correcting the chromatic aberrations. By using the manual dropper I was able to do a much better job at removing the specific color fringing present in this photo.

Shows the uncorrected sections with chromatic aberration

Shows the manually corrected sections. Most color fringing is now gone, or at least reduced.

Below is a slideshow of the above two images. Click on the photo to cycle between uncorrected and manually corrected.

Conclusion

Chromatic aberration won’t be a problem in all photos. In fact, I’d say it’s not a problem in most of my photos. And in many cases when it is present Lightroom does a great job automatically correcting the color fringing. But in special situations, often when I’m doing macro work with wide apertures and subjects with strong regions of contrast between light and dark, chromatic aberration will become a problem and I’ll put a little more effort into manually correcting for it.

Below is the final photo after manually correcting for chromatic aberration.

The final photo after manually correcting for chromatic aberration.

Bonus: Hidden Flying Insect

Did you happen to notice the tiny little insect hiding in the photo and closeups above? I’d not even seen it until I zoomed way in using Lightroom. Below is another of the closeup images where I’ve circled the little creature in red.

Check out the tiny flying insect on the fungus.


Do you enjoy these posts?

Sign up to receive periodic emails with updates and thoughts. Don’t worry, I won’t spam you. And please consider purchasing artwork or products from my online store, and using my affiliate links in the sidebar to the right when shopping online.

I appreciate your support!