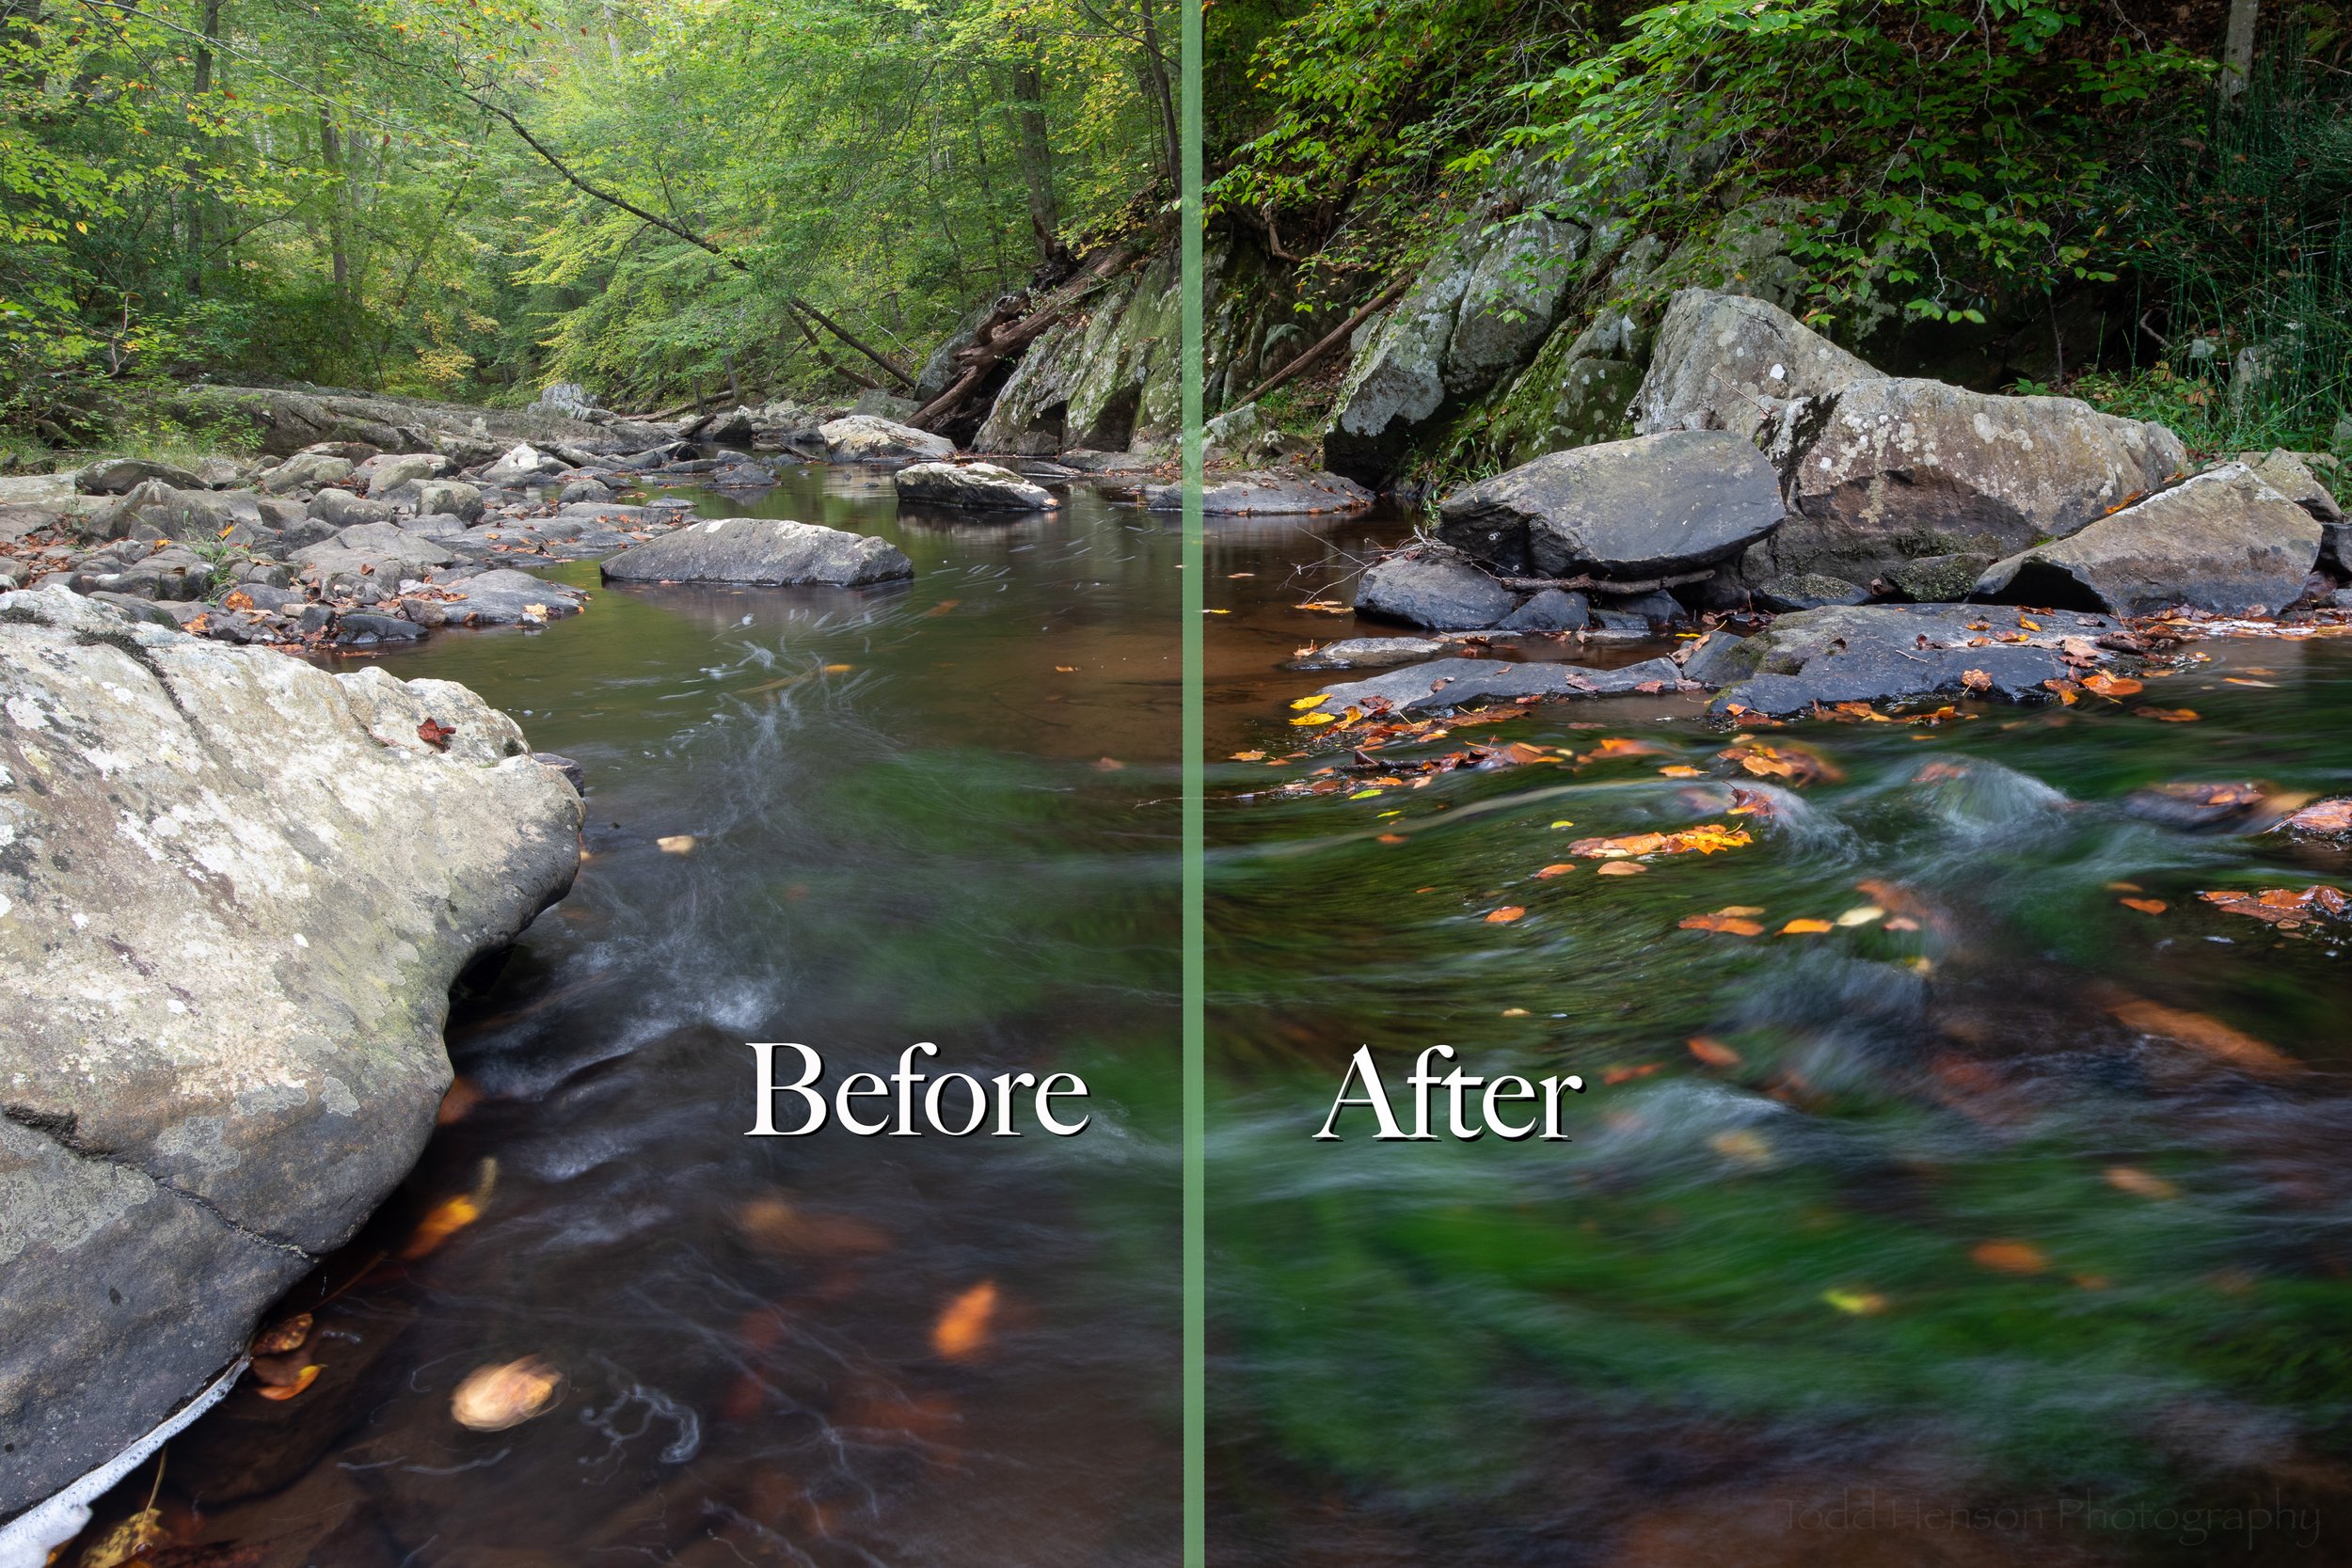
A look at the before & after of the image, Water & Stone.
Sometimes folks are curious how much work happens in post-production after the image file leaves the camera. So today I thought I’d show a simple example of a before and an after image. Sometimes I spend hours tweaking a photo in Adobe Lightroom and/or Photoshop, but most times, such as this one, I spend very little time and make a small number of adjustments.
If you use a camera that produces JPEG images then you may not need to make any adjustments in post. JPEG is a “finished” file format. Cameras have all kinds of settings, and these are baked in when shooting to JPEG, meaning the camera creates an image ready to be displayed. When shooting JPEG, for the most part you are letting the camera do the work of processing the image.
Some cameras can also produce images in a custom raw format. This gives us, as photographers, much more control. When shooting JPEG we let the camera do all the processing. When shooting raw the camera just captures all the information it can and packs that into the file, leaving it to us to process that data into a finished image later, in software. So raw images are like digital negatives, they require a bit of processing to create a finished photograph, whether that be a print or an image for online viewing. Because of this, sometimes the raw files that come out of cameras are a little dull until we process them.
Water & Stone: The unprocessed raw “before” image.
Water & Stone: The finished “after” image.
Most times I make a very small number of adjustments, often trying to create an image that looks like the actual scene. Other times I try to create something that looks as I imagined the scene based on how it made me feel at the time, which may or may not be exactly how it looked to others. It’s up to us at this point whether to get more artistic or creative in the processing, or just try to bring out what we created in camera. For this example I kept things simple, opting to create an image that looked much like the actual scene.
Let’s take a look at some of the settings I tweaked in Lightroom. I brought down the exposure just a bit to darken the overall image. I brought up the whites, brightening them, and brought down the blacks, darkening them. This increased the contrast, helping get past the dullness raw files sometimes have. I brought up the shadows a bit to keep them from getting too dark when I’d brought down the blacks. I added a bit of clarity and vibrance, which further increased contrast, but in more subtle ways. There were a few other settings I adjusted, but these were the big ones.
Click the image below to cycle back and forth between the before and after image. You’ll see the difference the settings made. These were fairly basic settings. This is how I adjust most photographs, though the specific settings vary based on the image. In future posts I’ll show more before and after examples, some of which may be more involved than this one.
I hope you enjoyed this brief look at the before and the after of image making.
Do you enjoy these posts?
Sign up to receive periodic emails with updates and thoughts. Don’t worry, I won’t spam you. And please consider purchasing artwork or products from my online store, and using my affiliate links in the sidebar to the right when shopping online.
I appreciate your support!