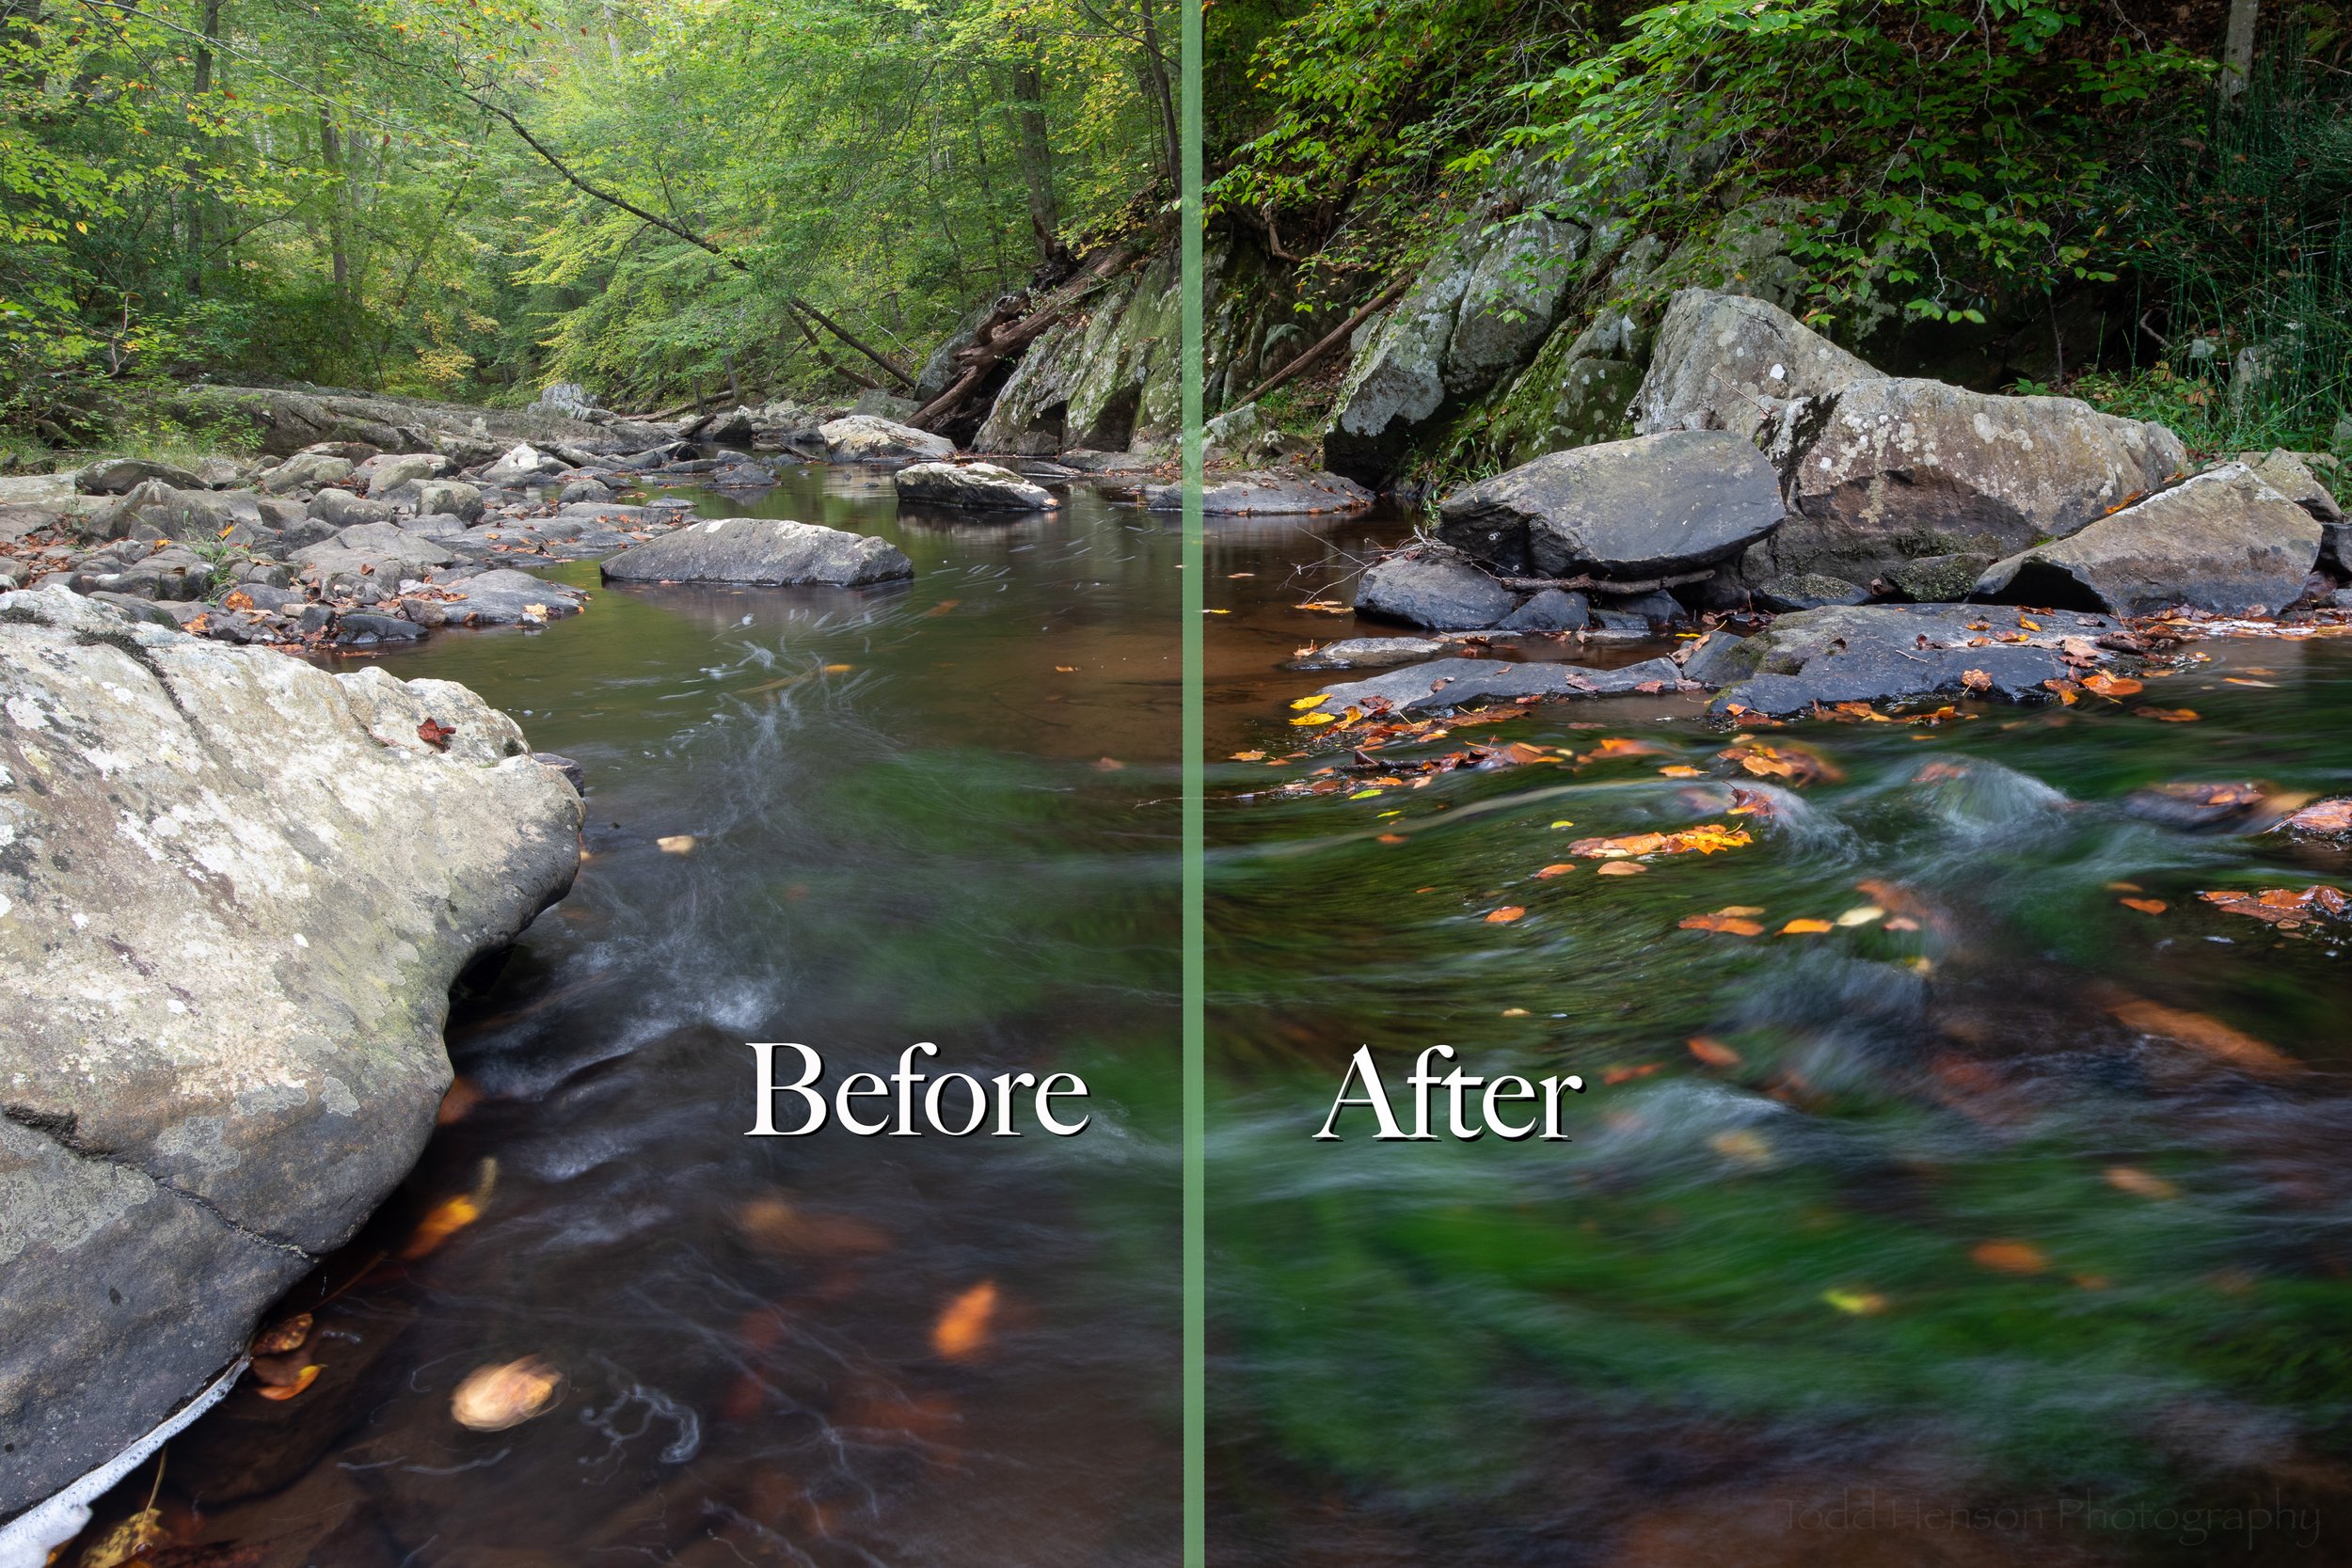
Before & After: Portrait of a Green Frog
It’s time for another before & after session, where we look at an image as it came out of the camera and see what I did in post-production to arrive at the final image. When thinking about which photograph to use I realized I’ve yet to show a before & after for any form of wildlife, a subject I’m very fond of. So I picked an older photograph I’ve always liked, both for the image itself and for the experience I had creating it which you can read about in another post: Green Frog - The Story Behind the Image.
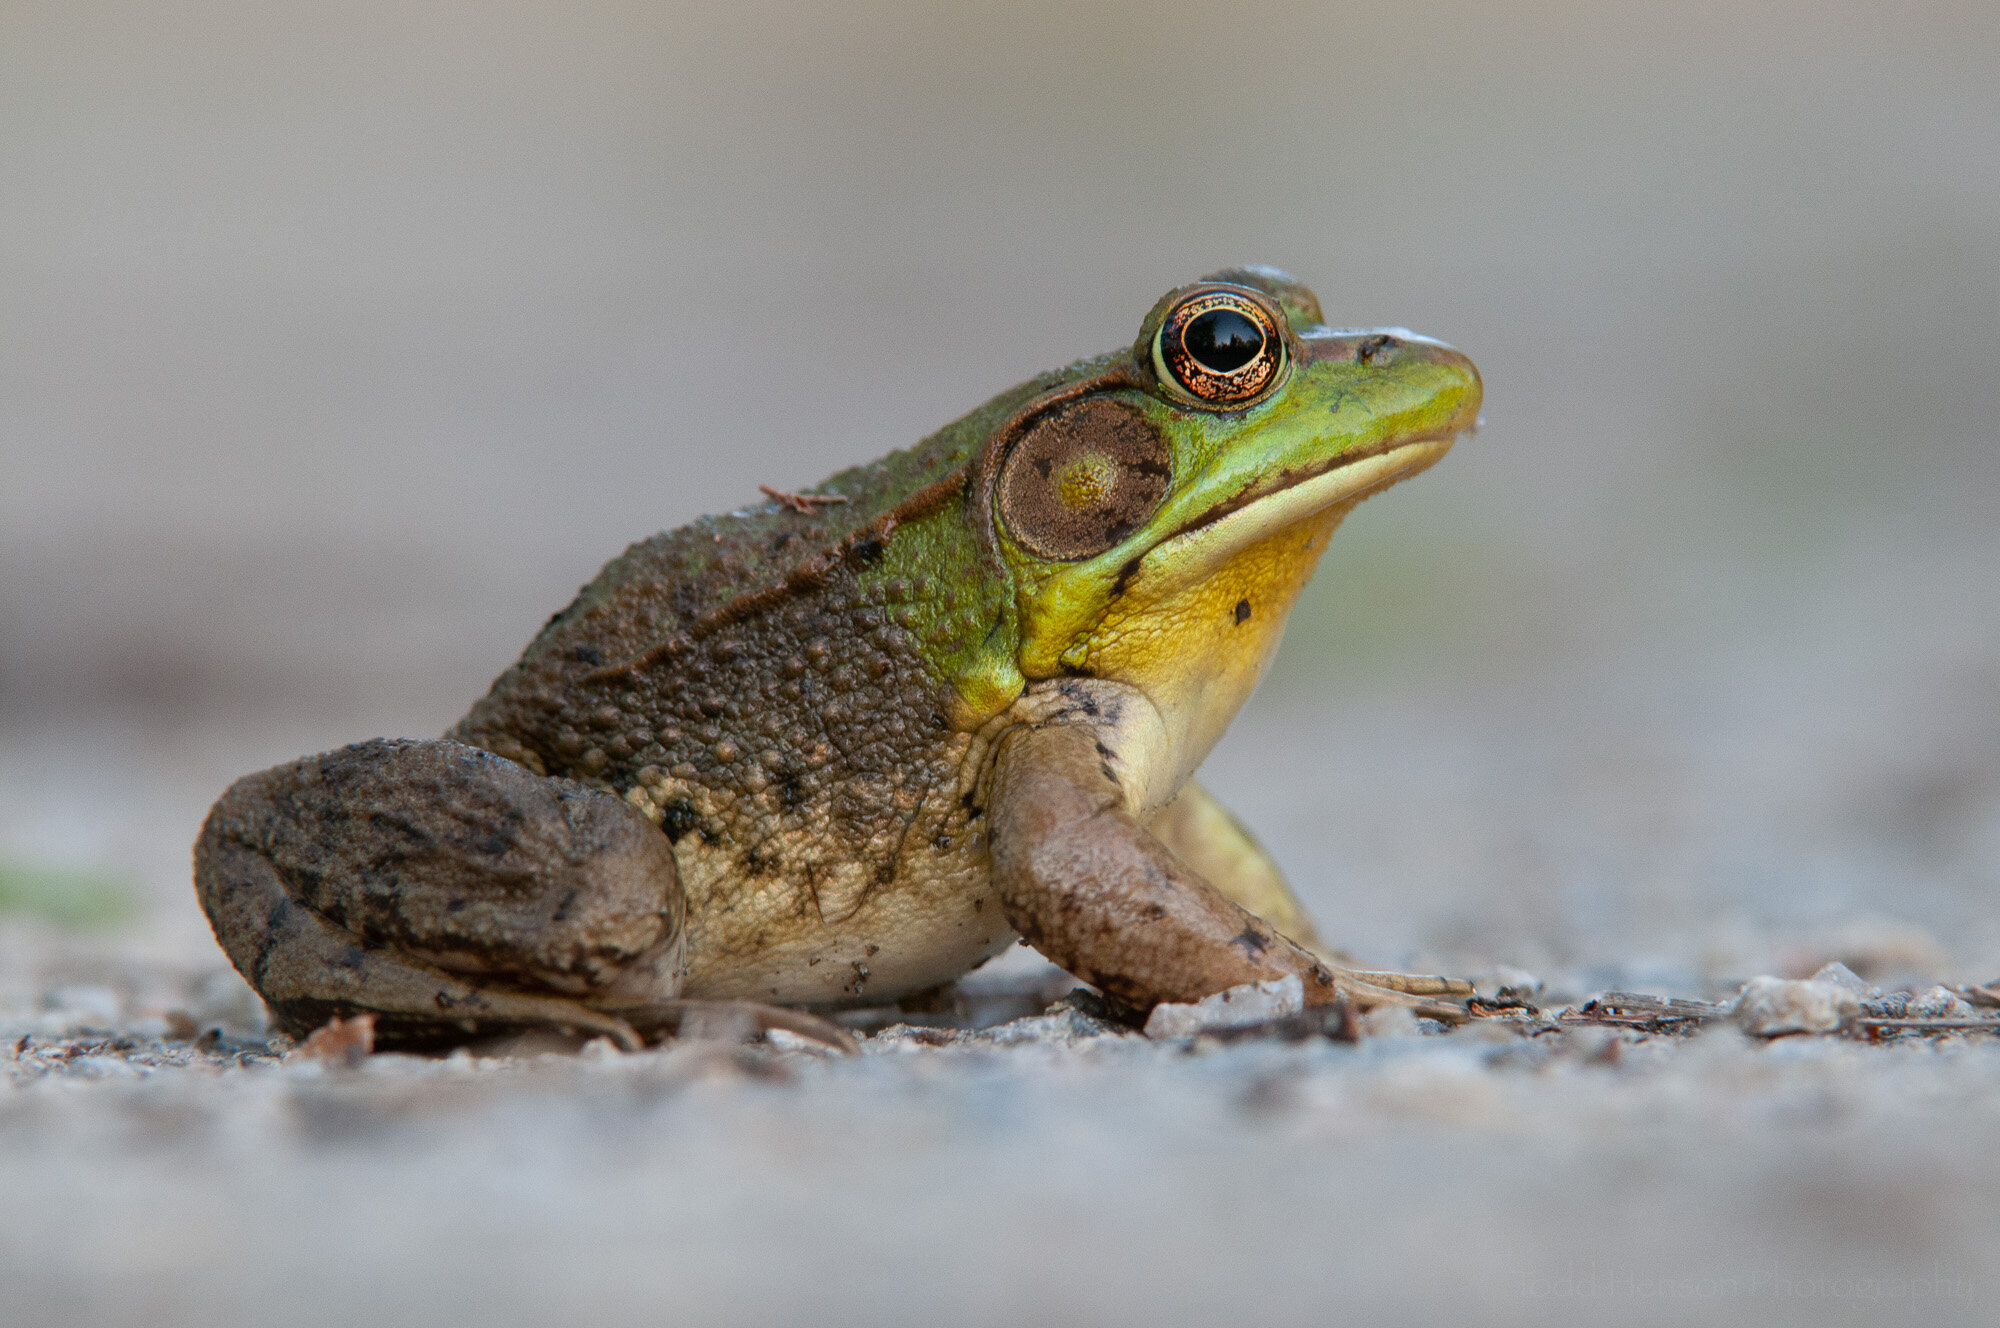
All of the post-production work for this photograph was done in Adobe Lightroom. And before we get into the processing steps, below is a capture of the image out of the camera showing the baseline settings, including white balance, before they were adjusted.
Before making any adjustments
Step 1: Basic Global Adjustments
Basic global adjustments
I usually work in the Basic tab first. These are global adjustments that affect the entire image. These days I tend to avoid some of the settings in the Basic tab, such as Texture and Clarity, and instead apply them using other tools such as an adjustment brush so they only apply to certain areas of the image. But when I processed this image I was still largely using the Basic tab.
You can see which settings I adjusted, tweaking the white balance just a touch, and increasing exposure and contrast just a bit. I adjust highlights, shadows, whites and blacks in most images (though sometimes only locally), and I adjusted all but highlights here. These settings help affect the contrast within the image, but also control how much detail we can see in darker or lighter areas. I also bumped up clarity a bit to increase contrast, something I still sometimes do, but these day I find myself using texture more often. And I bumped up the vibrance just a bit, which increases color saturation but only to the less saturated areas so it doesn’t go overboard.
Step 2: Adjustment Brush on the Eye
Adjustment brush on the gold ring of the eye
I wanted the viewer to be drawn to the frog’s eye, so here I used an adjustment brush to select the lighter golden ring of the eye and increased both the exposure to brighten it and the saturation to add a little bit of richness to that beautiful metallic gold. The image shows the selected area with a light red mask, which extends around the gold band of the eye.
Step 3: Graduated Filter at the Top
Graduated filter at the top of the image
One way to help guide the viewer’s eye toward a subject is to adjust the exposure in different areas causing some areas to get darker and others lighter. Here, if I lighten the background and then darken the top and bottom edges the eye will tend to move toward the darker subject at the center. Above, in the Basic tab, I’d increased the overall exposure a bit, so in this step I created a graduated filter at the top of the image, dropping the exposure to darken the top edge. Because it’s graduated it will begin darker at the very top and gradually lighten further below. You can see this in the red, which shows the masked area, how the red lightens as it approaches the frog.
Step 4: Graduated Filter at the Bottom
Graduated filter at the bottom of the image
And here we add a matching graduated filter at the bottom. Now we have a darker top and bottom and a lighter background that the frog stands out nicely against.
Step 5: Spot Removal on the Neck
Spot removal on the neck
This may seem a subtle thing, but the frog had a dark spot on its yellow neck, perhaps something stuck to the neck. It wasn’t a big deal but I kept getting distracted by it, so I decided to use the spot removal tool to remove that spot, or at least lighten it significantly such that my eye didn’t keep returning to it.
Step 6: Post-crop Vignette
Post-crop vignette to dry the eye inward
The last step was adding a post-crop vignette, something I often do to help keep the eye in the frame. This darkens the edges of the image. I’d already darkened the top and bottom, so this will darken those a big more but will also darken the sides and corners.
Final Image
Portrait of a Green Frog: Final Image
And that’s all there was to this image. Most of my wildlife images are fairly simple when it comes to editing. I want to show the wildlife as close as I can to how it really looked, but I’m also trying to create an aesthetically pleasing image. So there’s a balance I consider when processing. Raw files straight out of the camera tend to be a little dull, lacking in contrast and saturation, so they require a little processing to make the image look real. If you set your camera to create JPEG images you may not have to do these steps as the camera will make those decisions for you, but you’ll lose control over how it’s done. And after that there are also small things we can do to help bring attention to the subject and coax the viewer’s eye where we want it, such as the vignetting, graduated filters and exposure adjustments.
I hope you’ve enjoyed this look behind the scenes at how I processed this particular photo. Click on the image below to see a comparison of the before and after images. This will make it easier to see the changes.
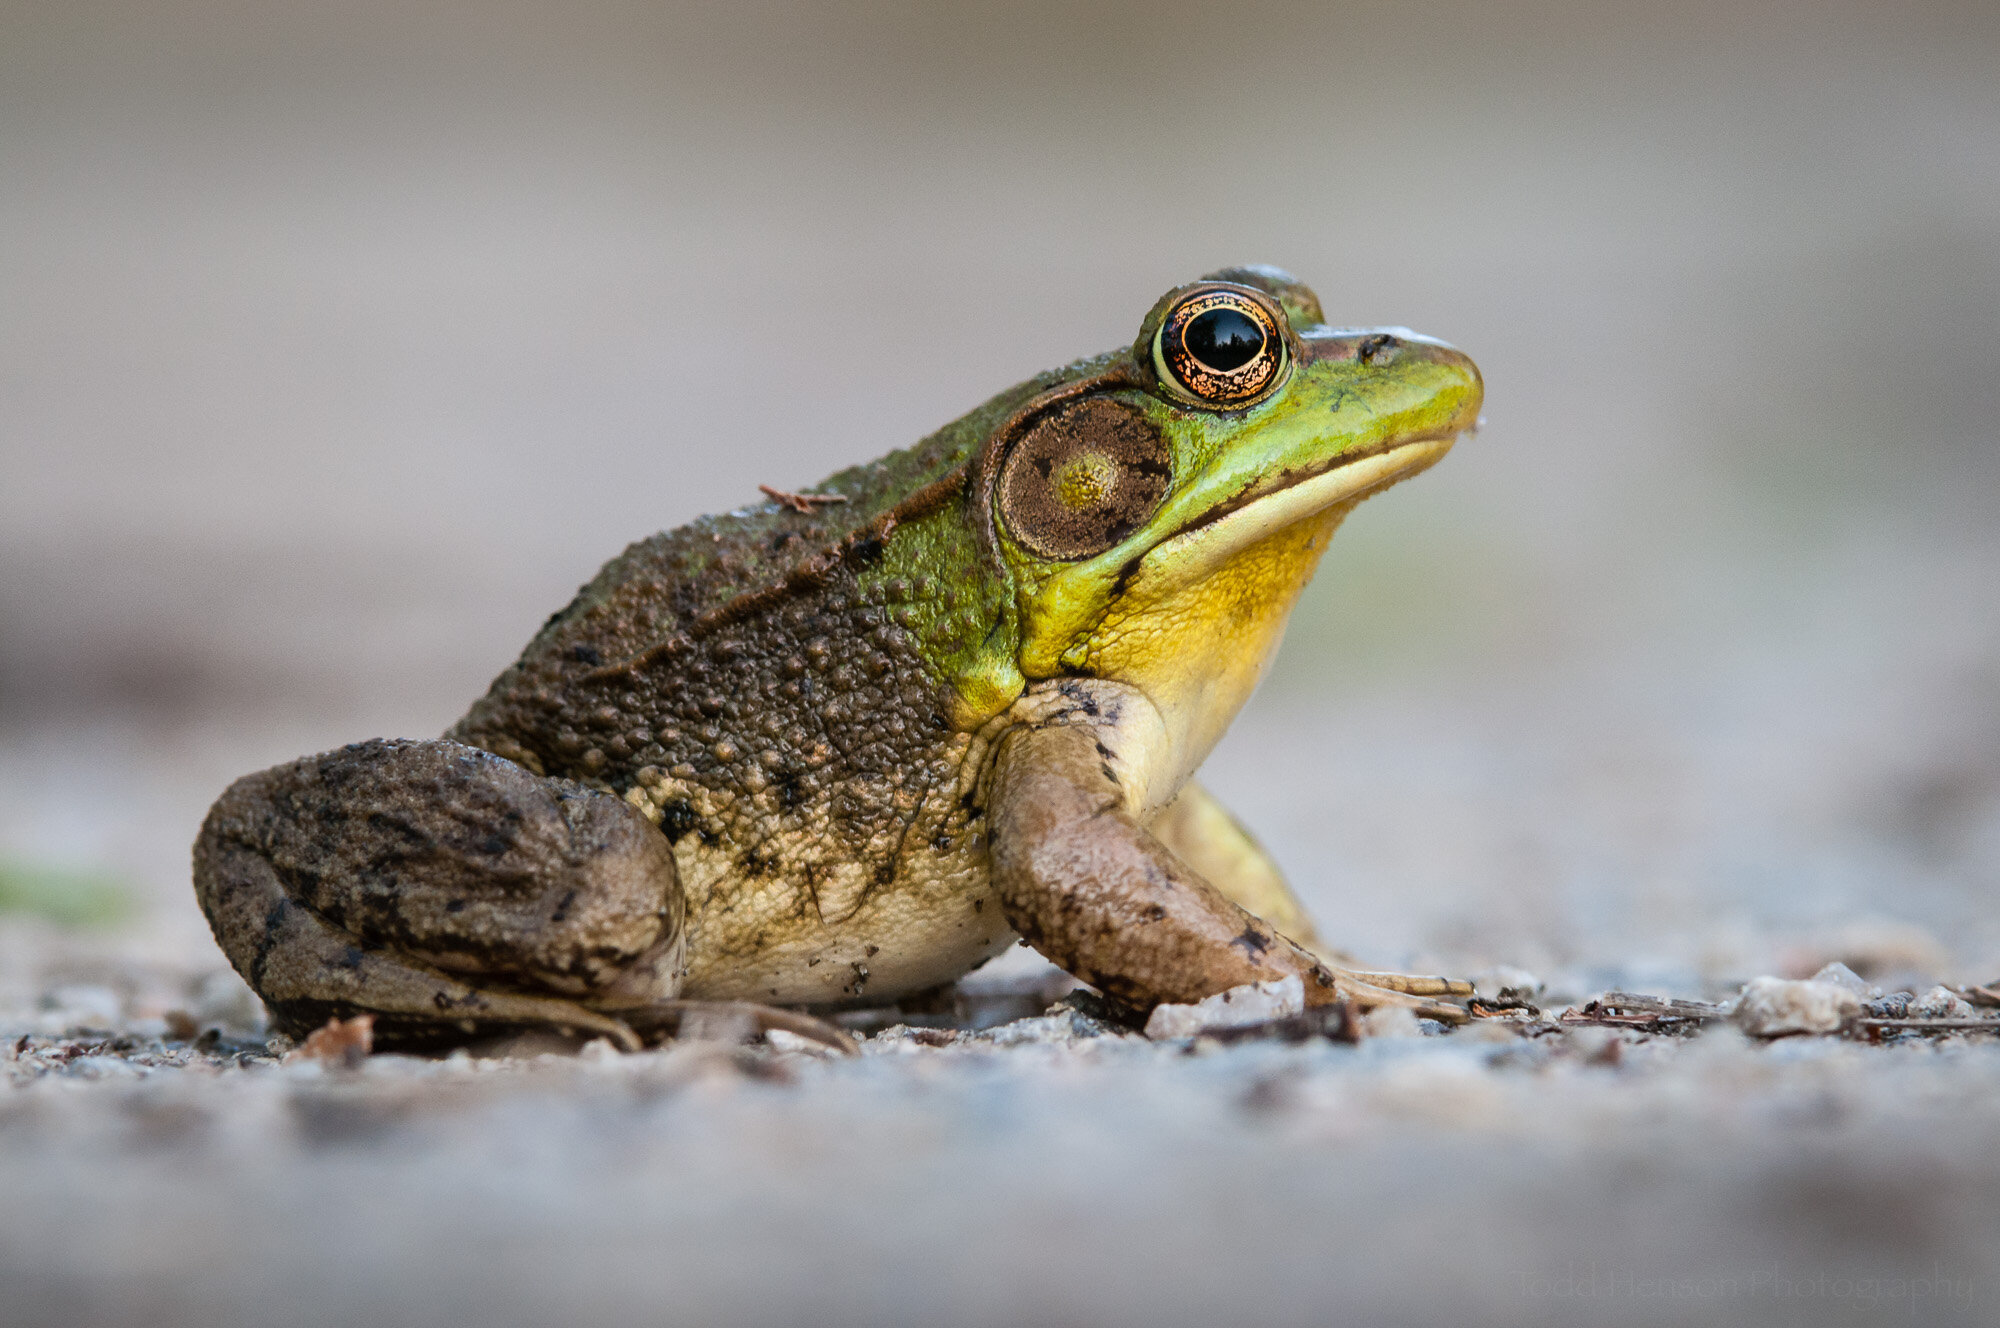
Portrait of a Green Frog is available for purchase as wall art or on a variety of products at my online store.

Do you enjoy these posts?
Sign up to receive periodic emails with updates and thoughts. Don’t worry, I won’t spam you. And please consider purchasing artwork or products from my online store, and using my affiliate links in the sidebar to the right when shopping online.
I appreciate your support!