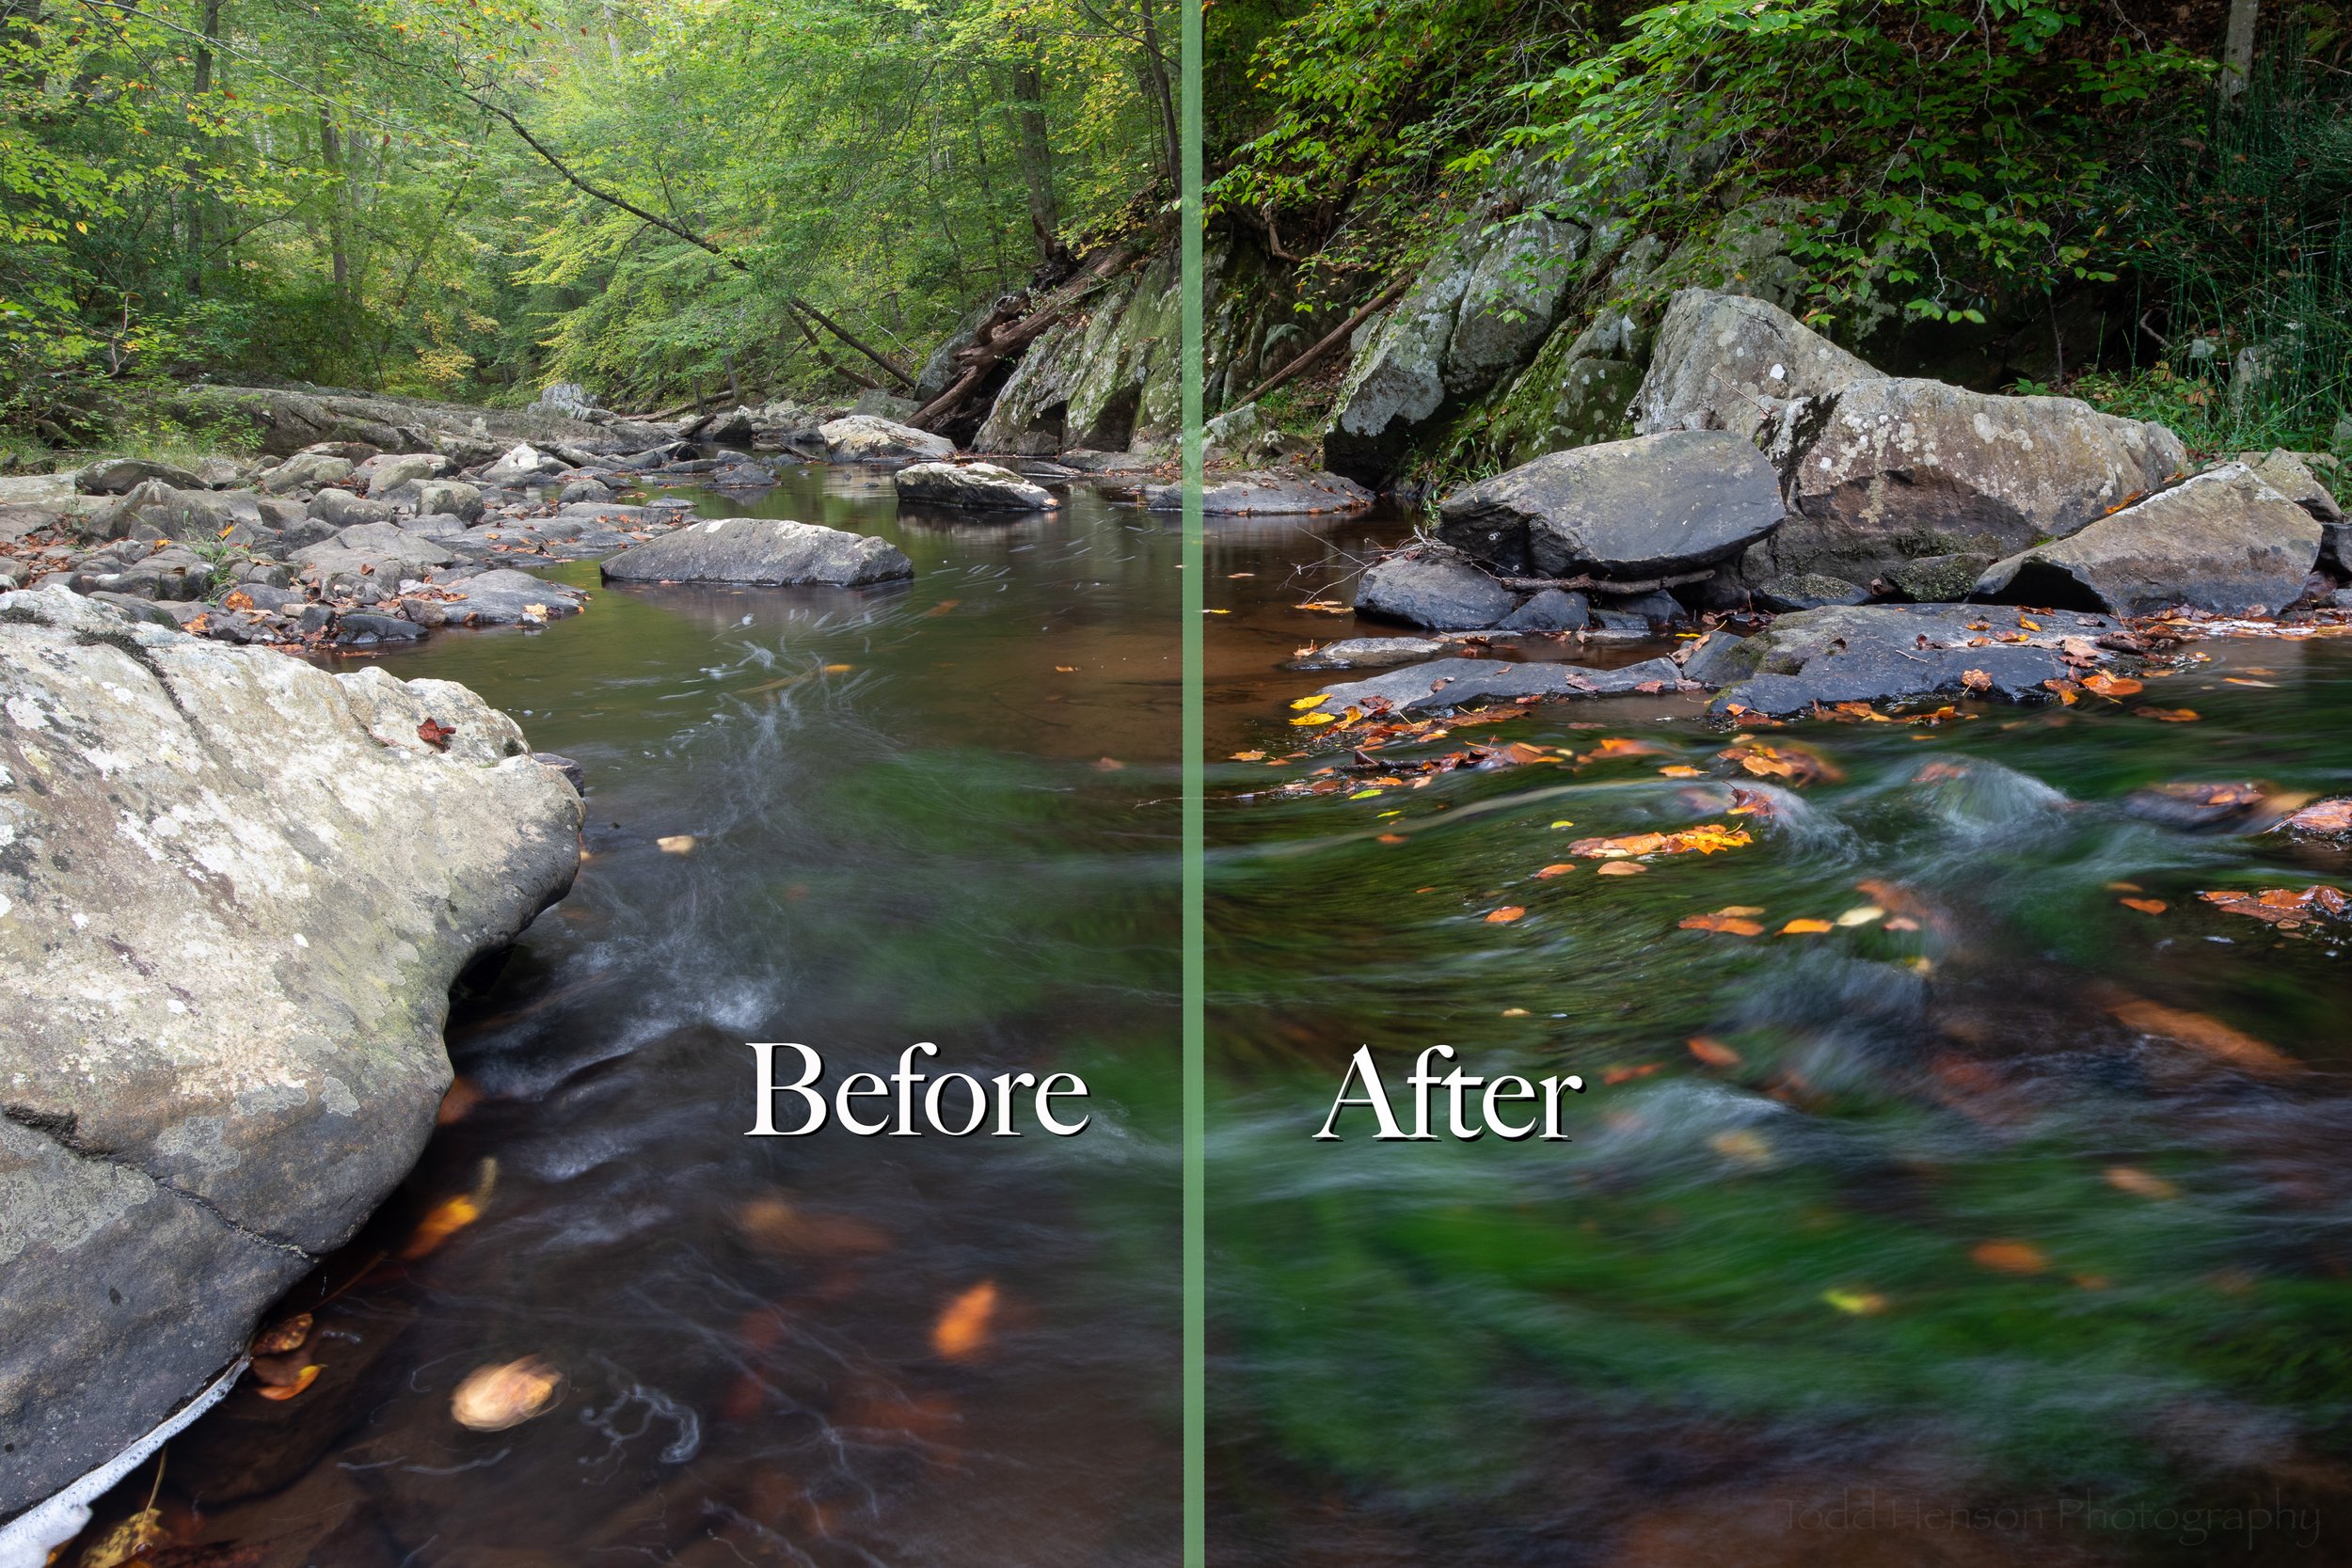
Before & After: Masonic Temple
Today we’ll look at the before & after of another photograph, comparing the raw image file before post-processing to the final processed image. The photograph is of the Masonic Temple in Alexandria, Virginia, taken from the King Street Metro station. My brother and I were on our way into DC to see the Cherry Blossoms in 2019, traveling by Metro. We stopped at the King Street station to switch trains. And while standing on the platform I decided to grab a few shots of the Masonic Temple, a building I’ve always been impressed with.
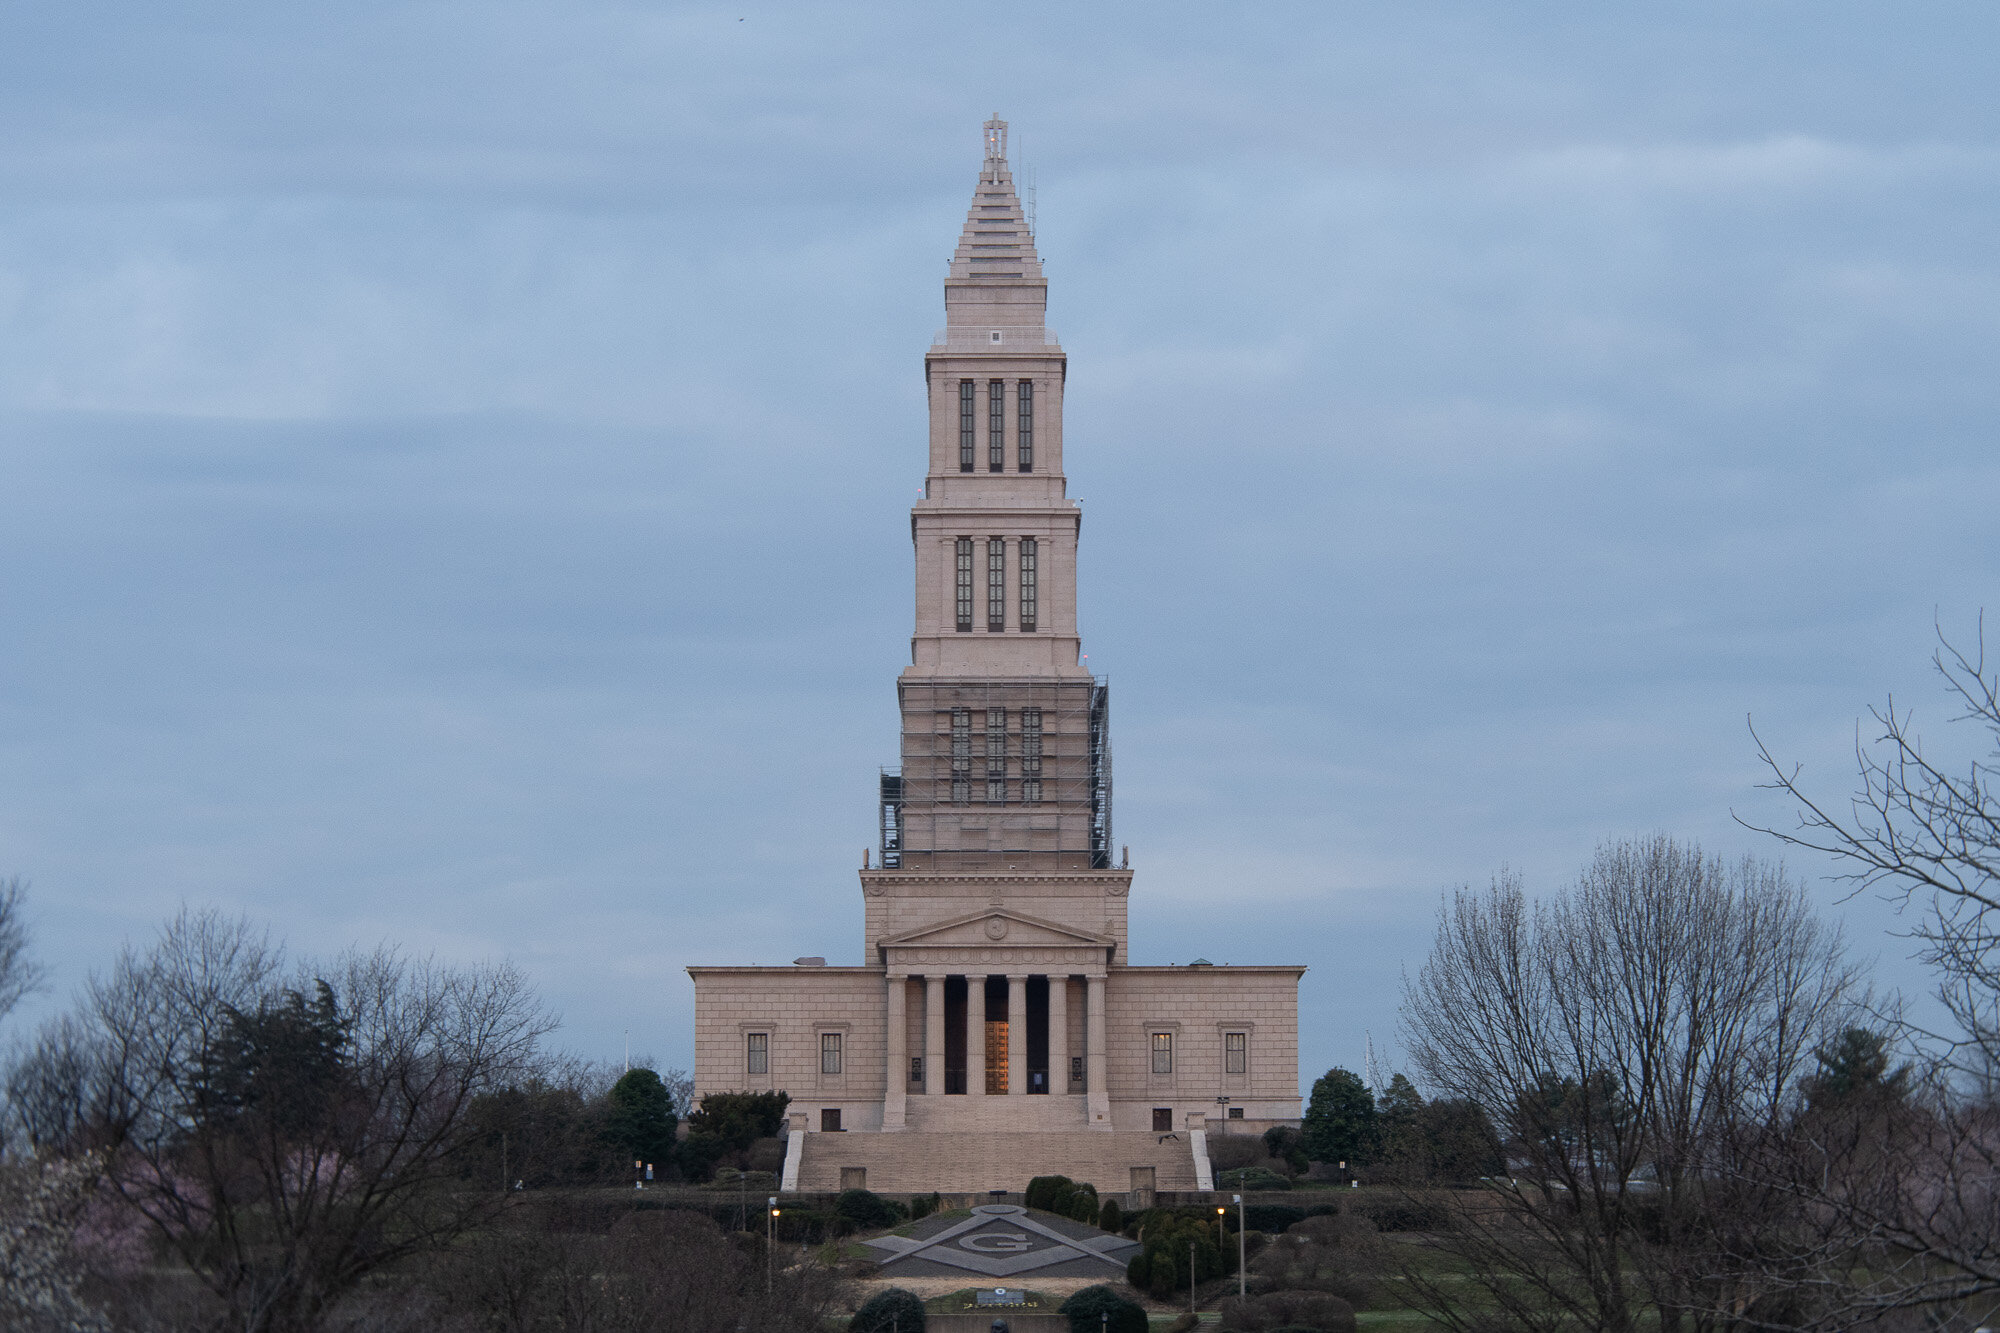
Masonic Temple: The unprocessed raw “before” image.
It was early morning, 7:20 AM, and the sky was overcast. Being late March the trees were still bare of leaves. I imagined the sun peaking from between the clouds and illuminating the building, creating a nice glow, while the sky still had that early morning blue hour feel to it. As you can see in the before image, this isn’t exactly what we saw, but it was what I hoped for, what I imagined. And we didn’t have time to wait and see if the scene unfolded as I’d desired. So I pulled out the camera and captured what images I could in the time we had between trains.
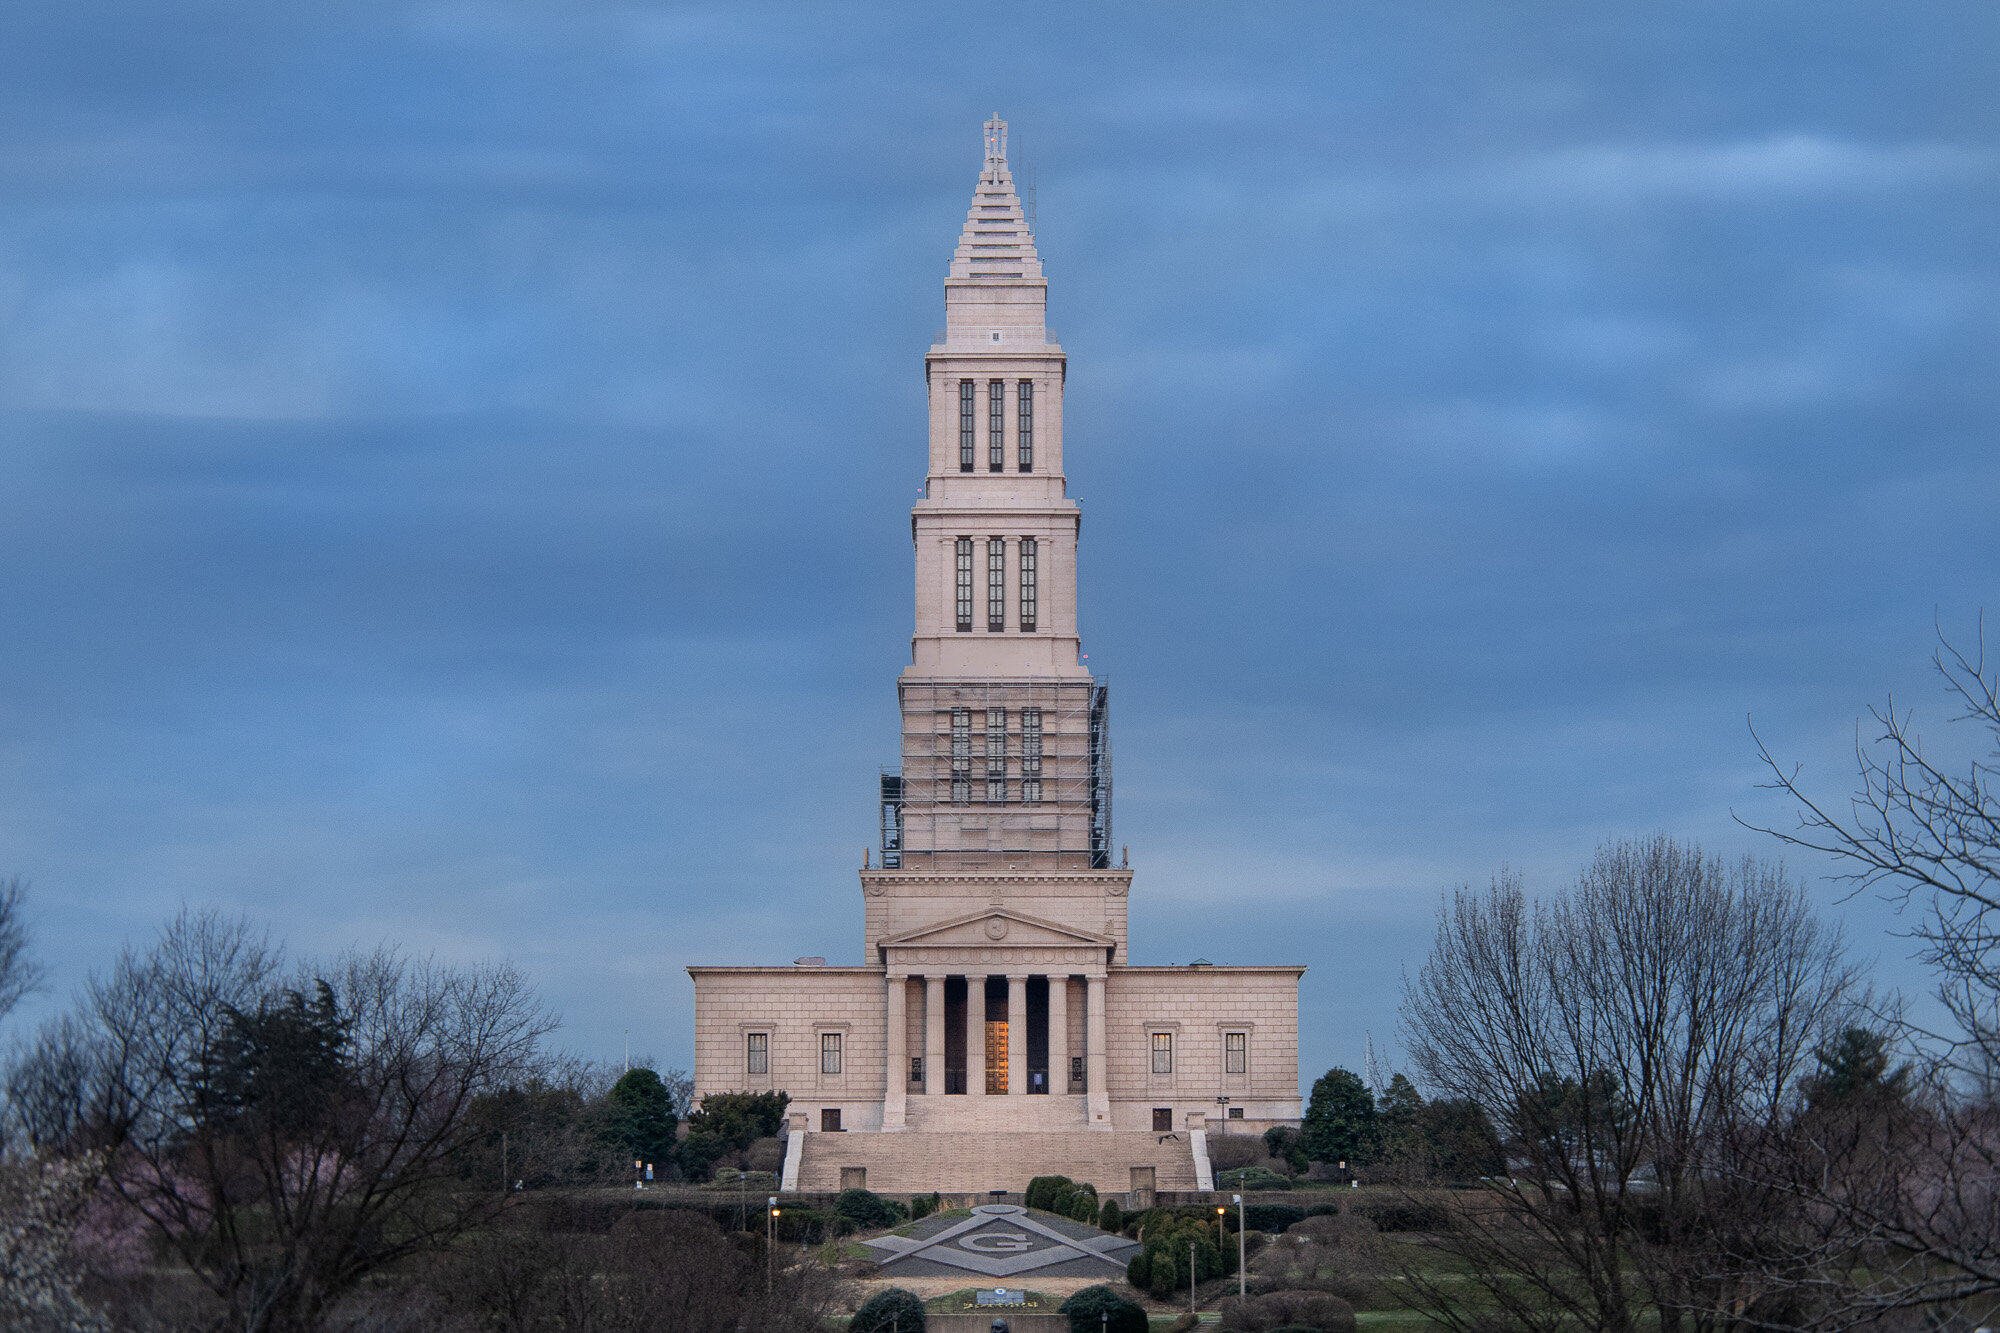
Masonic Temple: The finished “after” image.
And now, a year later, I sit down at my computer and look back through the photos I created and think about how to get across what I felt as I snapped the shutter, how to show you the beautiful scene I imagined. After spending a bit of time in Adobe Lightroom, longer than I usually spend on individual photos, I ended up with the final after image. I’m not completely happy with the image and I’d like to return to that area specifically to shoot the temple, especially if I can photograph it without scaffolding. But I’m happy with the result given it was a quick grab while on route to other things.
I spent a lot of time experimenting with different settings, changing something one way, then the other, trying to find the right balance. Below is a sequence of screenshots showing how I applied the majority of settings in Lightroom.
First off, I knew I needed to brighten the temple. I imagined the early morning sun lighting it up. So I created a mask over just the building, as well as some of the grounds at the base of the building. This took a bit of time and was built up piecemeal using both Auto Mask and free hand masking. If you look to the right you’ll see the settings I applied within the mask. I increased Exposure by 0.73 to brighten the building and grounds. I increased the Whites by 8, further brightening things. I lowered the Blacks by -4 to darken the blacks, adding contrast. And I increased Texture by 17 to add contrast that increased the look of sharpness to the building.
Next I worked on the sky. I wanted to add a little drama and bring out some texture in the sky. So I raised the Highlights by 32 and painted that into the lighter portions of the clouds. This further lightened those sections, bringing out some of the whites in clouds.
I did the same thing for darker regions of the sky, lowering Shadows by -17 to darken the sky, and painted that into already dark regions. Lightening the highlights and darkening the shadows added contrast and helped create some of that drama you can get from clouds, even if they don’t quite look that way to our eyes.
And to add a bit more drama to the sky I applied a graduated neutral density filter. You can see how the mask is a bit darker at the top of the sky and gradually gets lighter towards the bottom. Also, look closely and you’ll see I used the Color Range Mask to apply the mask only to the blues of the sky. This excluded the building from the mask. Then I lowered Exposure in the masked area by -0.71. I also lowered the white balance temperature by -8, moving it more into the blue range to shift it from the slightly washed out blues I saw on the overcast day closer to the blue hour look I was imagining.
Finally, to add just a bit more drama to the sky I painted in a white balance adjustment, lowering the Temp by -16, adding more blue to just those parts I’d masked. This helped create a larger range of blue tones in the sky.
And there you have it, the before and after of shooting the Masonic Temple. Click on the image below to toggle back and further between the before and after images. And let me know what you think of the results.
Do you enjoy these posts?
Sign up to receive periodic emails with updates and thoughts. Don’t worry, I won’t spam you. And please consider purchasing artwork or products from my online store, and using my affiliate links in the sidebar to the right when shopping online.
I appreciate your support!