Beginning of Spring in Shenandoah National Park by Todd Henson

Mountains as seen from Skyline Drive

I realized this year how great a location the mountains can be for observing the signs of seasonal transitions. My folks and I were on a day trip and decided to drive over part of Skyline Drive in Shenandoah National Park. This is the north-south road through the park and provides lots of views of the mountains and down into the valleys. We picked a fortunate time to visit in early spring when most of the trees at higher elevations were bare but at lower elevations you could see lines of color of new leaf growth. I would love to see a time lapse movie of this process as the new green growth moves its way up the sides of the mountains.

New leaf growth moving up the mountains

An alternate, vertical, view of the first image showing the new green growth moving up the slopes

I hope you’ve enjoyed this brief observation of the transition from winter to spring.


Do you enjoy these posts?

Sign up to receive periodic emails with updates and thoughts. Don’t worry, I won’t spam you. And please consider purchasing artwork or products from my online store, and using my affiliate links in the sidebar to the right when shopping online.

I appreciate your support!


Focus Stacking Pink Lady’s Slippers in 2022 by Todd Henson

Pink Lady’s Slipper (2022). This photo is the result of focus stacking 9 images to try to capture a significant portion of the bloom in focus.

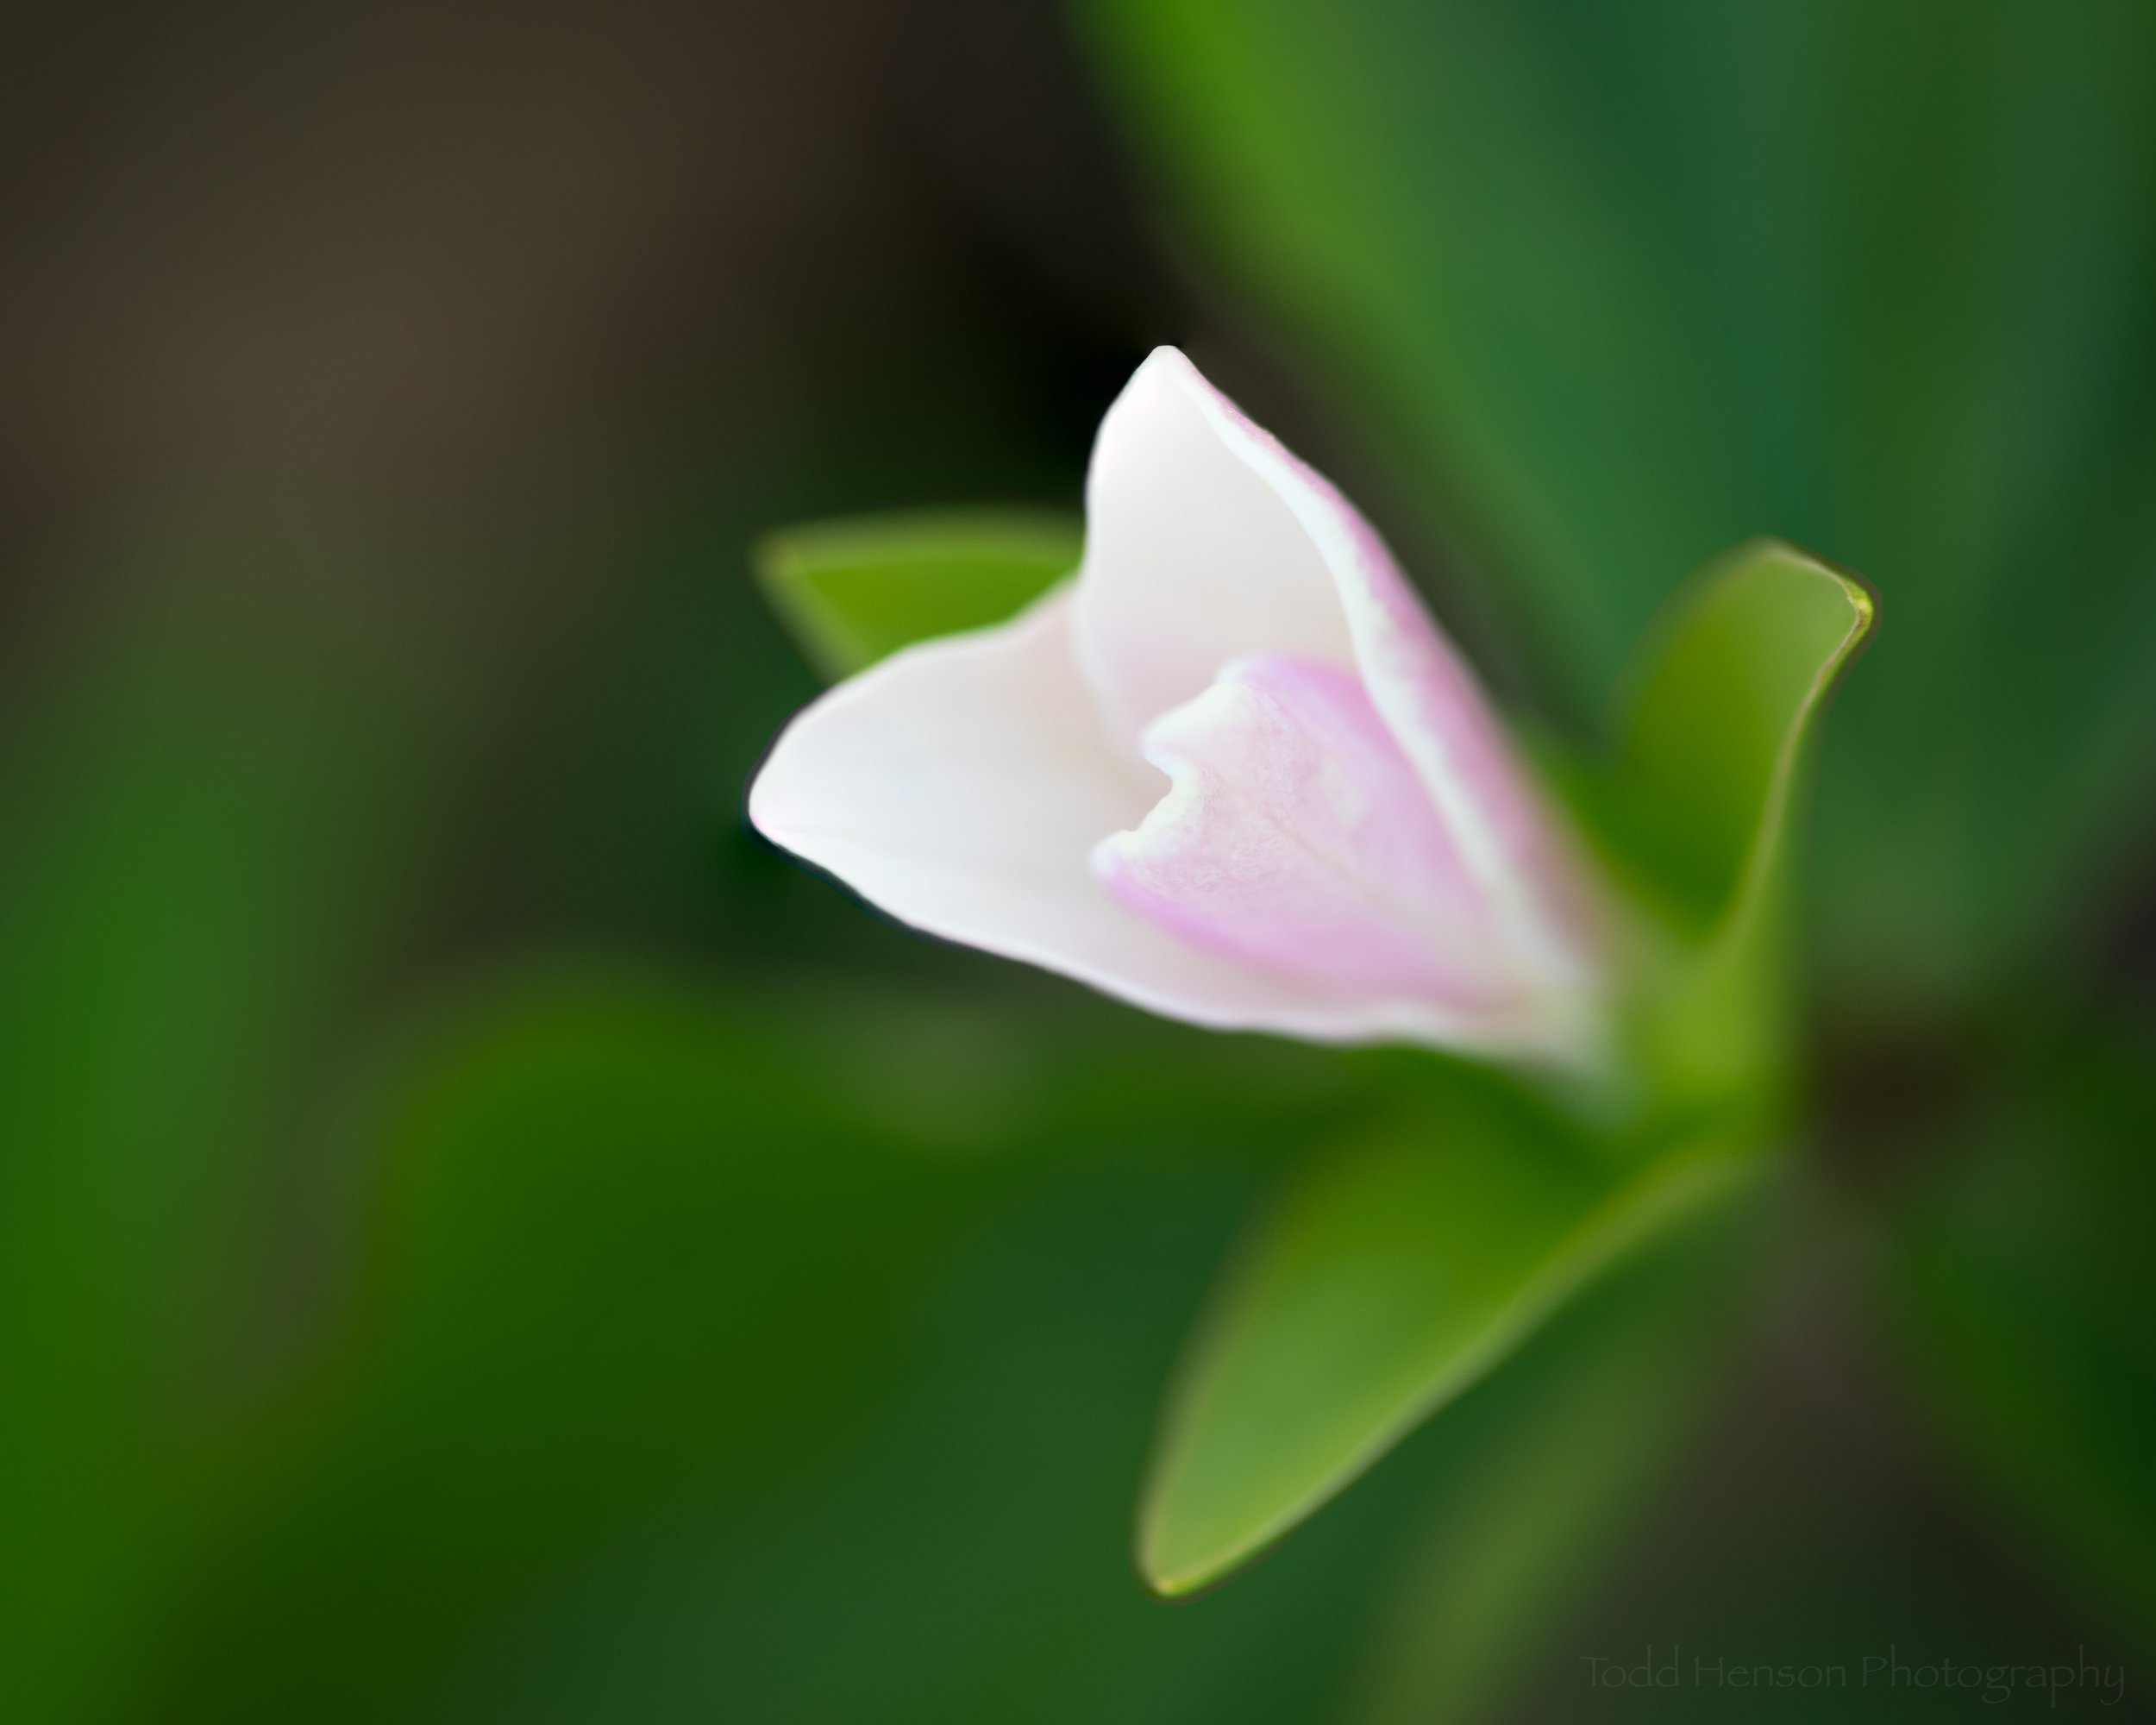
One of the goals I had this season was to create a nice closeup photograph of one of our local orchids, the pink lady’s slipper, with an uncluttered out of focus background but showing a maximum amount of the blossom in focus. In the past I’ve tried this by experimenting with apertures to try to balance the amount of the blossom in focus against the amount of the background that’s out of focus. It’s been a challenge with many of the flowers I’ve found locally as they so often grow in very busy and brushy areas. So this year I decided to try using the focus stacking technique to accomplish my goal. This is a technique I’ve only rarely used, so I’m not an expert and am still learning.

Technique: Focus Stacking

Focus stacking refers to making many photographs of the same subject, one right after the other, while shifting the focus point for each photograph. In this case I used a very wide open aperture to keep the background nicely blurred. Then I focused on the closest point on the flower and made an image. Then I shifted the focus back just a little and made another photo, and repeated this until I was focused on the back of the flower. Essentially, each photo has a slice of the subject in focus and when you combine all of them in software you will, hopefully, get the entire subject in focus.

I’m not going to go into lengthy detail on the specifics of how to do this in software, but at a high level I did the following:

  • Selected all the individual photos in Lightroom and chose to edit as layers in Photoshop.

  • Selected all the layers in Photoshop, then auto-aligned the layers to line them all up correctly in case there was any slight movement between shots.

  • Auto-merged the layers, choosing the focus stacking option, to combine them all letting Photoshop pick the areas most in focus from each image.

  • Cropped the final merge to get rid of any inconsistent areas around the edges.

  • Performed any final edits in Lightroom.

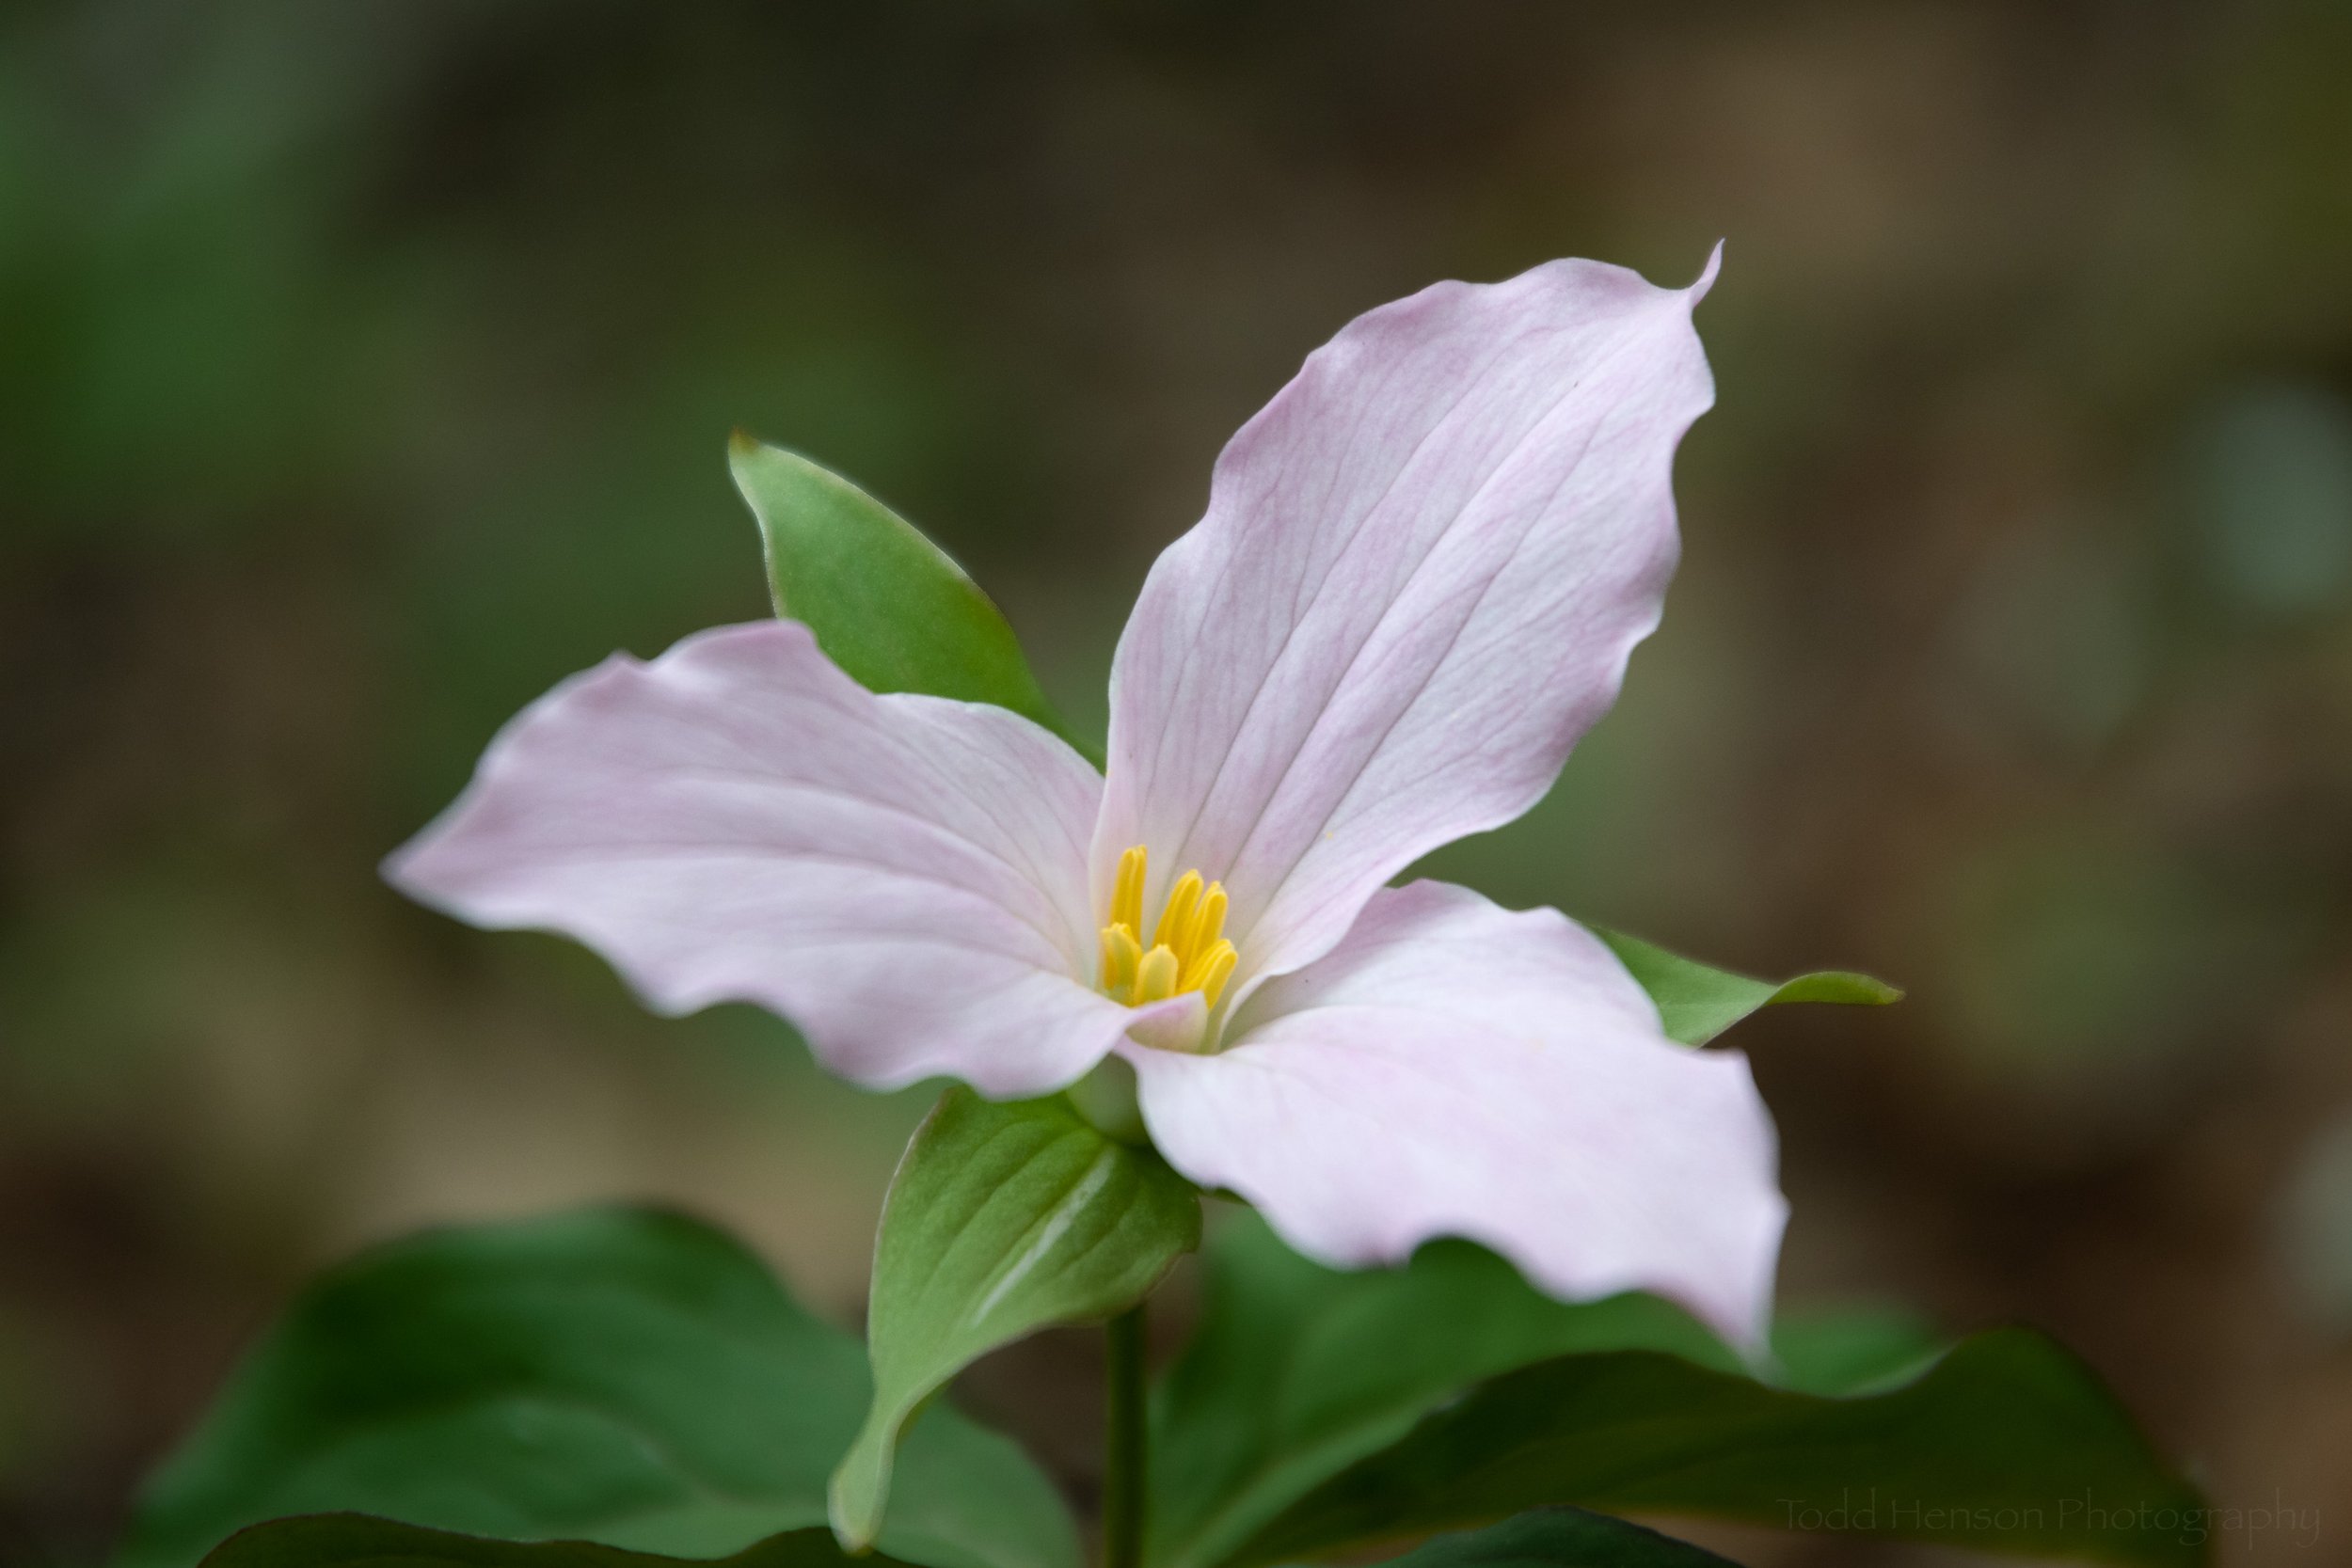
The two photos I share today are examples of how I did. They are not perfect merges, though I am reasonably happy with the results. I’m ok with some things being a little out of focus but there are small areas of pink on each flower that I’d hoped would be in focus and are not. At some point I may spend more time on each to see if I might have captured those areas in focus in some of the images but the software just didn’t merge them correctly, and if so I would need to manually adjust the layers after the merge to try to capture those areas in focus. Or it’s also possible I just moved the focus a little too far such that I missed a slice, in which case I’ll need to try again next season.

Another Pink Lady’s Slipper (2022). This photos is the result of focus stacking 14 images, resulting in a 3.01 GB file.

Lessons Learned

  • If you are shooting with a wide open aperture and are close to your subject then adjust the focus in very small increments to assure you capture the entire subject. You can’t always go back and redo this later.

  • Try to pick days where there’s no wind, or at least very little. You don’t want the subject moving between each shot.

  • Use a sturdy tripod. Software can align the photos if they are not all perfectly aligned, but why risk problems? Use a tripod and get the shots as steady and lined up as possible while in the field.

  • Consider what software to use. I used Adobe Lightroom and Photoshop to perform all processing. This is a great combo but sometimes there are third party software packages that might do a better job with specific tasks. I’ve heard good things about Helicon Focus when it comes to focus stacking, but I’ve never tried it.

  • Consider how much memory and processing power this might take. I’m still working from a fairly old computer (12 years old) and this process did tax it. It became so memory constrained at times that the entire process seemed to stall and likely took far longer than it would on a more recent computer (I’ve been recently thinking about finally getting a new one).

  • Consider how much hard drive space this might take. Granted, space is relatively cheap in the scheme of things, but just realize that combining 14 images created on a 20 megapixel camera can result in a 3 GB merged file. If your subject requires even more images then the size will grow even larger.

  • Practice, practice, practice.

Conclusion

Focus stacking is a great technique that can help you create images that surpass the capabilities of whatever camera and lens you own. You can create very shallow depth of field photographs but still capture maximum detail in the specific areas you want. Modern software makes it relatively painless in most cases to create some nice images, but it can still take a little work, and it does help to practice the technique to better your skills and increase the chances of creating a final photo that exceeds your expectations.


Do you enjoy these posts?

Sign up to receive periodic emails with updates and thoughts. Don’t worry, I won’t spam you. And please consider purchasing artwork or products from my online store, and using my affiliate links in the sidebar to the right when shopping online.

I appreciate your support!


Three Grebes of Two Species by Todd Henson

On a recent morning while hiking a nearby wildlife refuge we spoke with someone who said they’d seen several grebes out in the water, so I kept my eyes open when we made it to the bay trail. Sure enough, we also saw a few grebes swimming around and fishing, sometimes near shore.

Plumage Transition of Horned Grebes

We found two great examples of Horned Grebes. One has almost completely transitioned to its summer, or breeding, plumage with fairly dark body feathers and the distinctive lighter yellow “horns” stretching from its eye to the back of its head.

Mostly summer (breeding) plumage of a Horned Grebe

The other appears to only recently have begun its transition and still retains more of its winter, or non-breeding, plumage, which is less colorful and more grey.

A Horned Grebe transitioning from its winter (non-breeding) to summer (breeding) plumage

I wonder if perhaps one is male and the other female. Some birds have distinctly different plumage for male and female, but with grebes they look alike and instead change plumage with the seasons, so I can’t tell their sex from their plumage.

Pied-billed Grebe

The other grebe we found was a single Pied-billed Grebe, which is smaller than the Horned Grebe. This one appears to have transitioned to its breeding plumage, which includes that distinctive black bar across its bill.

A Pied-billed Grebe in breeding plumage

All of these grebes were very busy feeding, which meant they kept disappearing from view, diving down below the surface for food and resurfacing, often at a distance from where they first dove. They are a very enjoyable bird to watch and photograph, and I’m glad we happen to be in an area they migrate through on their way north to their breeding grounds.


Do you enjoy these posts?

Sign up to receive periodic emails with updates and thoughts. Don’t worry, I won’t spam you. And please consider purchasing artwork or products from my online store, and using my affiliate links in the sidebar to the right when shopping online.

I appreciate your support!