Prelude to Rafting. Great Falls Park, Virginia.
The Story
I love Great Falls Park, a national park located in northern Virginia along the Potomac River. Who would think such a beautiful and wild location would be located just outside Washington, D.C.? Just across the river is the Chesapeake & Ohio Canal National Historical Park, which also gives some great views of the falls and the river.
I was on the Virginia side when creating this particular photograph. I had arrived to the park just before sunrise, both because it’s far less crowded this time of day, and because it’s such a great time to photograph. Not only do you have great light, but you also don’t need to worry as much about blowing out highlights in the waterfalls, which is very easy to do if you wait until the sun is high in the sky on a cloudless day.
This photograph was created from the overlook just south of Fisherman’s Eddy. It provides a nice view of the falls, and also looks down on the rocks below, where you will sometimes see people fishing, rafting or kayaking.
The rafts were not in the scene when I first began photographing. I was focusing on the falls and the scenery. This is a beautiful landscape I never tire of. But then a rafting crew brought their blue rafts to the edge of the water and began setting up for a trip downriver. I realized there might be a story here, so I started focusing on the rafts, integrating them into the photograph. The rafting crew left the rafts and went back up the hill to bring down the rest of their gear. I liked the idea of these empty rafts sitting by the river. I thought it added that slight bit of tension, anticipation, or longing. Empty rafts so close to the water, waiting for people to take them out. Of course, this led to the title of the photograph, Prelude to Rafting.
During one specific exposure, the one that would result in the final image, the sun peaked out from behind a cloud and, like a spotlight, illuminated the rafts, rock face, and part of the river with a beautiful warm glow. I was so pleased this happened just as I started an exposure. It didn’t last long, but it lasted long enough. I was very happy with the exposure. None of the others had quite the drama as this one. Light is everything in photography.
I had arrived on the scene around 6:54 AM, and created my favorite exposure at 8:06 AM. I continued photographing until after 10 AM, but none of the other photos came close to this one. But even when I think I have a great image, I almost always continue photographing. You just never know what might happen. Perhaps the light will surprise you. Maybe something or someone will move into a position that makes a better image. And it’s hard to leave these sorts of beautiful locations.
The Technique
My plan that morning was to create some long exposure images that would blur the movement of the water and turn the scene into something we can’t see in reality. I did this with my Singh-Ray Mor-Slow 10-Stop Neutral Density filter. Think of a neutral density filter as sunglasses for the camera lens, blocking some light from entering the lens. In the case of this filter it blocks 10 stops of light.
I was also experimenting with my Singh-Ray Gold-N-Blue Polarizer, a great creative filter that lets you play with color in the scene. I don’t use this filter all that often, but it’s a lot of fun to work with and can help create some really striking images. It’s just like a normal polarizer in that you turn the filter to adjust the polarization effect. The difference is that as you turn the filter it also affects the blues and golds in the scene. This can provide a very subtle effect that enhances the natural colors in a scene, or it can radically alter the colors and create very unnatural looking images. And like all polarizers, it also blocks some light from entering the lens, which allowed me to use even slower shutter speeds.
Because I was working on long exposures having the people around the rafts didn’t do much for the photos. They turned into blurred streaks, which can be nice in some images, but just didn’t seem to fit in this one. So I waited until the people went back uphill and out of the scene. Then I started really experimenting with the Gold-N-Blue polarizer, turning it a little at a time, creating exposures as I went. Each exposure was a little over a minute in length due to the 10-stop neutral density filter and the polarizer.
Two pieces of gear are necessary, or at least highly recommended, when creating long exposure images:
Tripod
Remote shutter release
I had the camera mounted on a sturdy tripod to keep it steady and prevent blur caused by camera movement. There’s just no way I could hold the camera steady for over a minute without a tripod. I used a remote shutter release instead of pressing the shutter release button on the camera. This helps reduce the chance of moving the camera when pushing the shutter button. Once you press the shutter release be careful not to touch the camera, lens, or tripod during the exposure. If you do accidentally touch anything you may get a blurry image.
The Processing
Before processing images comes the editing phase. This is where you go through all the photos from the day and decide which are worth further work. This can be a difficult process, but in this case it was pretty easy. I was most interested in the one long exposure that had caught that beautiful spotlight of sunshine.
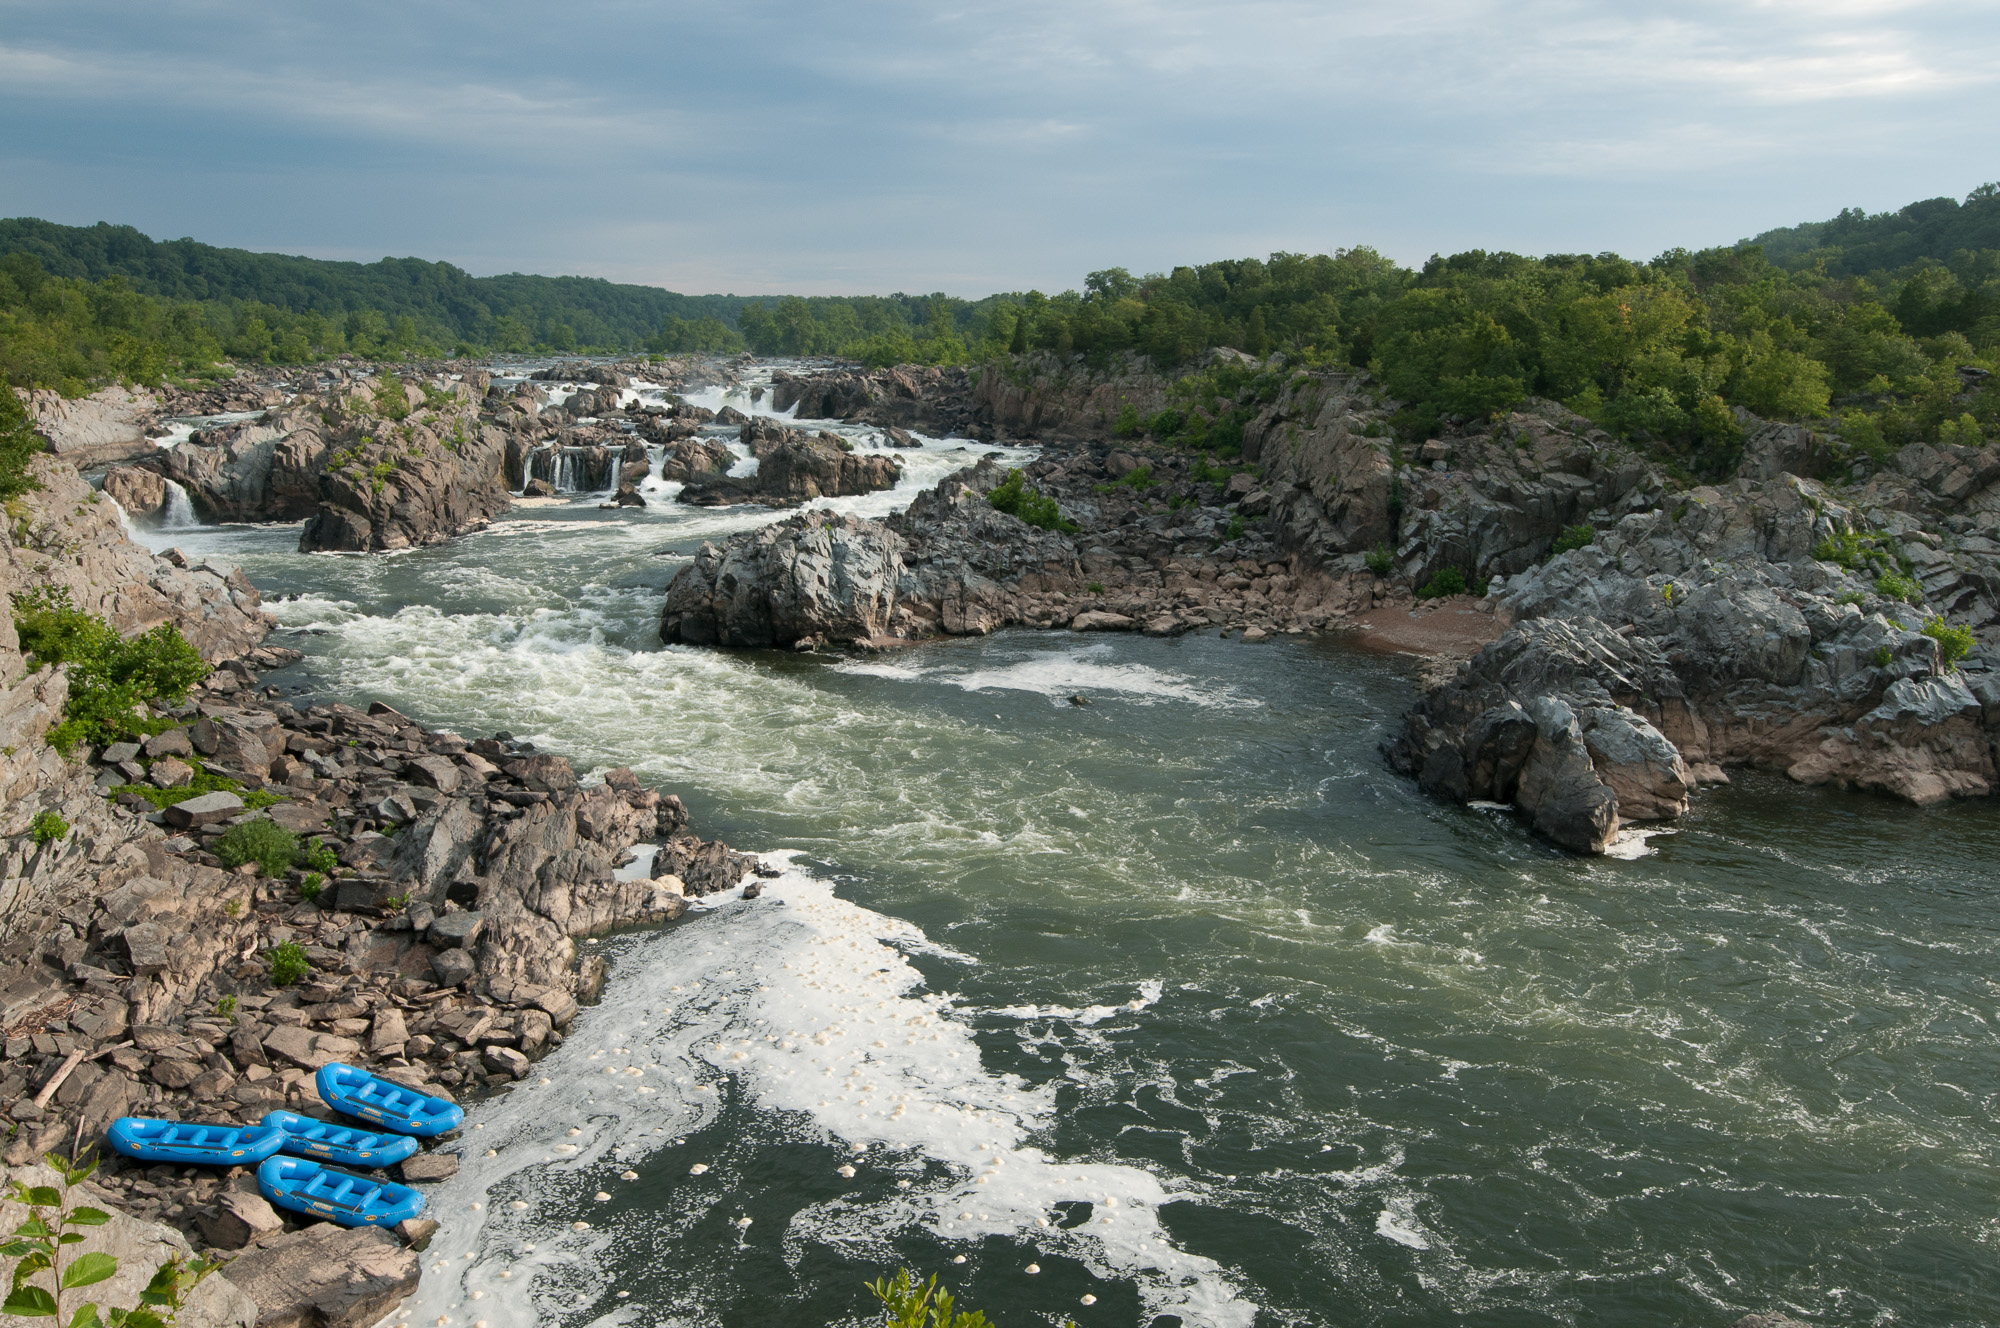
I’ve pulled out a few other photographs for this post to show the different versions of the scene. The first image is an unprocessed raw file without any filters. It gives a more accurate representation of the colors in the scene that day, though being a raw file it is lacking in contrast and punch.
Unprocessed raw image without any filters on the lens.
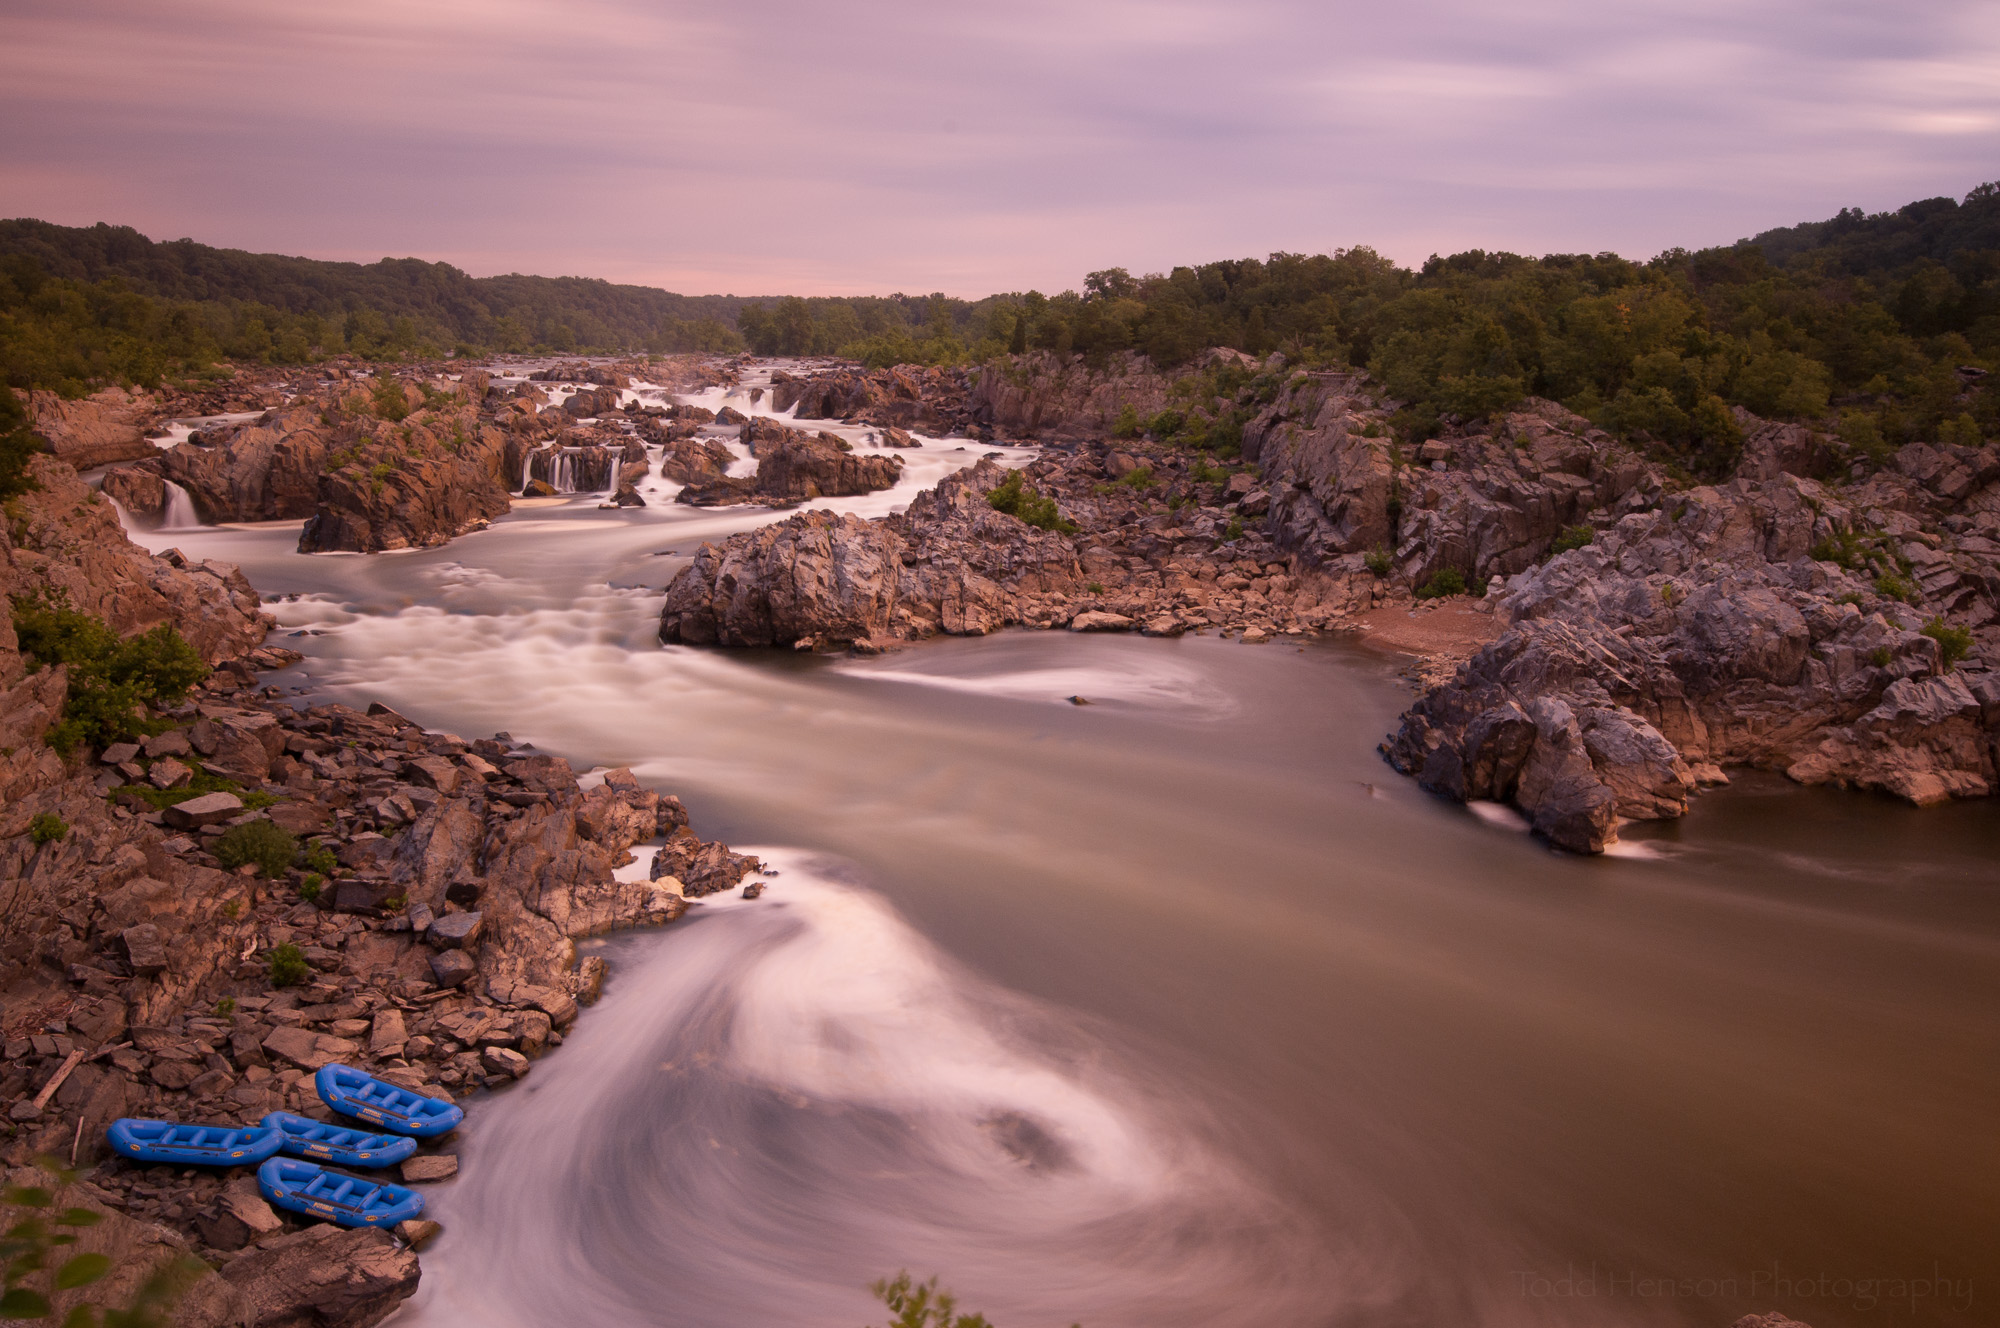
In the next photograph I’ve put on the 10-stop neutral density (ND) filter, which blocks light from entering the lens. This allows me to slow the shutter speed down significantly. I also put on the Gold-N-Blue polarizer to affect the colors, but this filter also blocks out a couple more stops of light, allowing an even longer exposure. By way of example, the version without any filters had a shutter speed of 1/80 second, whereas the versions with the filters had shutter speeds of between 60 - 90 seconds.
Unprocessed raw image with 10-stop ND filter and Gold-N-Blue polarizer (more toward the gold side).
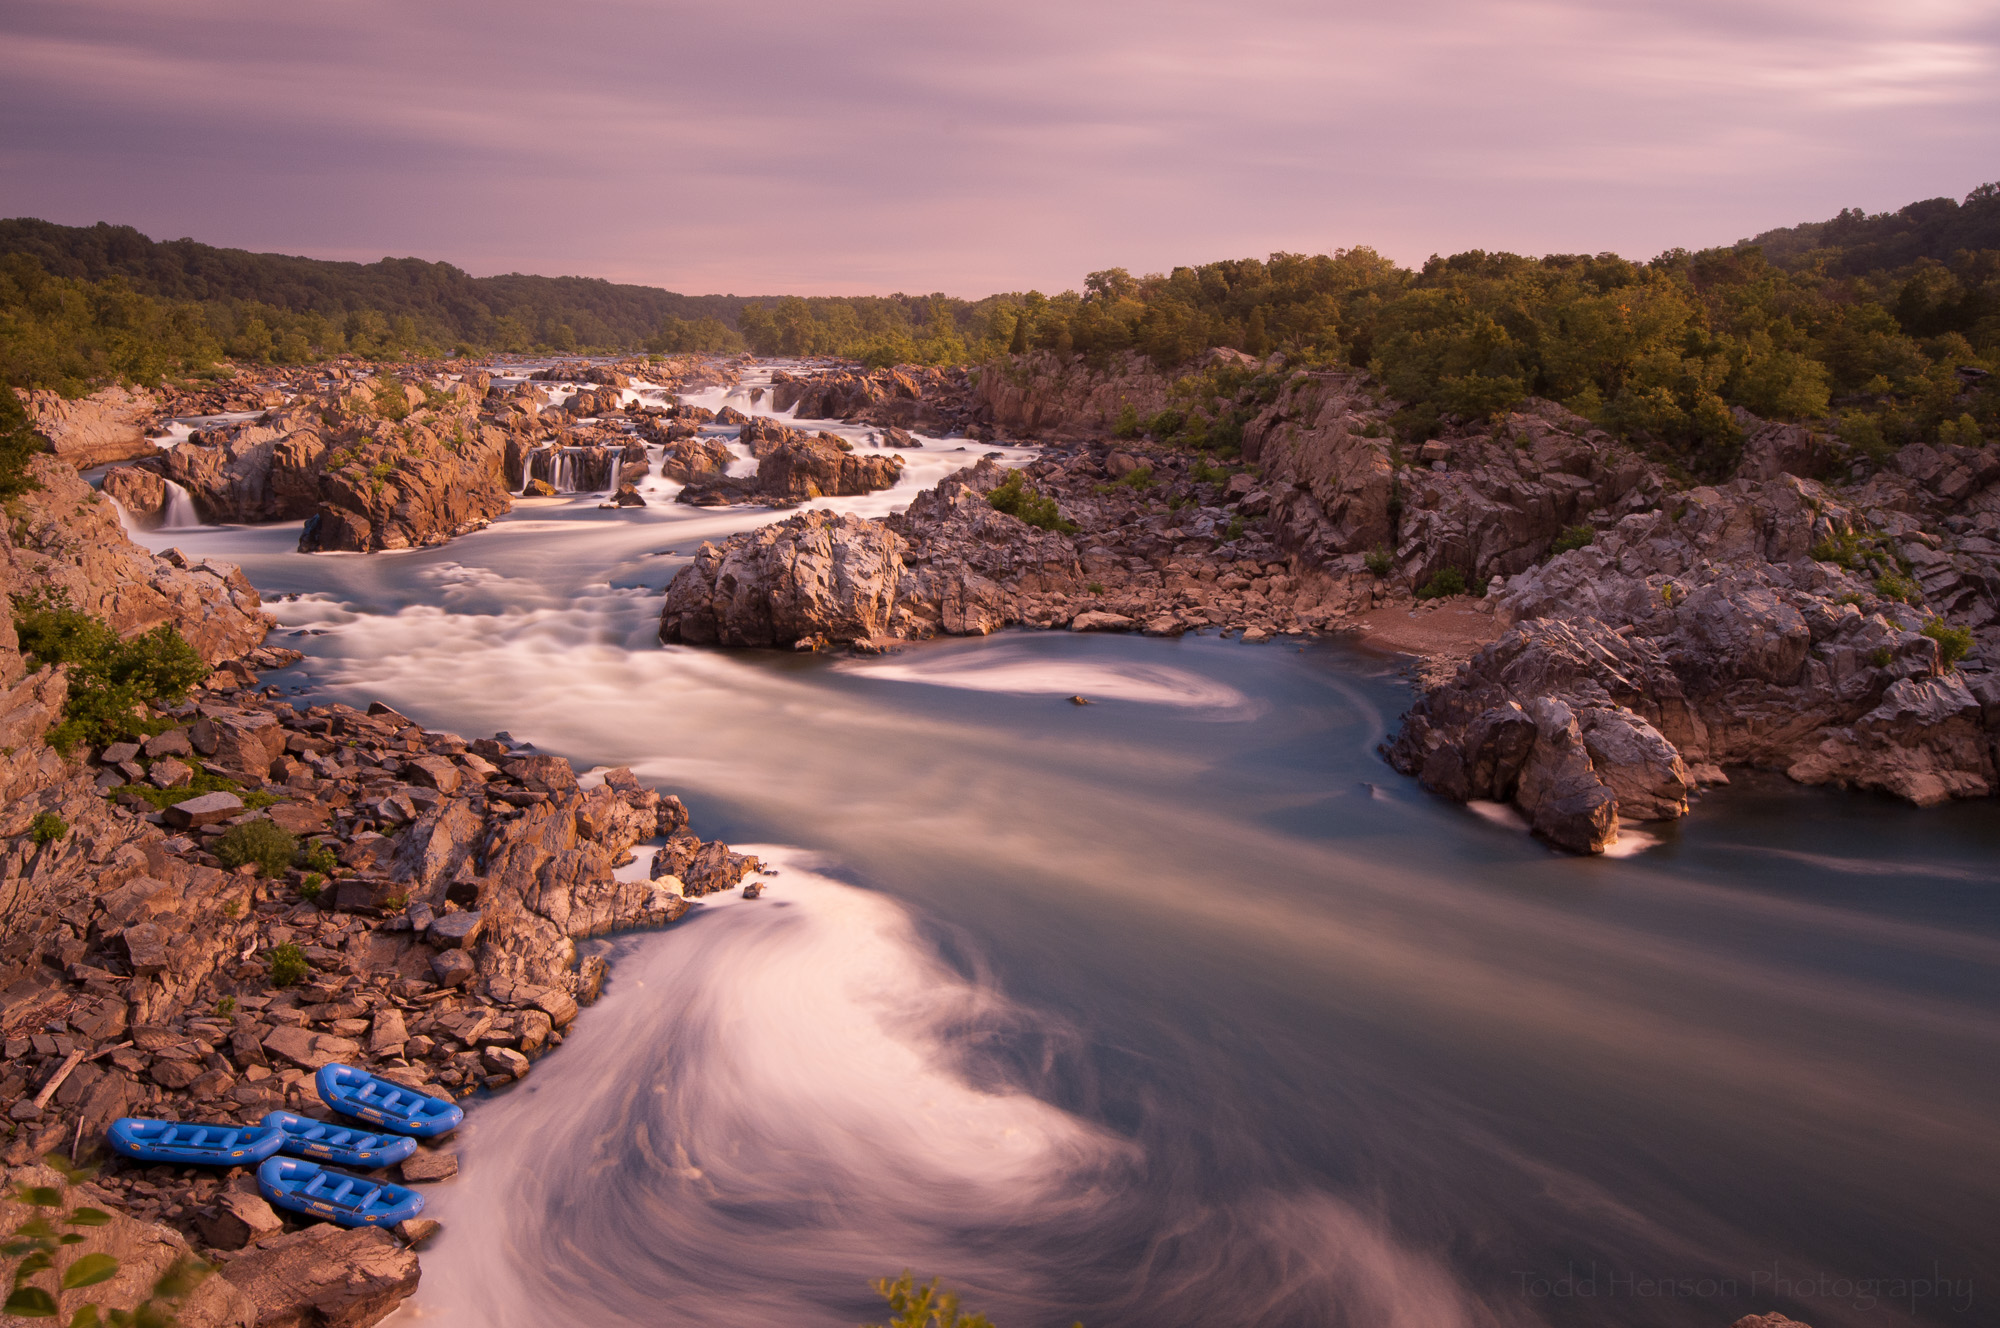
You can see the effects of the ray of sunlight in the next photograph, which is the unprocessed raw version of the final image. I still have both filters on the lens. I have adjusted the Gold-N-Blue polarizer, which changes the color balance in the image. You can see this most easily in the color of the water. In the previous image the water had a more gold tone, almost muddy, whereas in this image it has a bluer tone.
Unprocessed raw image with both filters (Gold-N-Blue more towards the blue side) and a little help from the sun.
The final photograph is the processed image. I applied lens corrections, which undo some of the warp caused by the wide angle lens. I adjusted the color balance to keep the highlights of the water as white as possible. I adjusted whites and blacks and the tone curve to provide some contrast. I dodged and burned (lightened and darkened) some select areas to help draw the eye through the scene.
The final processed image. Includes use of 10-stop ND filter and Gold-N-Blue polarizing filter on the lens, the sun peaking through the clouds, and post-processing in Adobe Lightroom.
I also cloned out a few distractions. If you compare the images you’ll see I removed a small patch of leaves in the bottom center, a small rock extending into the lower right, and a tiny patch of brown leaves in the upper right that I found distracting. As I’ve discussed in the past, I would not have done these things if this was intended to be a documentary photograph, but I’m ok making these kinds of tweaks when creating a more artistic representation of what I saw. I want to keep the core reality of the scene, but add in the wonder and excitement I felt that day.
Click on the images below to step through each version of the photograph. I hope you enjoy it. Let me know if you would have done anything differently.

Do you enjoy these posts?
Sign up to receive periodic emails with updates and thoughts. Don’t worry, I won’t spam you. And please consider purchasing artwork or products from my online store, and using my affiliate links in the sidebar to the right when shopping online.
I appreciate your support!