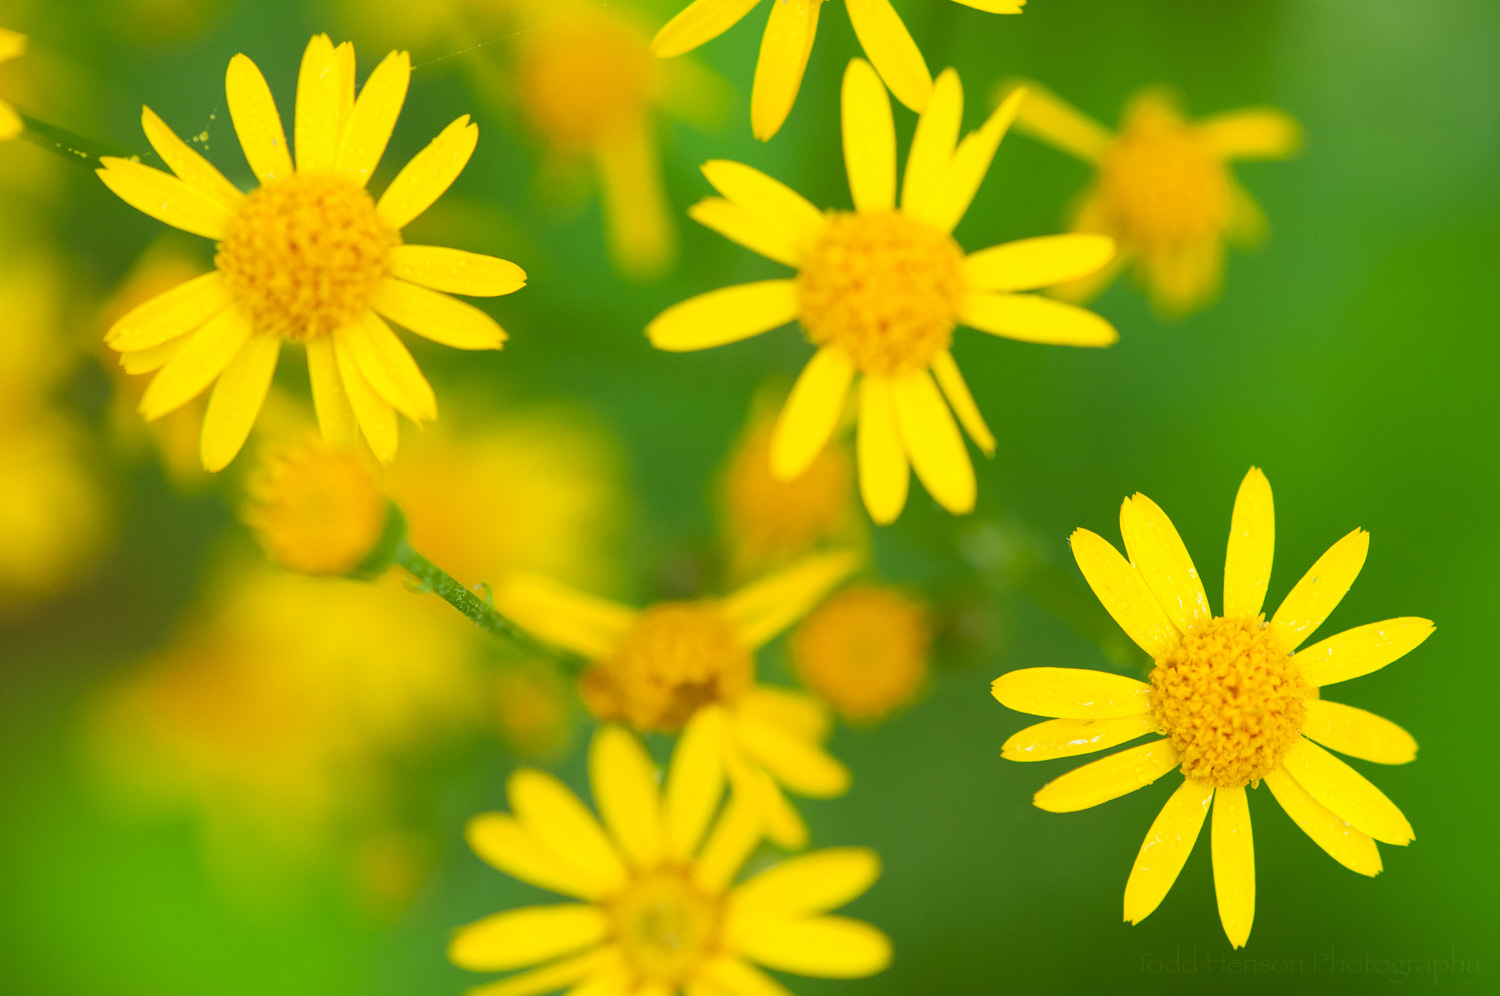
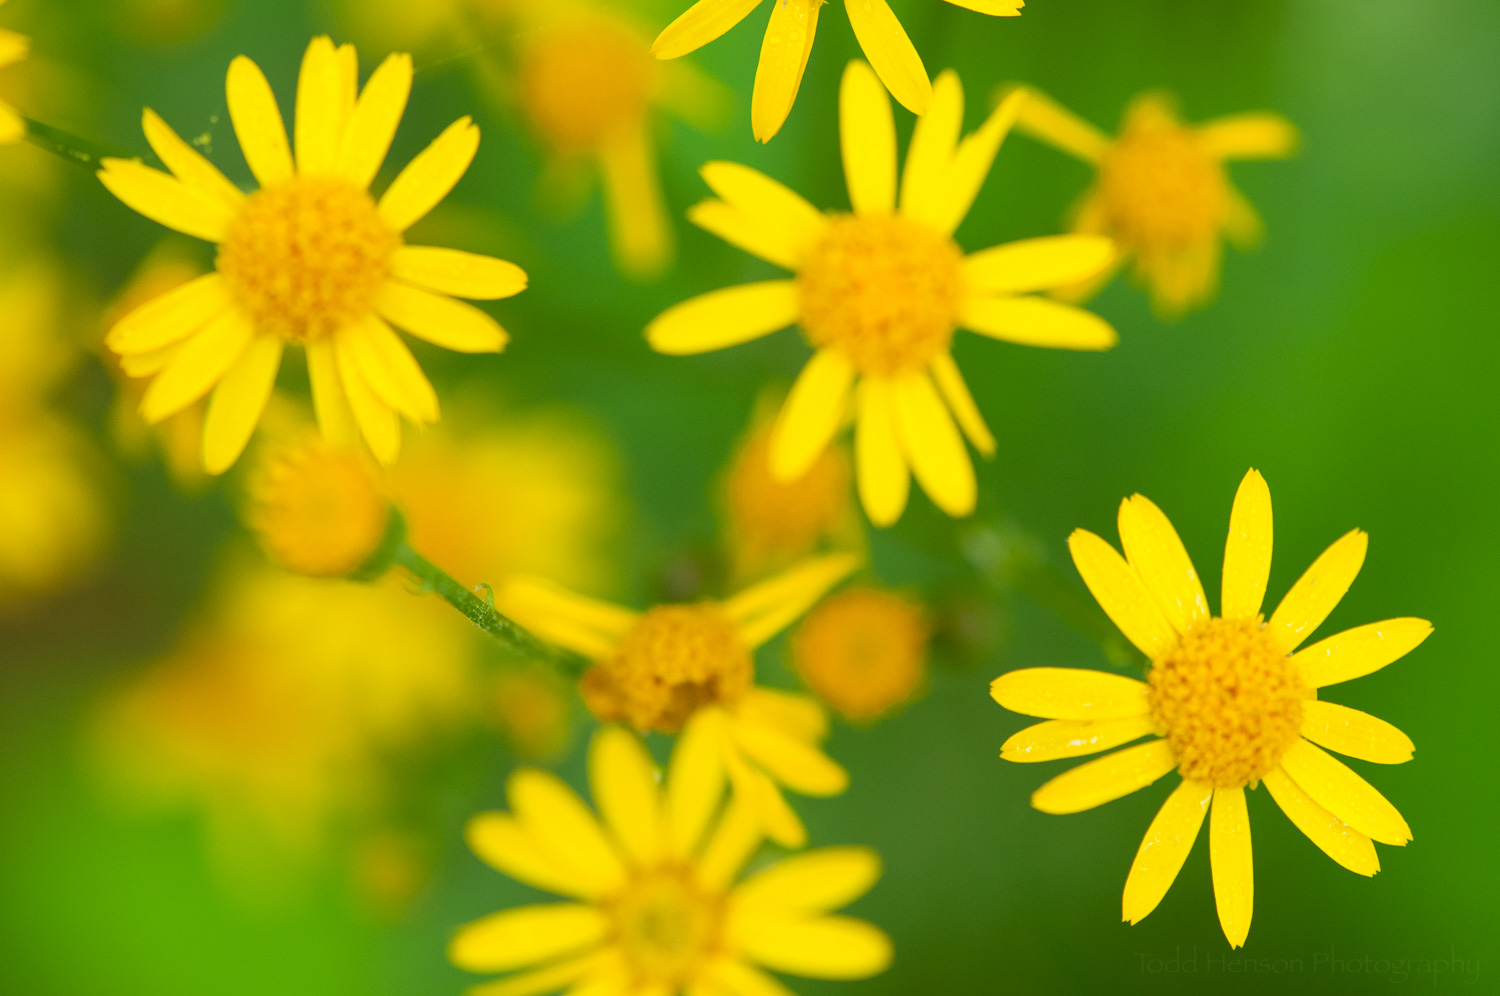
The final image, after focus stacking 9 images in Photoshop. Notice how each foreground flower is in focus.
I’ve just begun experimenting with the focus stacking technique in Photoshop. Focus stacking is used when you’re not able to capture everything you desire in the photo in sharp focus. To get around this limitation you make multiple exposures with identical settings, shifting the focus in each exposure. For example, if you have a landscape photo of a shell on a beach very close to the camera and a cliff in the far distance, perhaps you can’t get both shell and cliff in sharp focus. So you take at least two photos of the scene, one with the shell in sharp focus and another with the cliff in sharp focus, and then merge those exposures in Photoshop. Photoshop will allow you to combine the most in focus parts of each exposure into a single image.
In this particular experiment I was attempting to capture a number of small flowers in the forest, having each flower in focus but keeping the background out of focus. On my camera I set the ISO to 400, the aperture to f/5.0, the shutter speed to 1/40 second, and made sure the white balance was not on auto. I wanted the same settings for each exposure. I chose an aperture of f/5.0 to have a little depth of field in each exposure but keep the background blown out nicely. Then I focused on the closest flower, made an exposure, set the focus a little deeper into the frame, made another exposure, and continued this until I thought I had captured detail in all the flower parts of the image I was interested in. I made a total of 9 images.
From Lightroom I selected all 9 images, right-clicked and chose Edit In, then selected Open as Layers in Photoshop. This imported all the images into Photoshop as separate layers.
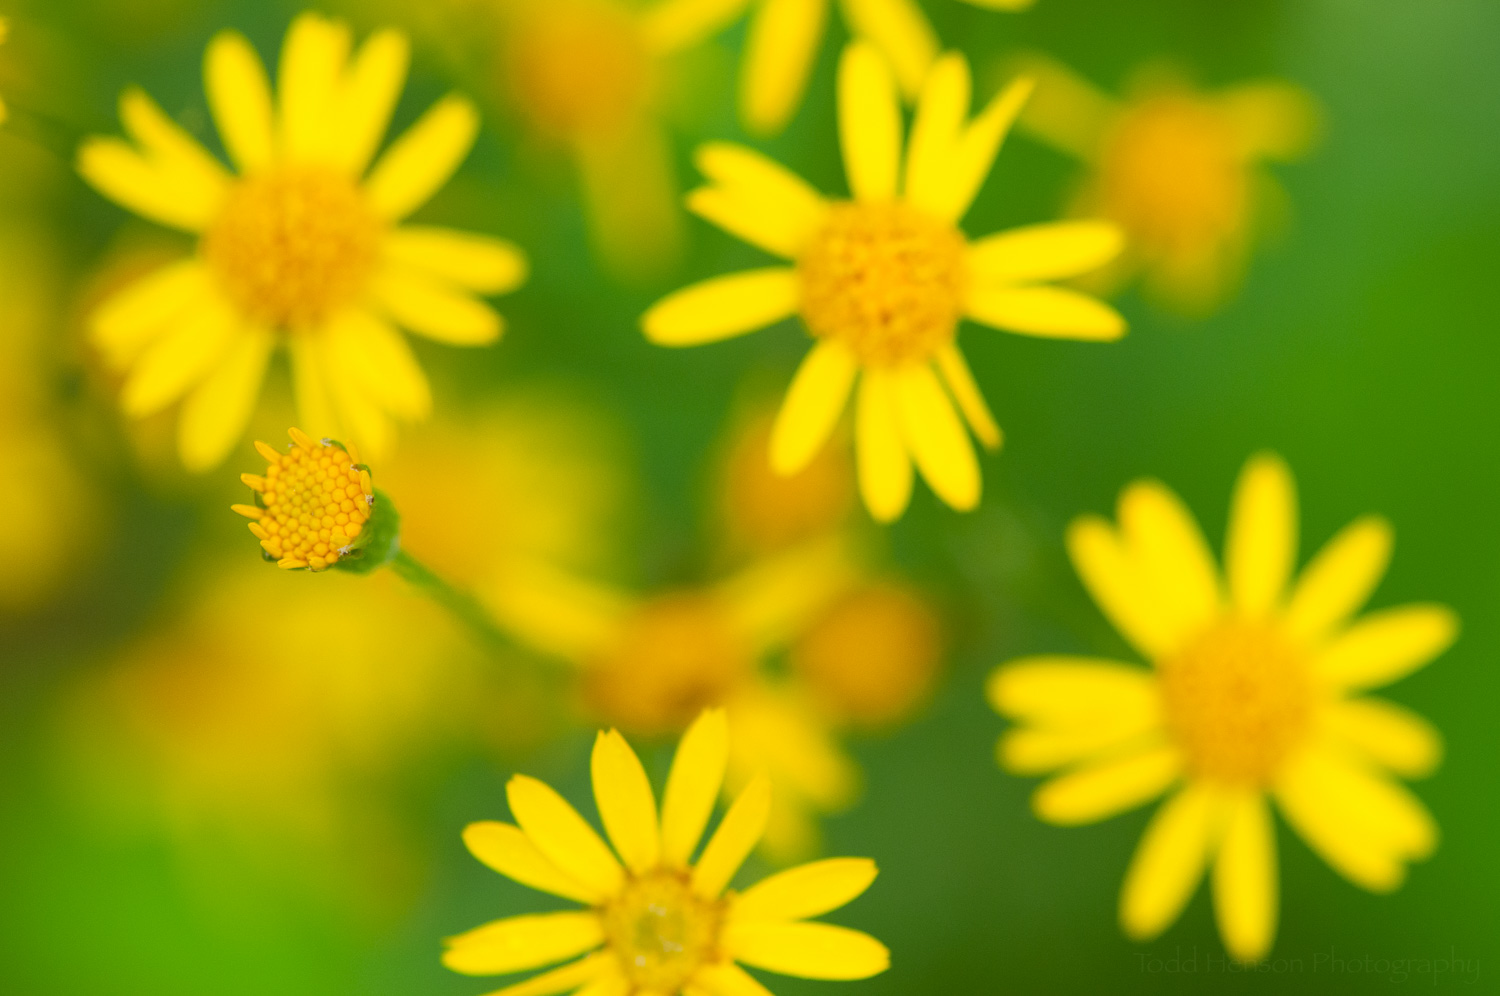
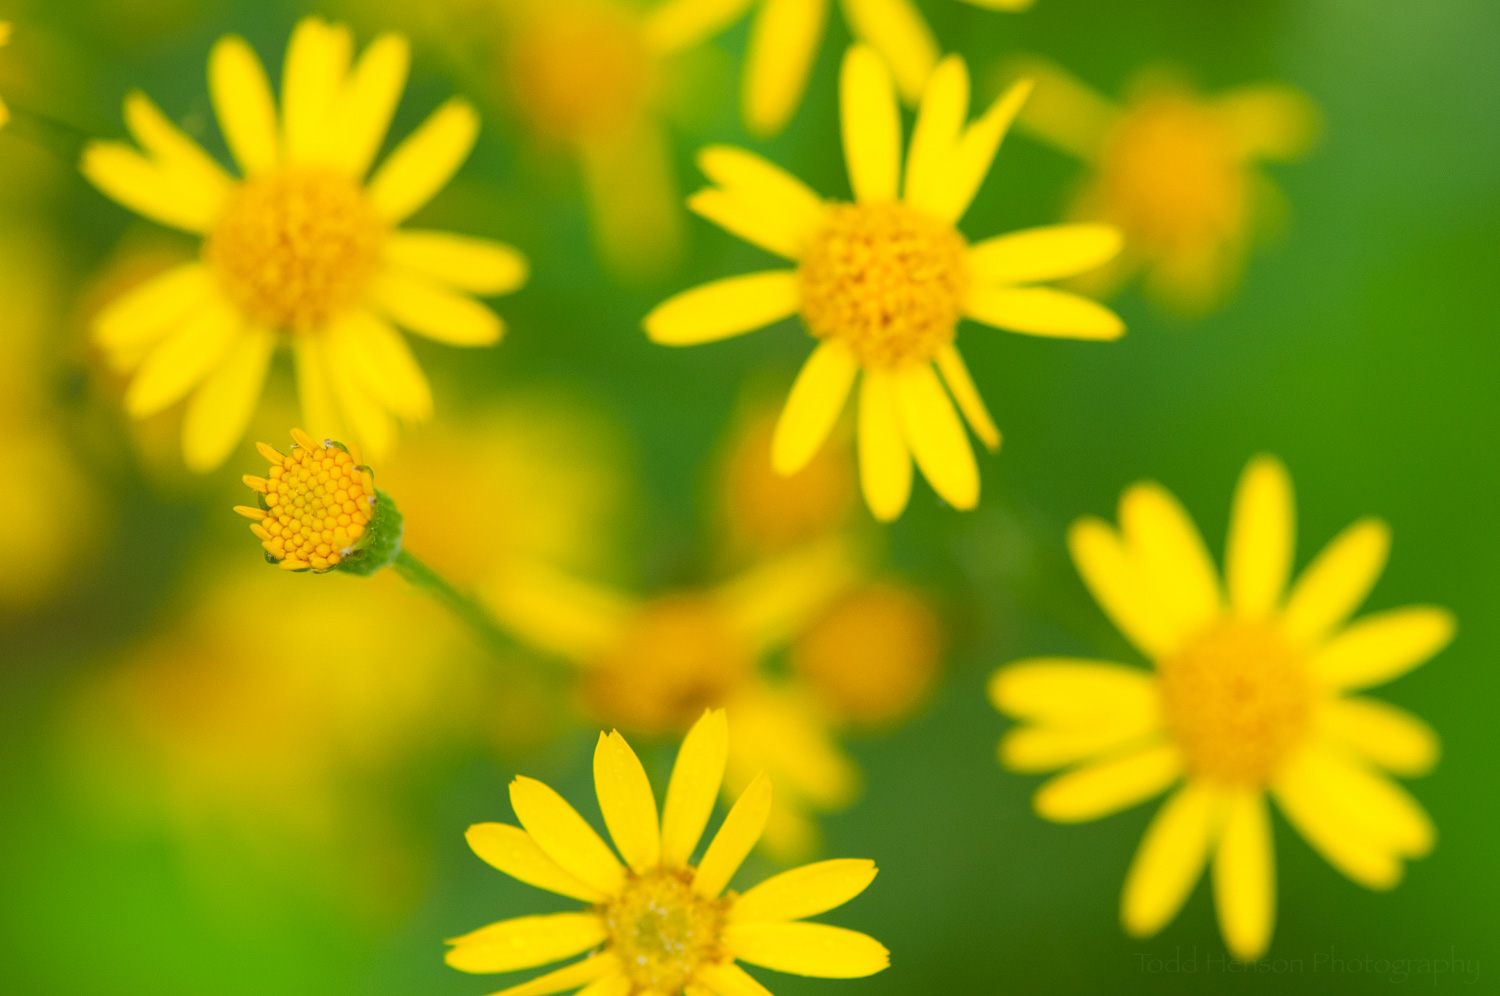
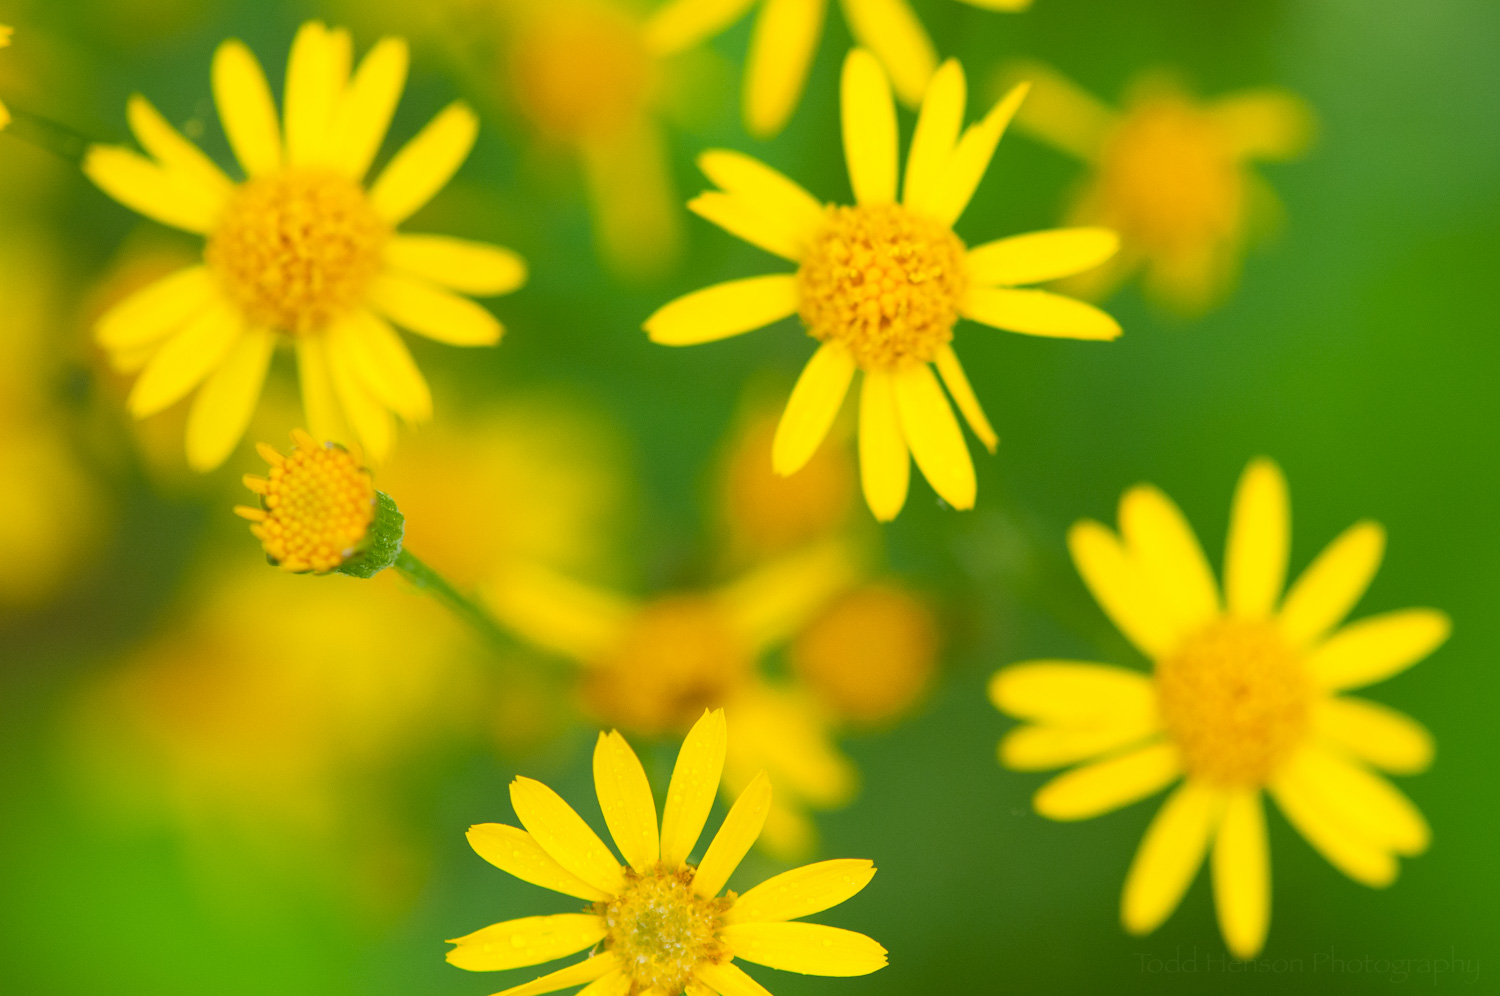


Once in Photoshop I needed to align the images. I had the camera mounted on a sturdy tripod and was using a cable release, but these were close-up images taken with a macro lens and I had no way to stop any swaying of the flowers that might occur. Thankfully Photoshop is really good at automatically aligning images. To do this I selected all the layers then clicked Edit and Auto-Align Layers. I chose the Auto setting in the Auto-Align Layers dialog. This took a bit of time. When it finished I cropped in just a little to assure I had clean edges.
The next step was to stack the images and have Photoshop choose the portions of each image that were most in focus, hence the term focus stacking. Once again I selected all the layers, clicked Edit and Auto-Blend Layers. I chose Stack Images and checked Seamless Tones and Colors in the Auto-Blend Layers dialog. This step took some time and was where most of the magic was performed. When Photoshop was finished I had a layer mask associated with each layer. It was interesting to click on each layer and see which portions of the image Photoshop chose to include. I saved the image and moved back into Lightroom to perform a little more tweaking.
I did notice that, as good as Photoshop is at choosing what to keep in the image, it is not perfect. There are some strange blurred areas on the petals at the top of the image, and the spider web with dew on the left side has a distinctly darker area around it. I don’t yet know how to fix these small areas, but will eventually. I’m always trying to learn more. Overall, I’m pleased with the process. It did a good job of allowing me to focus on multiple flowers, something I might not have been able to with a single image straight out of the camera.
Give focus stacking a try sometime. It can be one more tool to help you realize your creative vision.
Do you enjoy these posts?
Sign up to receive periodic emails with updates and thoughts. Don’t worry, I won’t spam you. And please consider purchasing artwork or products from my online store, and using my affiliate links in the sidebar to the right when shopping online.
I appreciate your support!


