The Art of Flower Photography by Todd Henson

This post contains affiliate links and I will be compensated if you make a purchase after clicking on my links. This is at no extra cost to you.

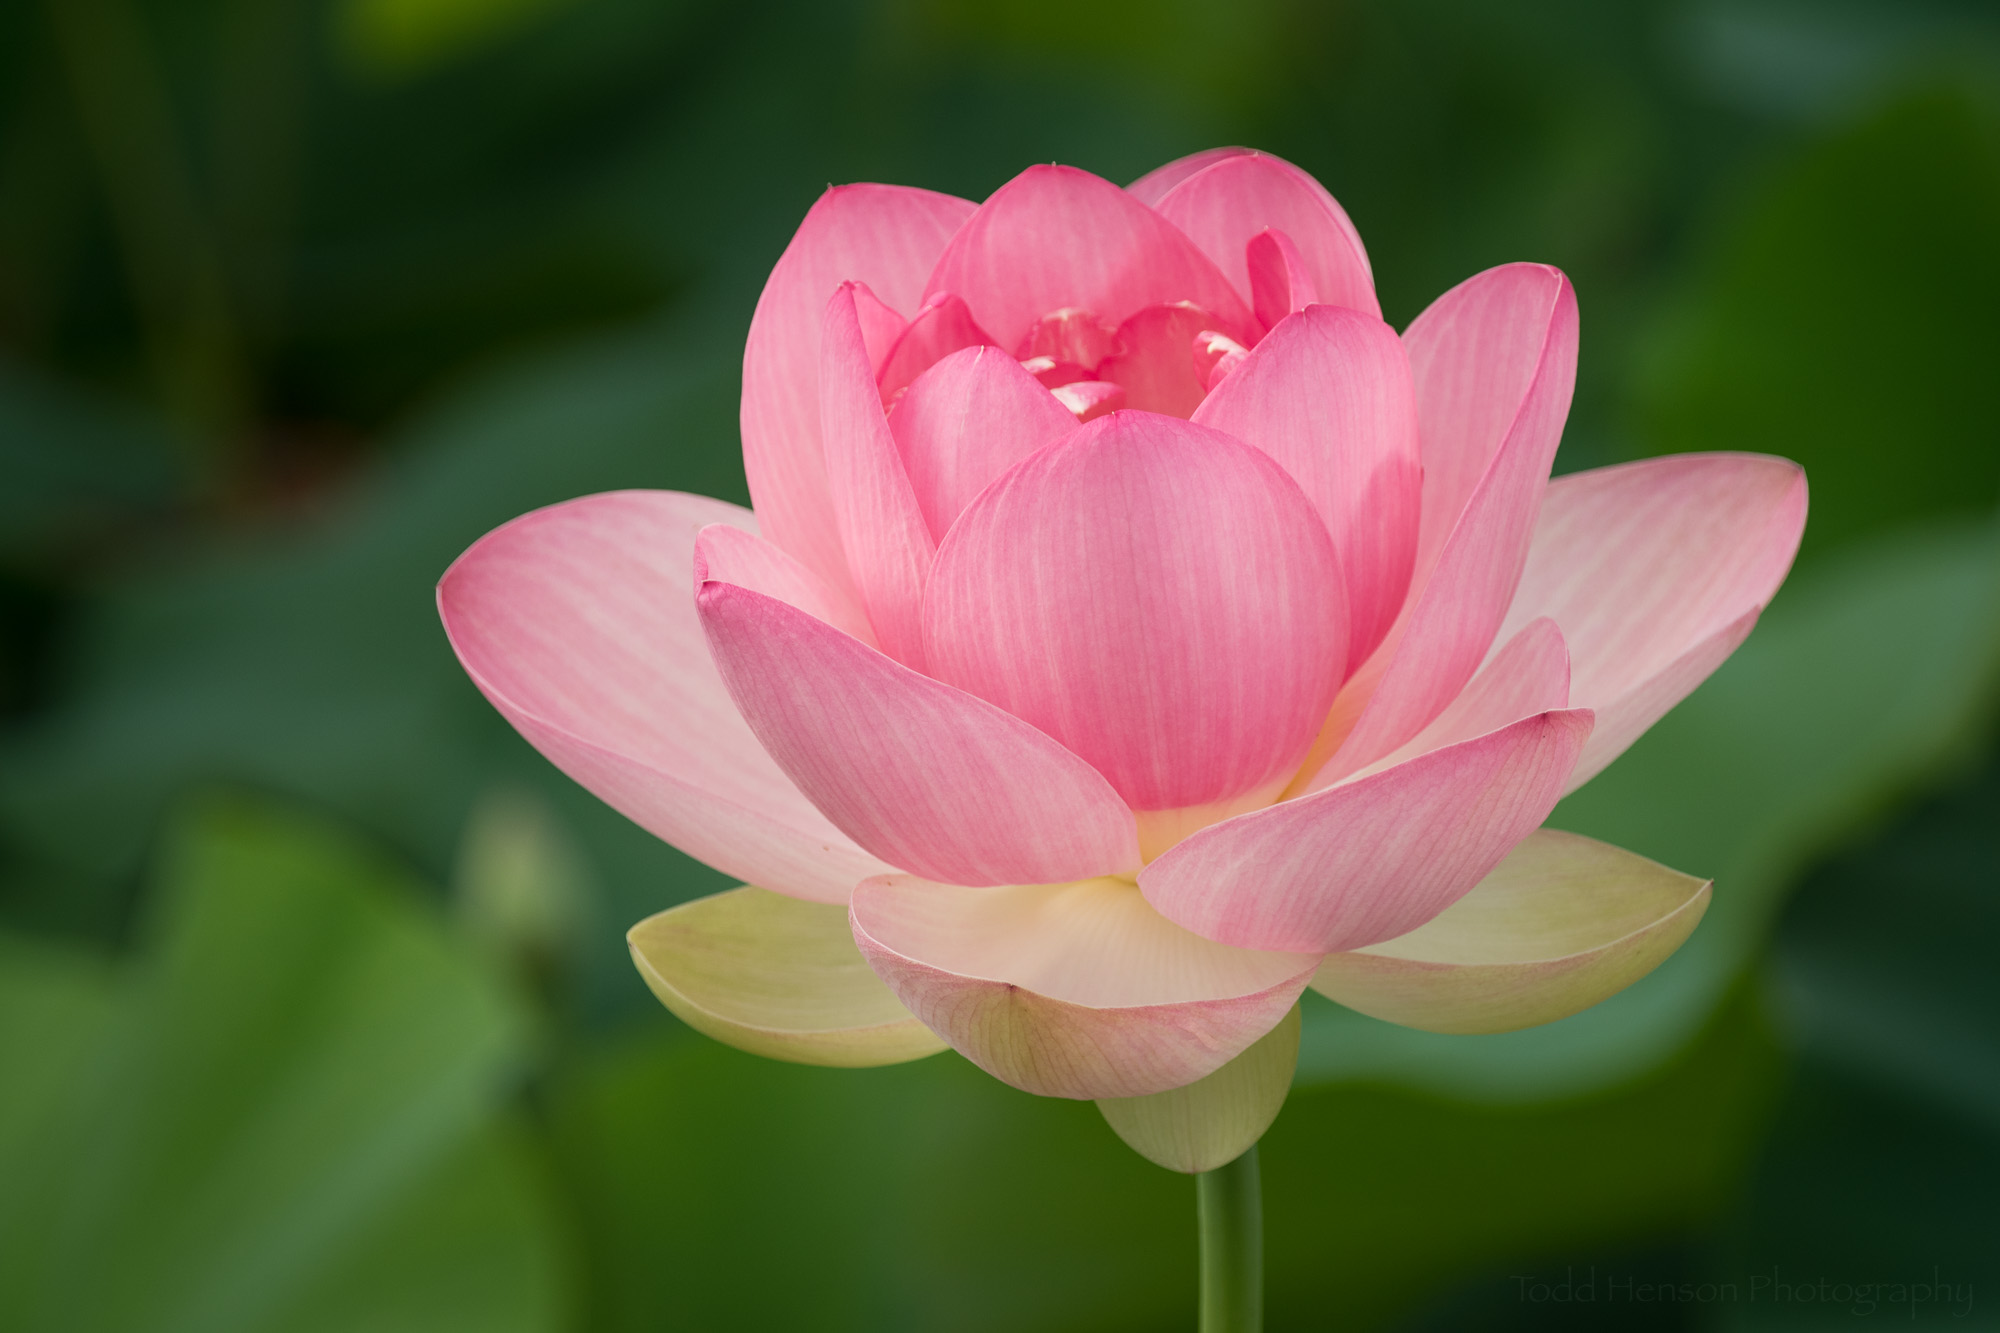
Focusing on the edge of the rose petals

I recently felt the pull to photograph flowers. This is not something I do all that often, and when I do it’s usually very small wildflowers along a forested trail. But I’ve always loved artistic photographs of larger flowers, so that is what I decided to photograph.

If you’re like me you benefit from finding inspiration in others work. Sometimes I just don’t know how to photograph a subject and I get so frustrated by this I put it aside and go back to photographing things I’m more comfortable with. Spending time studying someone else’s work, or watching a class, can sometimes help me find enough inspiration and motivation to get off my butt and start photographing.

A young rose bud

In this case I re-watched Kathleen Clemons’ CreativeLive class, The Art of Flower Photography. Kathleen has a very particular style to her flower photography, one I very much like. She often creates very soft dreamlike flowers, frequently using a Lensbaby to help achieve these qualities.

But it’s about more than lens choice. It’s about lighting. It’s about focus. It’s about finding a background suitable for the subject. It’s about composition. Where do I place the flower in the frame? How much do I show? What part of the flower do I show? Is the composition stronger centered, more to one side or the other, or perhaps angled in some way? These are all questions she talks about in her class, using her own photographs as examples.

For the photographs in this post I used my 105mm macro lens (not one of her favorites, but what I have). I didn’t have any flowers near my house so I drove over to my folks house where they have several rose bushes out front. I waited until the sun had moved behind their house, eliminating any direct sunlight, giving me an even soft light without overly harsh highlights or shadows.

Looking at the curls and curves of the rose petals

I find composition challenging when photographing flowers. That is one of the reasons I think I benefit from studying others work. I know when I like a photograph. If I find enough photographs I like I can begin to look for patterns. What is it about them that I like? A particular composition? A shooting or processing technique? Whatever it is I can try to use that to find my own compositions that I like. It’s not easy, but it’s a fun challenge.

I hope the photos here are just the beginning. I would like to continue practicing. I may watch The Art of Flower Photography again to pick up a few more tips and see more examples of Kathleen’s work.

Inside a red rose

I find these CreativeLive classes the next best thing to attending live workshops. Check them out if you’ve never tried them. They stream classes free throughout the day. If you enjoy a class you can purchase it, letting you stream it again anytime or download the videos to watch offline, as well as giving access to extra materials available with some classes.

So go out there and find something you’d like to photograph but lack some confidence in. Search out a class or a book on the topic, or find another photographer or artist who deals in the subject you’re interested in. Watch the class, read the book, study the artist’s work.

Find inspiration, try to determine what you like about the subject, or about an artist's approach to the subject. Then get out there and practice. Your photographs may not be very good in the beginning, but that’s ok. You don’t need to show them to anyone. Just keep learning, keep practicing, and most importantly have fun!


The Art of Flower Photography with Kathleen Clemons. Image credit: CreativeLive

The Art of Flower Photography with Kathleen Clemons. Image credit: CreativeLive


Fundamentals of Photography with John Greengo by Todd Henson

This post contains affiliate links and I will be compensated if you make a purchase after clicking on my links. This is at no extra cost to you.

Fundamentals of Photography with John Greengo. Image credit: CreativeLive

Fundamentals of Photography with John Greengo. Image credit: CreativeLive

Are you new to photography? Interested in learning how to master your new camera and use it to begin creating beautiful images? Or perhaps you already know a bit about photography and would like a refresher to reinforce various topics? If so, check out CreativeLive’s class, Fundamentals of Photography, taught by John Greengo.

For many years John Greengo has taught his Fundamentals of Photography class, often adding or updating content, especially if anything new has happened in the world of photography. I’ve purchased two versions of this class in the past (in 2010 and 2012), and still go back to the lessons from time to time. John is a great teacher and he creates amazing visuals that help explain and reinforce the topics he teaches. (The visuals and examples in this post are my own.)

Selection of SLR lenses

In the class, John covers a wide range of topics. He talks about the different types of cameras out there today and how each work. He explains each part of a camera system, including the digital sensor and the differences between sensors, and camera lenses in their different forms. He explains how light works and how the camera captures it.

John teaches about exposure, and how it is affected by choices of shutter speed, aperture, and ISO. He explains each of these topics with visuals that really help you grasp the concepts. Examples of this are how to use aperture to get a shallow depth of field or a large depth of field. He talks about how shutter speed will affect the look of your image, allowing you to freeze the action or create motion blur to show the action. He explains ISO and how it controls how sensitive the sensor is to light.


Example: Aperture and Depth of Field

The images of the lens below show the actual, physical, opening of the aperture at 4 different f-stops: f/1.4, f/4, f/8, and f/16. For this particular lens, a 50mm f/1.4 Nikkor lens, the largest opening possible is f/1.4 and the smallest opening possible is f/16. Click on the arrows on either side of the image to display to the next image.

The images of the frogs below show the depth of field for each of the apertures above. The depth of field is the area most in focus. In each image I focused on the eyes of the middle frog.

Notice at f/1.4 there is very little depth of field, meaning there is a lot of the image that is out of focus. Notice how at f/4, then f/8, and finally f/16, that more and more of the image is in focus.

Look at the images of the lens above again. Notice that f/1.4 is the largest opening and created the least depth of field (had the least in focus). Notice that f/16 is the smallest opening and created the largest depth of field (had the most in focus).


Example: Focal Length and Perspective

The images below were created at 2 different focal lengths. I attempted to keep the compositions as close as possible.

The first image was created using a wide angle lens at a focal length of 16mm. The front of the lens is very close to the foreground frog. Notice how large the foreground frog is in relation to the background frog. Notice how far away the background frog looks. Short focal length lenses (wide angle lenses) can stretch out the landscape, making objects in the foreground appear larger and making objects in the background appear smaller.

The second image was created using a telephoto lens at a focal length of 200mm. Notice how much larger the background frog is in relation to the foreground frog. Notice how much closer the background frog seems than in the wide angle image. This is called compression. Longer focal length lenses (telephoto lenses) compress the foreground and background, bringing the background objects closer to the foreground.

These images are an example of why it can still be very useful to move back and forth in a scene and not just rely on zooming your lens to fit the scene to the lens. Instead, visualize how you'd like the image to look.

Do you want to emphasize the foreground and minimize the background? Then use a wide angle lens and get close to the foreground object.

Do you want to emphasize the background, making it seem very large? Then use a telephoto lens. You can then move closer or further from the foreground object depending on how large you what that to be in the frame.


In addition to the more technical topics, John also talks about composition and design, about how to create pleasing images, how to add drama and evoke emotion in the viewer. He has had a long and successful career in photography, and has worked with other well known photographers, such as Art Wolfe. John is very good at taking what he’s learned and passing that on to his students through the videos and visuals.

Fundamentals of Photography is a long class full of content. It is first broadcast live over several days, usually close to 5 or 6 hours a day. One of the nice things about purchasing the class is being able to watch it later at your own pace. You can take one topic at a time, watch the videos, experiment with your camera, really understand the topic. Then move on to the next topic.

If you’re new to CreativeLive, check them out. They are an online education company that broadcasts classes on a whole range of topics. The classes are free to watch during the live broadcast and from time to time when they rebroadcast the class. They are always broadcasting something. If you like the class you can purchase it, letting you stream the class anytime, and also letting you download the videos and other content to your computer to watch offline anytime you want. Some classes have extra content only available when you purchase. I have purchased dozens of classes over the years, and likely will continue to. CreativeLive offers a fantastic platform for learning. Their topics cover not just photography & video, but also art & design, music & audio, craft & maker, and money & life.


Sampling of Stained Glass Windows from Washington National Cathedral by Todd Henson

Space Window. Stained glass window at Washington National Cathedral.

Labor Window. Stained glass window at Washington National Cathedral.

A number of years ago my brother and I took a tour of Washington National Cathedral. This is a magnificent building with so many architectural features to photograph. One of those features are the wonderful stained glass windows throughout the Cathedral. They absolutely glow when light shines through them. Click on any of the images for a larger view.

According to their website, Washington National Cathedral contains 215 stained glass windows. I didn’t photograph anywhere near this number as our time was limited and there was so much to see. But included in today’s post are a sampling of the stained glass in the Cathedral.

The weather outside was overcast, in fact it snowed while we were there. So the light shining through the windows was more subdued. This might have been a good thing as it helped avoid blowing out the details, but it also meant we didn’t see as much of the strong colorful glowing light rays that sometimes stream through stained glass windows.

Founding of a New Nation. Stained glass window in Washington National Cathedral.

YWCA Window. Stained glass window at Washington National Cathedral.

When creating these images I exposed for the windows, letting their surroundings go dark. In fact, in post processing I tried to assure the background was as dark as possible, letting the details of the windows stand out. With today’s cameras I could have exposed in such a way as to capture both the light shining through the windows and some details in the surroundings within the Cathedral. And that might have made for some nice images. But I wanted to focus exclusively on the windows, so I exposed accordingly. Try both if you ever photograph in a building with stained glass windows. See which you prefer.

The depth of field wasn’t very important as the entire window should largely be at the same distance. So the aperture wasn’t critical. I was experimenting when creating these images, so I chose apertures anywhere from f/4 to f/10. Be careful, though, to try to orient the camera parallel to the windows to avoid distortion.

I was using a tripod so the shutter speed wasn’t important. And for this reason I chose the lowest ISO my camera supported to keep noise as low as possible, especially since I was shooting in a dark environment.

I was standing on one side of the Cathedral photographing windows on the opposite side. Because of the distance I was using a 70-200mm lens at focal lengths between 100 - 150mm. This lens was perfect for the windows, but I’d highly recommend also bringing a very wide angle lens to capture sweeping interior images.

Stained glass from Washington National Cathedral.

I’d like to return to the Cathedral one day and photograph more of it. I’d like to see what the stained glass looks like in different light, and how this affects the interior of the building. And I would like to capture wide angle views of the interior of the Cathedral.

I’d highly recommend a visit if you’re ever in Washington, D.C. We visited the Cathedral as part of a Washington Photo Safari, which took us through portions of the Cathedral not typically open to the public.

If you do visit the Cathedral leave a comment below and let me know about your trip.


Do you enjoy these posts?

Sign up to receive periodic emails with updates and thoughts. Don’t worry, I won’t spam you. And please consider purchasing artwork or products from my online store, and using my affiliate links in the sidebar to the right when shopping online.

I appreciate your support!