Reviews

Rocky Shoreline of Acadia National Park by Todd Henson

My favorite image of a rocky beach in Acadia National Park, Maine

Acadia National Park, in Maine, has some absolutely beautiful coastline. Most of it is rough coastline with rocky beaches, which I much prefer over the more common sandy beaches down south. During a recent vacation my father and I explored parts of Mount Desert Island, which contains the main portion of Acadia National Park. Park Loop Road loops through a large part of the park and contains the majority of the sites most commonly seen (though there is much to be seen outside this loop). On our final day in the park we drove through the one-way portion of the loop and were favored with fantastic views of the rocky coastline extending out into the Atlantic Ocean, with some islands in the distance.

The morning had begun with light rain and some fog. We started the day with a drive towards the summit of Cadillac Mountain, but it was completely fogged in, much as it had been the very first day we drove up there. So we turned around, went back down the mountain out of the fog, and took the one-way portion of Park Loop Road. I’m glad we did.

The Panoramic View

We found a location with a small pull out on the side of the road. It was a small enough location they hadn’t put in a full parking area. A trail led from the road out along the top of a cliff line that ran above a small inlet and rocky beach. It was a fantastic view with several places to photograph from. At one of the views I created a series of images, holding the camera vertically and rotating the camera a little between each frame, knowing I’d merge these into a multi-image stitched panorama when I got home. The final image was created from 8 individual vertical frames.

Little Hunters Beach Panorama in Acadia National Park

Little Hunters Beach Panorama is available for purchase as a print or on a variety of products.

Down to the Rocky Beach

A wooden stairway led from the road down to the rocky beach. There were still storm clouds around from the earlier rain, and the tide was slowly coming in, moving up the beach. I decided this inlet would be perfect to try some long exposure images of the water lapping at the rocky beach. The lack of parking kept the crowds down and I had the entire beach to myself for the majority of the time.

I tried two different compositions, one facing the shoreline and cliffs to the left, where I’d created the panoramic image, and one facing the shoreline to the right. I processed each differently, tweaking the white balance just slightly to give each a different mood.

For the first composition I faced towards the right, including part of the rocky beach and the right edge of the inlet. I used an aperture of f/22 for a large depth of field and a slower shutter speed, and put on a 10 stop neutral density filter, allowing me to hold the shutter open for 70 seconds. This turned the water into a milky mist. In post-production I lowered the color temperature, which shifted the white balance towards the blue end of the spectrum. This gives the image a colder feel.

Long exposure (70 sec) of right side of inlet taken from rocky beach, cooler tones

For the second composition I faced towards the left, including part of the rocky beach and the left edge of the inlet. I had stood at the top of this cliff line to create the panoramic image. Once again I used an aperture of f/22 and a 10 stop neutral density filter to slow the shutter speed. This time I held the shutter open for 100 seconds. In post-production I warmed up the color temperature a little, though it’s still naturally towards the blue end, and I shifted the tint slightly towards magenta, giving a warmer feel to the image. I think this is my favorite of the two.

Long exposure (100 sec) of left side of inlet taken from rocky beach, warmer tones

Tips For Long Exposures

A tripod is critical when creating these longer exposure images. It’s also good to use a remote release if you have one. If not you can use the timer on the camera to activate the shutter. The key is not pushing the shutter button on the camera during the exposure. Anytime you touch the camera you can introduce vibrations.

To get slower shutter speeds you can use the base ISO for your camera (200 in my case) and stop down the aperture (larger f/stop numbers, f/22 in my case), but you’ll need a neutral density filter to get very long exposures. A 10 stop neutral density filter allowed me to get exposure times in the 1 to 2 minute range. You can try using a polarizer if you don’t have a neutral density filter. Depending on which polarizer you have it should slow the shutter speed down 1 to 2 stops. This may not be enough for very long exposures, but it’s a start. For more ideas about using slow shutter speeds see my post, 9 Creative Uses for Slow Shutter Speeds.


The book recommendation below contains affiliate links and I will be compensated if you make a purchase after clicking on my links. This is at no extra cost to you.

A Book Recommendation

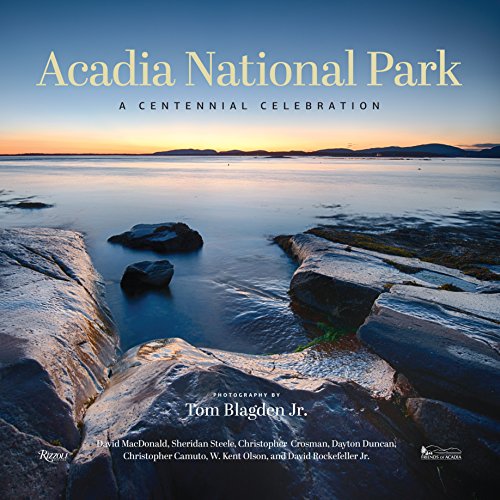
If you’d like to see more examples of the beautiful scenery all throughout Acadia National Park, check out the book, Acadia National Park: A Centennial Celebration. I picked up a copy in a small store in the town of Northeast Harbor, on Mount Desert Island. It’s a large format book, about a foot wide and tall, and around an inch thick. It contains 224 pages, most of which are filled with beautiful images from all over the park, showcasing not just the amazing landscapes, but also some of the wildlife and plant life that inhabits the park. I’m very pleased with the book.


Do you enjoy these posts?

Sign up to receive periodic emails with updates and thoughts. Don’t worry, I won’t spam you. And please consider purchasing artwork or products from my online store, and using my affiliate links in the sidebar to the right when shopping online.

I appreciate your support!


Book Review - The Art of Photographing Nature by Martha Hill & Art Wolfe by Todd Henson

the-art-of-photographing-nature-martha-hill-art-wolfe_cover_THP
This post contains affiliate links and I will be compensated if you make a purchase after clicking on my links. This is at no extra cost to you.

See my review of the updated edition of this book, titled: The New Art of Photographing Nature.

As Martha Hill states in the introduction, this is a book about seeing. It’s about learning how to see a scene, to interpret a scene, to capture that scene in a photograph. And not just a photograph, but a great photograph. It’s about learning the elements that contribute to strong compositions, and how the different choices affect the final image. The book is broken into topics, and for each topic a selection of similar photographs by Art Wolfe are shown. Art Wolfe describes his thoughts about creating the images, and Martha Hill talks about the artistic merit of the photos. Martha Hill was the picture editor of Audubon magazine for 14 years, and Art Wolfe has been photographing and publishing his images for most of his life. His work has been seen in countless publications, including his own books.

I found this book a very effective way of learning about composition in nature photography. I loved the sections that contain multiple similar images and discuss the merits of each. In many cases there is no one best image, but images better suited for one use or another. I also enjoyed the differing perspectives of Art Wolfe and Martha Hill. Art is the artist and Martha is the editor. Each discusses the photos from their unique perspective, and both perspectives have great value. How much value you get from each discussion will depend on your purpose for your own photography.

The Art of Photographing Nature consists of 9 chapters:

  1. Isolating the Subject
  2. Composing the Picture
  3. Defining Your Perspective
  4. The Power of Color
  5. The Elements of Design
  6. Reading the Light
  7. Creative Options
  8. In the Field with Art Wolfe
  9. At the Light Table with Martha Hill
the-art-of-photographing-nature-martha-hill-art-wolfe_inside_THP

The sample pages are from chapter 6, Reading the Light, and demonstrate how the different times of the day can affect the quality and character of the light, and thus affect the final photograph. None of the images are necessarily better than the others, but each has a different mood based on the different lighting. The book strives to make you aware of what elements you can use to bring to life the photograph you visualize.

As with so many of my photography books, I keep returning to this one. It’s great to pick a section and re-read it, restudy the photographs. I like to constantly refresh myself on these topics, always hoping to learn something new or further reinforce a subject. Over time I learn and mature as a photographer and I see and appreciate scenes and subjects in new ways, and returning to books like this I’m able to pick up new subtleties I might have missed the first time through.

The topics covered in The Art of Photographing Nature are timeless and just as relevant whether using digital or film gear. If you’re someone who learns from example you might benefit from this book. I continue to find it immensely useful.

The edition of the book I own is from 1993. This edition appears to be out of print and only available used, but I have since purchased a new updated edition published in 2013. See my review of this new edition, titled: The New Art of Photographing Nature: An Updated Guide to Composing Stunning Images of Animals, Nature, and Landscapes.

New edition:
Original edition:

Travel Photography: The Complete Guide with Ben Willmore by Todd Henson

Entrance to the United States Botanic Garden

Would you like to improve your travel photography? Would you like some tips and resources for planning out your next trip, knowing what gear to bring, and knowing what to photograph when you arrive? Are you new to, or could you use a refresher in, Lightroom and Photoshop and how they can be used to process your photographs into the impactful images you imagined when you were on your trip?

Ben Willmore has travelled all over the world. He has seen and photographed many fascinating and beautiful locations. He has made mistakes and learned from them. In his CreativeLive class, Travel Photography: The Complete Guide, he passes on the lessons he’s learned. He shares tips on making the most of your trip and capturing the best images you can. And he discusses many topics on how to organize and process the images you’ve created after you return home.

Capturing Your Best Travel Images

To help you make the most of your trip Ben covers:

  • Planning your trip

  • What gear to bring

  • What types of images to create

  • How to handle tourists in your images

  • Looking for unique cultural images

  • Capturing location information

  • Tips for great compositions

  • Key differences between wide angle and telephoto lense

How to handle tourists and other people in images

Look for unique cultural images

Processing to Perfection

The class also covers many topics specific to Lightroom and Photoshop. It’s not a full beginners class on these tools (though Ben has classes to fill that role), but Ben does cover a large range of topics that are likely to benefit any travel photographer. Some of the techniques are very basic, such as using Lightroom adjustment sliders, but others are more advanced techniques that can really help your images stand out. He covers topics such as:

  • How to organize your images in Lightroom

  • How to find any image quickly using keywords

  • How to create HDR images

  • How to create stitched panoramas

  • How to use Lightroom’s adjustment tools

  • When to use Lightroom and when to use Photoshop

  • How to use masks in Photoshop

  • How to process composite images in Photoshop

  • Advanced panorama techniques in Photoshop

  • Removing tourists in Photoshop

Thomas Jefferson Memorial, Washington, D.C. This is an HDR image created from the 5 images below.

How to Use the Class

One thing I really enjoyed about this class was how Ben was not dogmatic about you doing things his way. He has tried different techniques and learned pros and cons of various methods, and he passes on that info. He shows you his process and, most importantly, describes his reasoning. You may have valid reasons for doing things differently and that’s fine. Take what you learn from him, find the pieces that resonate with you, and integrate those into your workflow.

Capture location information

I was fascinated by his system of organizing images and his method for quickly knowing the status of any image, whether it was yet to be processed, was still being processed, or was finished and ready for sharing or publishing. I plan on re-watching those sections and using some of his techniques to improve my own workflow. I began as an Aperture user, and I’m still learning my way around Lightroom and, most especially, Photoshop. I learned a lot of useful lessons from Ben and hope to make use of them in the future. In fact, one huge lesson was the importance of organizing keywords and how this can save so much time in the future when searching for images. And using his importable set of keywords saves so much time now when getting started.

Travel Photography: The Complete Guide is over 10 hours of video content. But it also includes a really nice selection of extra content if you purchase the class, things like Ben’s Lightroom presets, some of his Lightroom actions, a very well organized starter set of importable keywords to better organize your images, practice images to work on, and a number of different PDF guides including a 74 page Travel Photography Handbook that serves as a great reference to everything covered in the class, and a nice Travel Photography Mobile Guide that’s suitable for keeping with you on mobile devices, offering 35 pages of short tips to help you create interesting and pleasing images while on travel.

If you're new to CreativeLive, give them a try. They live stream classes on a large range of topics, all for free online, and they are constantly rebroadcasting previous classes. So you can try their content out before purchasing anything. If you enjoy the class you can purchase it, which allows you to stream it again in HD anytime, or even download HD videos to your computer to watch offline. Many classes come with extra content available if you purchase. I've been very impressed with the photographers who've taught classes on CreativeLive, folks like Art Wolfe, Tom Mangelsen, Frans Lanting, John Greengo, Ian Shive, Chris Burkard, Marc Muench... you get the idea. These are very talented photographers who are also very skilled at teaching their craft. And CreativeLive offers classes on more than photography. Check them out!