A selection of gift ideas for nature & outdoor photographers.
Are you looking for affordable gift ideas for a nature or outdoor photographer? Or perhaps you’re looking for a beautiful new lens for yourself or someone else? Whether you’re shopping for Christmas, a birthday, or any other occasion, I have a list of ideas to help you find a gift they will use and enjoy. These gift ideas cover a range of price points, from inexpensive stocking stuffers on up.
This post contains affiliate links and I will be compensated if you make a purchase after clicking on my links. This is at no extra cost to you.
Categories of Gift Ideas:
Camera Cleaning
Giottos Rocket Air Blaster
Every photographer should have an air blower to help clean their gear, and the Giottos Rocket Air Blasters are great for this purpose. You squeeze the bulb and a strong jet of air blasts out of the tip. This is great for getting dirt off the camera body, lens surfaces, and even from the camera sensor (just be careful not to hit the sensor with the tip). Never use compressed air on your camera, always use these hand blowers. I keep one in my bag anytime I go out.
Spudz Microfiber Cleaning Cloth
Another must have for every photographer are microfiber cleaning cloths, which are very useful for cleaning the glass surfaces of lenses, filters, and screens. Just be sure to clean your cloth regularly. These cloths come in many forms, but one I’ve found useful are Spudz, which fold up into their own little pouch for convenience. You can hook the pouch to your keychain, camera bag, etc.


Zeiss Pre-Moistened Lens Cleaning Wipes
I like to carry a handful of these on any outing in case the front of my lens or filter get dirt, grease, or fingerprints on them. These wipes are pre-moistened and made for lenses. They are individually packaged and made for a single use, so dispose of each one after using it.


LensPen
LensPen are another option for cleaning the front element of lenses. They have a retractable brush on one end for brushing dirt or larger particles off the glass. The other end has a carbon tipped pad that you move over the lens to remove fingerprints and other grime. I used one of these in the beginning, but eventually moved to air blowers, microfiber cloths, and Zeiss wipes.


Photography Accessories
Memory Cards
Every digital camera needs a memory card to save images to. And it’s always a good idea to have spare memory cards on hand. There are few things worse than running out of memory while out photographing. Be sure to get the correct type of memory card for your camera, as there are several types of card out there. And if you’re interested in speed, either for action photos or to offload images from the card faster, then look for faster memory cards. I personally tend to stick to name brands.

Camera Batteries
Another accessory you can’t do without is a battery for your camera. And, as with memory cards, it’s often a good idea to carry a spare (or multiple spares depending on how and where you photograph). Be sure to find the correct battery for your specific camera, as many of them differ between models. I tend to purchase camera manufacturer batteries instead of third-party batteries.

Hot Shoe Bubble Level
Sometimes you need to assure the camera is perfectly level, perhaps because you’re creating a panorama, or working on architectural photography. Some cameras come with a built in level, but if yours doesn’t then using a bubble level in the hot shoe of your camera can help assure it is level. I mostly use these when trying to keep the horizon level in landscape images and for keeping all the images aligned properly in a multi-image stitched panorama.

Reflectors & Diffusers
Reflectors and diffusers are great for controlling light, adding a little here, softening the light there. I use them with macro subjects, such as flowers. I have a larger 32-inch 5-in-1 model that has reflective surfaces in gold, silver, white, and sunlight (gold/silver combo). These surfaces are on zippered fabric that zips around a central diffuser, which is great for softening light on a subject. The entire 32-inch disk folds up into a 12-inch pouch. I also have a 12-inch gold/silver reflector for adding back in a little light in specific areas, and a 12-inch diffuser to soften light in smaller areas. The 12-inch reflector/diffuser folds up into a 4.5-inch pouch. There are lots of other options out there. I think a black surface might also be useful to subtract a little light from one side of the scene. And I think some of the triangle reflector/diffuser models might be handy when handholding or trying to set it down of a flat surface.


Lens Filter Wrench
Sometimes a lens filter might get stuck on the lens, especially on hot summer days when the metal of the filter expands. This can be frustrating, trying to quickly remove a filter that doesn’t want to come off. I’ve found these little plastic filter wrenches very useful for removing stuck filters. I don’t use them often, but when I need one I really appreciate it. Be careful when ordering to order the size that fits your filters. I have a set of the ridged filter wrenches, which have little plastic ridges inside the wrench that help grip the filter. I’ve never used the rubber-coated version, but it looks interesting.

Hoodman HoodEYE
The HoodEYE is a great replacement for the stock eyepiece that comes with your camera. It’s larger than the standard eyepiece and is moulded to fit your face and block out more sunlight, making it easier to see through the eyepiece. It can be easily rotated so you can look through it with your left or right eye. I’ve been using one of these for years. Be sure to get the version that fits your particular camera, as each manufacturer has a different eyepiece mount, and many have multiple mounts for different camera lines. Hoodman also has a larger version of the HoodEye for folks with glasses.


Gepe Card Cases
I love Gepe card cases. They hold multiple cards of various formats of memory media so be sure to verify the one you get will accommodate the types of media you use. They come in a variety of colors, and fit easily in a pocket, so you can keep your cards safe and together. I like to place my cards logo face up when they’re empty and ready to use, and blank label face up when I’ve filled them. It’s a quick and easy way to limit the chances of me writing over a card I haven’t yet emptied.


Storm Jacket Camera Cover
I like these covers when I might be out photographing in the rain. My camera can stand a little light rain without a cover, but if I’m worried about the rain getting worse, or if I’m in a wet environment, I like the extra peace of mind knowing the camera is covered. They come in a variety of sizes to fit different lenses. And they have both a regular model and a PRO model. The PRO model has a velcro opening at the bottom for tripods and monopods (very useful). I have the large PRO model that’s about 24 inches long, which fits my 200-400mm lens. They fold up into a small pouch to make them easy to carry. Each end has an adjustable closure to cinch the opening closed to the lens or camera back.

BlackRapid Camera Strap
I absolutely love my BlackRapid camera strap. Most camera straps are made to hang around your neck, which after a long day can really weigh down your neck and cause discomfort, especially if you have a heavy camera/lens combo. The BlackRapid solves this problem. It is a sling camera strap that rests on one shoulder with the camera hanging over the other side of your body, so it’s balanced really well.
They make many different versions of the strap to suit your preferences. Mine is an older version of the RS-7. My brother has the Sport version with an underarm strap that keeps the cushion from moving off your shoulder. These straps are very easy to use and are quick. The camera slides up and down the strap allowing you to quickly bring it up to your eye, or let it rest by your hip or behind your back. There’s an adjustable stop at the bottom to keep it from moving further than you’d like.
If you often use a tripod with Arca-style mounts, as I do, you can purchase a quick release clamp from Kirk Enterprises that will attach to the BlackRapid strap and allow you to mount the Arca-style camera/lens plate to the strap. Very useful.


Extension Tubes
Macro enthusiasts will appreciate extension tubes. These are really just spacers that move your lens further from the camera body. This allows the lens to focus on closer subjects than it would otherwise be able to. The more extension you use the closer you can focus. The drawback is that you can’t focus to infinity when these are on, so you can only photograph macro when using extension tubes. They are very useful, especially if you don’t yet want to invest in a more expensive macro lens.
There are a number of different brands and sizes available. I own the Kenko, so those are the only ones I can speak directly about. I used them a lot before purchasing a macro lens, but I still use them on my 70-200 when I want some extra magnification. Note, I have not been able to combine these with teleconverters, they just don’t fit, so you might need to research a different brand/model if you wanted to do that. Also note, because these fit between the camera and lens they are made for specific brands and models of camera, so be sure to purchase the right ones for your own gear.

Filter Step Up Rings
Filter step up rings are very useful when you have a set of lenses with different filter sizes, but you don’t want to go to the expense of purchasing filters for every lens. So you purchase filters that will fit the lens with the largest filter mount and then purchase step up rings that go between the filter size and each lens mount size. For example, if I have a lens with a 77mm filter mount and a lens with a 58mm filter mount I will purchase a 77mm polarizer filter and a 58mm to 77mm step up ring. The 58mm side will mount on the lens, and the 77mm filter will mount on the other side.
There are a huge number of options available, both in sizes, materials, and price. As with most things you do tend to get what you pay for. The less expensive models are usually made of aluminum, which can be more prone to sticking on the lens or filter and warping over time. The more expensive models are usually made of brass, which is less prone to sticking or warping. I’ve been very frustrated trying to remove cheap aluminum rings from my filters, so I’d recommend brass over aluminum, if possible, though it is more expensive. Be sure to pick a model that has matte black finish to limit any reflections between the filter and lens. Be sure to pick the right sizes for both your lens and filter. And don’t confuse step up rings with step down rings. Step up rings allow you purchase a larger filter that fits on lenses with a smaller mount. The less common step down rings are used to mount filters with a smaller size to a lens with a larger mount size, but this can cause vignetting as the ring and filter will cover some of the lens.

Spare Lens Caps
It’s a simple thing, I know, but sometimes you misplace a lens cap and having a spare can come in handy. As with everything related to lenses, though, be sure to get the right size and style for your lens.

Personal Accessories
Carabiners
These cheap little things are very useful. These are NOT the carabiners used for climbing, but they’re great for clipping things together. I use these to clip water bottles to my backpacks and sling packs. Anything with the right sized hook or hole can be hooked together with these. They come in a variety of sizes, colors, and styles.


CamelBak Chute Water Bottle
If you’re out hiking for very long you’ll need water. My favorite water bottle of the moment is the CamelBak Chute. I have both 0.75 L and 1 L models. They are made of BPA free hard plastic and come in a variety of colors. They have a handle, and you can use a carabiner to attach them to many backpacks or straps. What I like about the Chute is the covered spout that keeps the spout clean if you happen to go through any muck. I’ve used other bottles with exposed spouts, and occasionally had problems with the spout getting fouled up. The CamelBak Chute solved that problem for me.
You can also try the 20 oz vacuum insulated stainless steel model if you’re interested in keeping your drink hot or cold. Mine keeps my tea hot for a good part of the day.


Energy Bars
You’re hiking through a park, photographing wildlife. You’re having a great time, there are lots of subjects to photograph. But it’s nearing lunch time. You just don’t want to leave the park to get something to eat. So it’s always good to bring along a couple LÄRABARs or CLIF Bars to keep you going while you’re hiking and photographing in the field. Personally, I like the Blueberry Crisp and Sierra Trail Mix flavors of CLIF Bars, and I like the Cherry Pie and Lemon Bar LÄRABARs, but there are lots of flavors available.


Outdoor Research Helios Sun Hat
A sun hat is very helpful if you’ll be out in the sun for any length of time. I like the Outdoor Research Helios Sun Hat. It’s very light weight and breathes well, but also protects from the sun. The strap can be removed, but I like it. It helps keep the hat on in stronger winds, and I can remove the hat and let it hang from the strap. The brim of this hat is about 2.5 inches, which is wide enough to help protect your eyes and neck from the sun but narrow enough not to get in the way on the camera too much. I’ve tried hats with a wider brim but they constantly get in the way of the camera.


Outdoor Research Gripper Gloves
I looked for years for a pair of gloves that had a decent grip on the fingers so I could work the camera without removing the gloves, and that would keep my hands reasonably warm during the winter or in the wind. Eventually, I found these Outdoor Research Gripper Gloves. They are not heavy gloves, so if you live in a very cold climate they may not be enough. But I’ve found them warm enough for Virginia. They are made of fabric that resists wind, which I wanted, but they are still fairly breathable. The outside of the thumb, first finger, middle finger and palm have a synthetic material that provides some grip. I find it “grippy” enough I can control the camera without removing the gloves. I have seen the gloves with holes at the end that are made for photographers, but I prefer these.


Walkstool Comfort
If you spend a lot of time hiking and photographing it can be nice to have a portable stool with you to sit down and rest. The best stool I’ve found so far is the Walkstool Comfort. It’s a bit more expensive than some of the others, but as so often happens, you get what you pay for. The Walkstool Comfort is a 3-legged stool that comes in several sizes to suit your height, and supports a large amount of weight (between 385 - 550 lbs, depending in which model you choose). I have the Walkstool Comfort 55 model, which has a normal sitting height of 22 inches (55 cm), and a low sitting height of 13 inches. When packed up it’s 16 inches long and comes in a small bag. Mine supports 495 lbs. The Walkstool Comfort models are made in Sweden, support more weight, and are a little more expensive. The Walkstool Basic models are made in China, support a little less weight, and cost a little less. Here is a comparison of the Walkstool models.

STABILicers LITE Hiker Ice Cleats
Walking over icy trails in the winter can be challenging, but these ice cleats can make it easier. You stretch them over your existing boots or shoes. On the bottom are metal cleats that provide extra traction when walking over ice. You still need to be careful, but these can help give you enough traction to get around without being quite as worried about slipping and sliding. They come in different sizes to fit different sized shoes.


Books
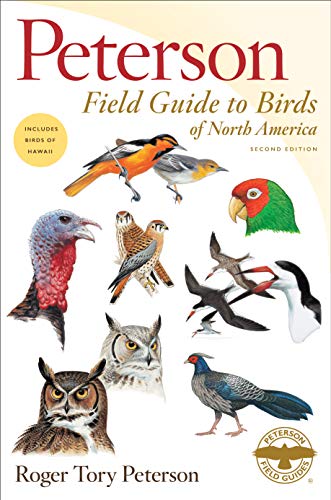
Peterson Field Guide to Birds of North America by Roger Tory Peterson
Any photographer who enjoys photographing birds will probably also want to be able to identify the birds they photograph. This is where field guides come in very handy. They can help identify birds, and can teach you a lot about them, as well. I have a number of bird field guides, but my favorite so far is the Peterson Field Guide to Birds of North America. It contains excellent drawings of the birds with various identifying features highlighted to assist in identification. It provides a nice description of each species, and contains maps of their ranges.
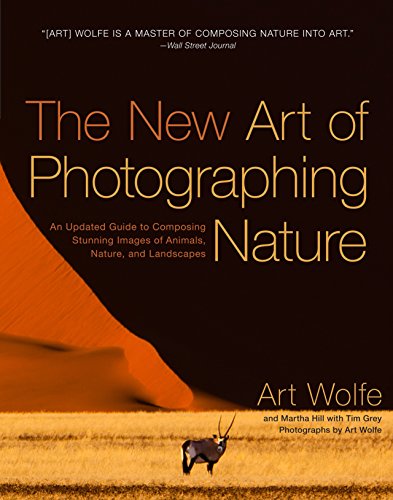
The New Art of Photographing Nature by Art Wolfe
I love Art Wolfe’s work. He has a long and very successful history of creating beautiful images. This book is a great way to learn from his experience. This is an updated version of a classic. I have both versions. Art Wolfe and Martha Hill give their views and opinions on some of Art’s photos, describing how they work and why. Art is the photographer, Martha is a photo editor. In this new edition Tim Grey adds sections on digital photography. See my review of The New Art of Photographing Nature by Art Wolfe.

Earth Is My Witness: The Photography of Art Wolfe
I love this book! This is a portfolio book full of Art Wolfe’s photography, and is by far the best collection of his images I’ve seen. The photographs are organized by geographic region covering every part of the earth, showing the range and diversity of Art’s work. Highly recommended! Note, there are 2 versions of this book. The older version is larger and is the one I own. There is also a more recent smaller, more affordable version. See my review of Earth Is My Witness: The Photography of Art Wolfe.
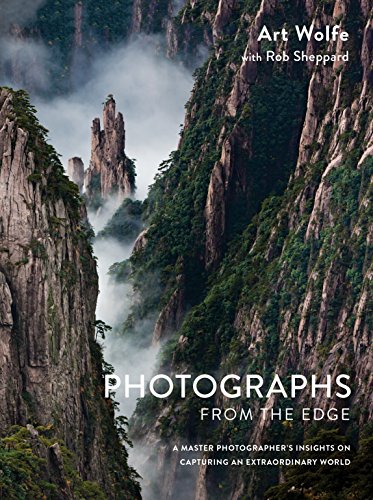
Photographs From the Edge by Art Wolfe
This is a beautiful book full of Art Wolfe’s images and their stories, organized chronologically. Rob Sheppard worked with Art to tell the story of each image. There are technical details, photo tips, and stories about the trip, the people, the animals, and the environment. This is a great addition to the library of any fan of Art Wolfe.
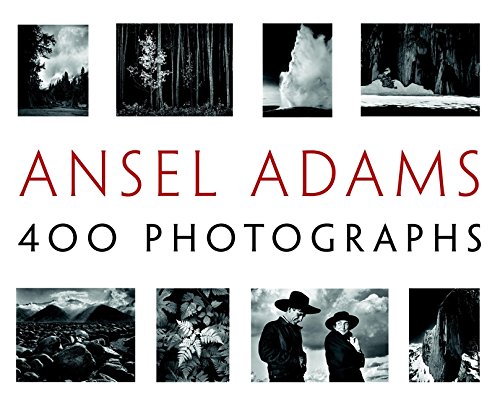
Ansel Adams: 400 Photographs
As the title says, this is a book of 400 photographs by Ansel Adams. It covers his entire career, from his early work when he was still learning, to his later years when he continued perfecting his craft. It’s nice to see how his photography progressed over the years. The end of the book also contains a great section of notes about each photograph. See my review of Ansel Adams: 400 Photographs.
Understanding Exposure by Bryan Peterson
This is the book that helped me begin to understand exposure, and how to expose for any situation. Bryan Peterson is a great photographer and a great teacher. He’s able to convey the details of exposure in ways that make it much easier to absorb. I still have much to learn, and I hope to return to this book to refresh and learn more.


Within the Frame: The Journey of Photographic Vision by David duChemin
I really enjoy David duChemin’s writing and his passion for the craft. This is not a technical book, it is not a how-to book. This is a book about vision, about learning how to see, and how to better convey what you see into your photography. It is about being intentional about what and how you photograph. David photographs people, places, and cultures. He travels and brings back images that tell stories of his travels, that share what he saw and what he felt. I found this book, as most of David’s writing, to be very inspiring.
Photographically Speaking: A Deeper Look at Creating Stronger Images by David duChemin
This book is a great follow on to Within the Frame. In this book David talks about what makes a great photograph and how to recognize it. He goes into the visual language of photography, how to talk about and discuss images so we can all learn from them. I’m still reading this book for the first time.

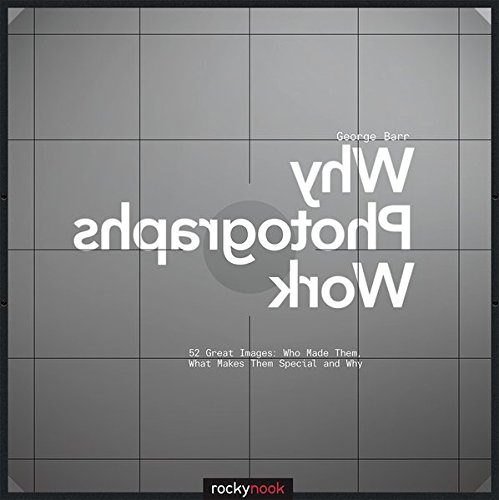
Why Photographs Work by George Barr
The subtitle for this book is 52 Great Images: Who Made Them, What Makes Them Special and Why. George has picked images from great photographers. Each image is accompanied by an analysis of the photograph by George, and another by the photographer. There is also a biography of each photographer, and a small section of technical details on the photograph. Some of the photographers include: Nick Brandt, Susan Burnstine, Michael Kenna, Michael Levin, Harald Mante, Freeman Patterson, John Sexton, and many more. See here for my review of Why Photographs Work.
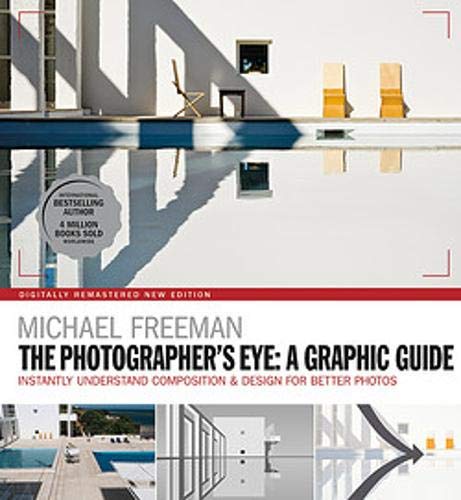
The Photographer’s Eye: A Graphic Guide by Michael Freeman
The Photographer’s Mind: Creative Thinking for Better Digital Photos by Michael Freeman
I’m a fan of Michael Freeman’s books, and these two really go together well. They provide a great foundation for understanding and learning composition and design, and how to use this to create stronger images. Michael covers a large range of topics and uses as examples his travel photographs from all over the world. We learn how to see, and how to think about what you see, and organize that into a photo that conveys something of value.

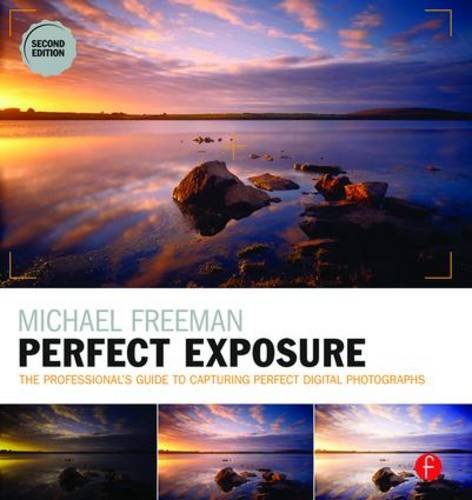
Perfect Exposure by Michael Freeman
In this book Michael tackles the topic of exposure. He goes into great detail about all the various aspects of exposure, and how exposure is used to craft the image you visualize. This book, in conjunction with Bryan Peterson’s Understanding Exposure, provide a great foundation for learning exposure.
Novelty
Camera Lens Thermos
These are fun for any photographer who drinks coffee, tea, hot chocolate, or other hot (or cold) drinks. There are lots of different options out there.

Lenses
Lenses can get expensive, but in this case, you often get what you pay for. I started out with a kit lens, as most of us do. It was fun and allowed me to experiment, see what I enjoyed photographing. But as I got more serious about photography I quickly started running into its limitations, so I started craving new glass. Below are some of the lenses I have owned, rented, or borrowed from friends.
Choosing a lens can be very difficult because so much depends on what you enjoy photographing, your budget, how much weight you can comfortably hold, and size constraints. There is no perfect lens for all situations. Some lenses, called super-zooms, have a great range of focal lengths, such as 18mm all the way to 300mm or even 500mm or 600mm. This range gives lots of versatility, but they will generally not be as high quality as a lens with a smaller range. Some lenses are very specialized, such as the super telephoto lenses. The 500mm f/4 and 600mm f/4 are beautiful lenses that can help capture amazing images, but they are very large, very heavy, and VERY expensive.
Though I do recommend purchasing the best lens you can afford, I also think it’s better to have a lens than to not have one. So start by trying to determine what you want a lens for, what you enjoy photographing, what the limitations are of your current gear. Then determine your budget. Then look through the lenses that fit those needs. Look at the weight of each lens. Is it too heavy for you? Look at the cost. Too expensive? Look at the features. A constant maximum aperture (f/4) is usually better than a variable maximum aperture (f/3.5-5.6). Does it have vibration reduction and do you care about that? And look for reviews and opinions from folks who seem to have similar interests.
Now on to my own opinions of the gear I’ve used. Note that I currently use Nikon DSLR cameras, so all the lenses below are Nikon compatible lenses for DSLR cameras. These days mirrorless cameras becoming the norm, versus DSLRs, so if you’re planning to purchase both a camera and lens strongly consider and research the mirrorless offerings. Each camera maker has their own lines of lenses for specific types of cameras (ex, DSLR or mirrorless). There are also third party lens makers. They will usually have their own versions of the lenses below, but I can’t really speak to those as I’ve never used them.
In the examples below, which are specific to DSLR cameras and lenses, the letters DX are used when a lens is made to fit a crop-sensor camera. Most of the consumer-level cameras are crop-sensor. I have a Nikon D300 and D500, which are crop-sensor cameras. The letters FX are used when a lens is made to fit a full-frame camera, which are often the higher end cameras. Nikon DX cameras can use most all of the DX and FX lenses (though some of the older FX lenses might not be fully compatible). But Nikon FX cameras should generally stick to FX lenses. Using DX lenses on an FX camera (unless they use a special shooting mode) will usually cause a hard vignette because the opening of the lens is smaller than the sensor.
I’m not currently very familiar with mirrorless cameras or their lenses, but as I mentioned above they are the direction camera makers are moving, so if you’re planning to purchase a new camera then strongly consider purchasing a mirrorless instead of a DSLR.

My first lens was an older version of this model. I think it’s a great lens if you’re just starting out and don’t necessarily know exactly what you want to photograph. It gives you a wide range to experiment with. Granted, large zoom ranges like this do come with compromises in lens quality and build quality. But if you’re looking for an inexpensive and light weight lens with a lot of range then this might be a good choice. The benefit to the large zoom range is that you don’t need to change lenses very often. The drawback is that the image quality might not be quite as good as lenses with smaller zoom ranges or prime lenses. There are now lenses with even larger zoom ranges, such as 18-300mm, but I have not tried these. Note, this lens is a DX lens, meaning it’s intended for crop-sensor cameras, not full frame cameras.
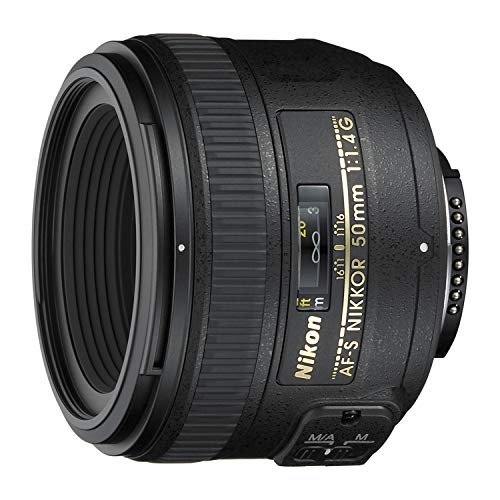
50mm lenses on a full frame camera give a field of view very close to what our eyes see. On a crop-sensor camera, as I have, they are slightly into the telephoto range. They can be great teaching tools, as they are a prime lens, not a zoom. Photographing with a prime is a great way to learn about framing and perspective. You have to zoom with your feet. The 50mm lenses are usually also inexpensive, which is always nice. I have an older model of the f/1.4. There is also a less expensive f/1.8 model, and a more expensive f/1.2 model. The smaller the f-stop number the wider the aperture. Wide apertures let in more light, so you can photograph in darker conditions, and they allow you to create images with shallower depth of field. I don’t use this lens very often. I suspect I might find it useful if I did more street photography, or as a portrait lens when photographing people. I have been tempted to experiment with food and product photography, and I think I might make use of this lens for those.
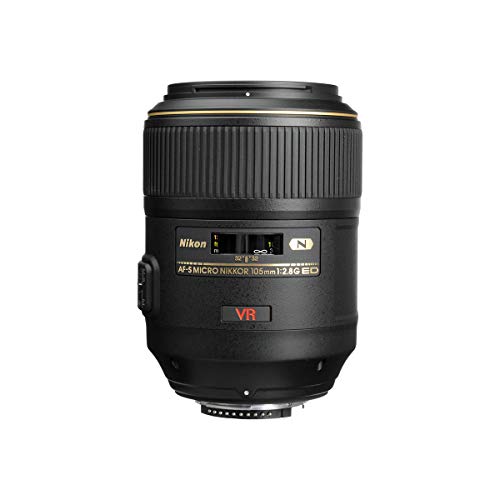
I really love this macro lens. It’s amazingly sharp, and useful for more than macro, though I do most often use it for macro work. It’s a prime lens and has a nice wide open aperture of f/2.8, though that changes as you focus closer, so you may not always be able to get down to f/2.8. Honestly, though, I often stop down when photographing macro to give me a little more depth of field when trying to show insects or flowers. When focused that close even small apertures can have a relatively shallow depth of field. This is a beautiful piece of glass.
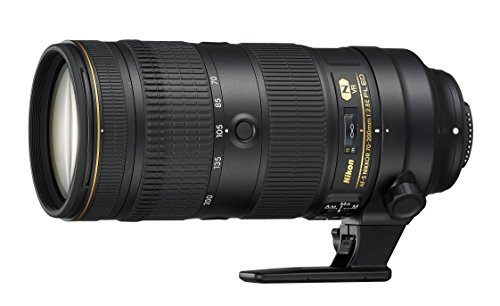
I have an older version of this lens, and it is perhaps my second favorite lens after the larger 200-400mm. 70-200mm is a very nice zoom range and the f/2.8 gives a nice shallow depth of field when needed. It is a heavy lens, but it’s built like a tank. It comes with a tripod foot to make it easy to mount the lens to your tripod instead of your camera. This balances the lens better on the tripod, and takes the stress off the mount point, where the lens mounts to the camera. The 70-200mm also works well with teleconverters, so you can use a 1.4x or a 2x to give more focal length without going to the expense of a longer lens. As with all things, there are compromises, but this can be a good choice if you need a little extra focal length once in a while. If you’d like something lighter consider the f/4 version.
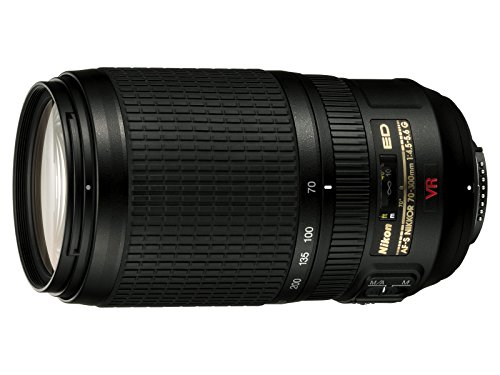
I don’t own this lens, but have used versions owned by my brother and a couple friends. It has more reach than the 70-200mm and is lighter weight, which can make it an easier lens to walk around with, maybe around town or at the zoo. It does take in less light than the 70-200mm and is slower to focus. But it also costs much less. You can see how there are always compromises when purchasing lenses. But if you’re on a budget, or want a little extra reach and a reasonably light lens, then this just might be a good choice for you.
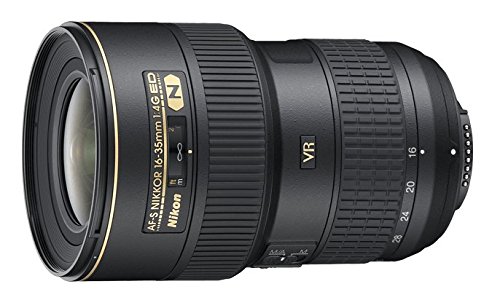
I’m most drawn to scenes that benefit from telephoto lenses, so I purchased good telephoto lenses before looking into wide angle. This lens was my choice for a wide angle lens. I started with the 18-200mm, but eventually found myself wanting more. I’ve tried and looked at the crop sensor (DX) wide angle lenses, and these certainly do give a wider field of view, but I’ve always thought I might one day purchase a full frame camera, so I’ve been trying to purchase full frame lenses to make them compatible with whatever I have. That’s why I ended up purchasing this lens. At 16mm it is wider than my 18-200mm, though not by much. It has a constant maximum aperture of f/4 throughout the zoom range, so you don’t have to worry about the aperture changing as you zoom. It’s a little on the costly side, but it’s a beautiful lens. I may still purchase a DX wide angle lens one day, but this lens will continue to work with either crop sensor or full frame cameras, so I’m pleased with my purchase either way.

I don’t own this lens, but have tried it out over a weekend. It was a lot of fun. It’s not something I would use very often, but I can see situations when it would be nice to have, such as in museums or photographing very wide angle landscapes. Being a fisheye it can severely distort the image if you let it. But if you line things up just right, keeping the horizon straight, you can minimize distortion in portions of the image. The aperture is f/2.8, which is a nice large aperture, letting in lots of light. This fisheye is very small and very light weight. It is a DX lens, meaning it’s designed for crop-sensor cameras and won’t work as well on full frame (you would get hard vignettes where the sensor was larger than the lens opening). I would like to purchase a fisheye lens one day. If I stick with DX then I might purchase this lens. But if I still think I might go full frame then I think I will also have to research some of the full frame fisheye lenses. If you plan to stick with crop sensor cameras (DX) then this would be a great fisheye to own.
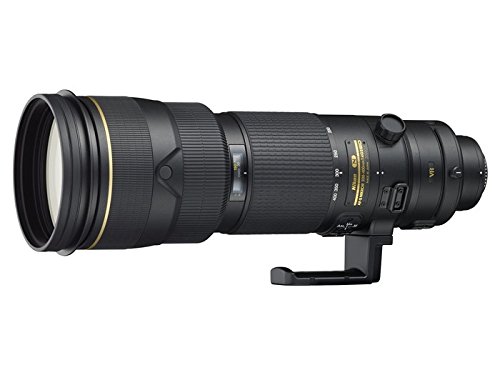
I have an older version of this lens, and it is, without a doubt, my favorite lens. It is a large, heavy, expensive lens, built like a tank. It fits in the super-telephoto range, but is a zoom lens, which gives it some extra flexibility. I photograph a lot of birds with this lens, though the longer prime super-telephotos might be better for this. I also sometimes photograph subjects closer to the macro range, such as flowers, butterflies, and other insects. The 200-400mm is great for photographing animals in the field, and it’s fantastic for air shows. The version I have does produce better images when the subject is closer than when focusing at a long distance. It’s one of the compromises of the lens. You can still photograph more distant subjects, but might need to stop down a bit and pay close attention to focus. I regularly use the 1.4x teleconverter to get a little extra reach. I have also used the 2x teleconverter, but this can require manual focus unless there is a lot of available light in the scene.

I don’t own this lens but have used a friend’s version of the lens. This is a beautiful piece of glass. It’s smaller than the 500mm or 600mm lenses, but still has a nice reach at 300mm. The front element of this lens is the same size as the front element of the 200-400mm f/4. The wide aperture of f/2.8 lets in lots of light, making this a very fast lens. My friend regularly uses teleconverters, both the 1.4x and the 2x, with much success. This lens was built to use teleconverters.
Nikon AF-S FX NIKKOR 500mm f/4E FL ED VR
I don’t own this lens, but did get the chance to use an older version of it for a short period of time. As with all the super-telephoto lenses, this one is absolutely beautiful, and a real monster. But it gives lots of reach, and is built to make use of teleconverters to extend its reach. This is a great lens for photographing birds, animals, or anything else that you want to really focus in on. As with all the super telephotos, it is large, heavy, and expensive.

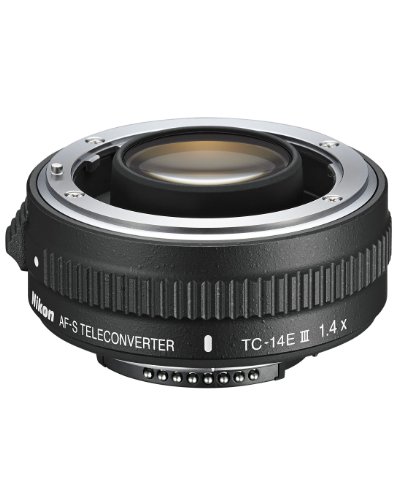
This lens is made to attach to high end telephoto lenses to extend their reach 1.4 times. If you attach it to a 300mm lens, that lens will effectively become a 450mm lens. The drawback is that it does eat up one stop of light. These teleconverters were only made to fit certain lenses, so be sure to check whether the lens you want to use it with is compatible. I regularly use this with my 200-400mm lens, giving me an extended range of 280-560mm.

This lens is another teleconverter that is made to attach to high end telephoto lenses to extend their reach 2 times. So with a 300mm lens you would extend the reach to 600mm. And on a 600mm lens you’d extend the reach to 1200mm. The drawback is this lens eats up to 2 stops of light. These teleconverters were only made to fit certain lenses, so be sure to check whether the lens you want to use it with is compatible. I regularly use this with my 70-200mm lens, giving me an extended range of 140-400mm. I occasionally use it with my 200-400mm, giving an extended range of 400-800mm. I also occasionally use it with my 105mm macro lens, extending my reach to 210mm.