polarizing filter

The Effects of a Polarizing Filter on Waterfalls and Woods by Todd Henson

Look at the color of the green and brown leaves, the rocks and the water. The polarizing filter is allowing more reflections in the example on the left and reducing reflections in the example on the right.

The polarizing filter is perhaps one of the most common filters for your camera lens. Some folks put one on their lens and never take it off. Others use it in specific situations. One of the reasons we’re often told to use one is that it will darken the sky in landscape images and make for more drama. And while this is true, the polarizing filter is capable of much more.

Personally, I only put on a polarizing filter when I think it will be useful for the images I’m creating. If it’s not useful I don’t see the purpose of putting it on as it reduces the amount of light reaching the camera which can force me to use longer shutter speeds, raise the ISO, or open the aperture more.

So when is a polarizing filter useful? As mentioned above, it can darken the sky, though you have to be careful using this with a wide angle lens as it doesn’t affect all parts of the sky equally and can create dark and light areas which sometimes look strange.

As also mentioned, a polarizing filter will reduce the amount of light entering the camera. This can be useful if you want longer shutter speeds and you’ve already closed down the aperture as much as you can and lowered the ISO as low as it’ll go. The only option then is to reduce the amount of light entering the camera. And I will use it for this, but I’d rather use a neutral density filter for this specific purpose if I have one with me.

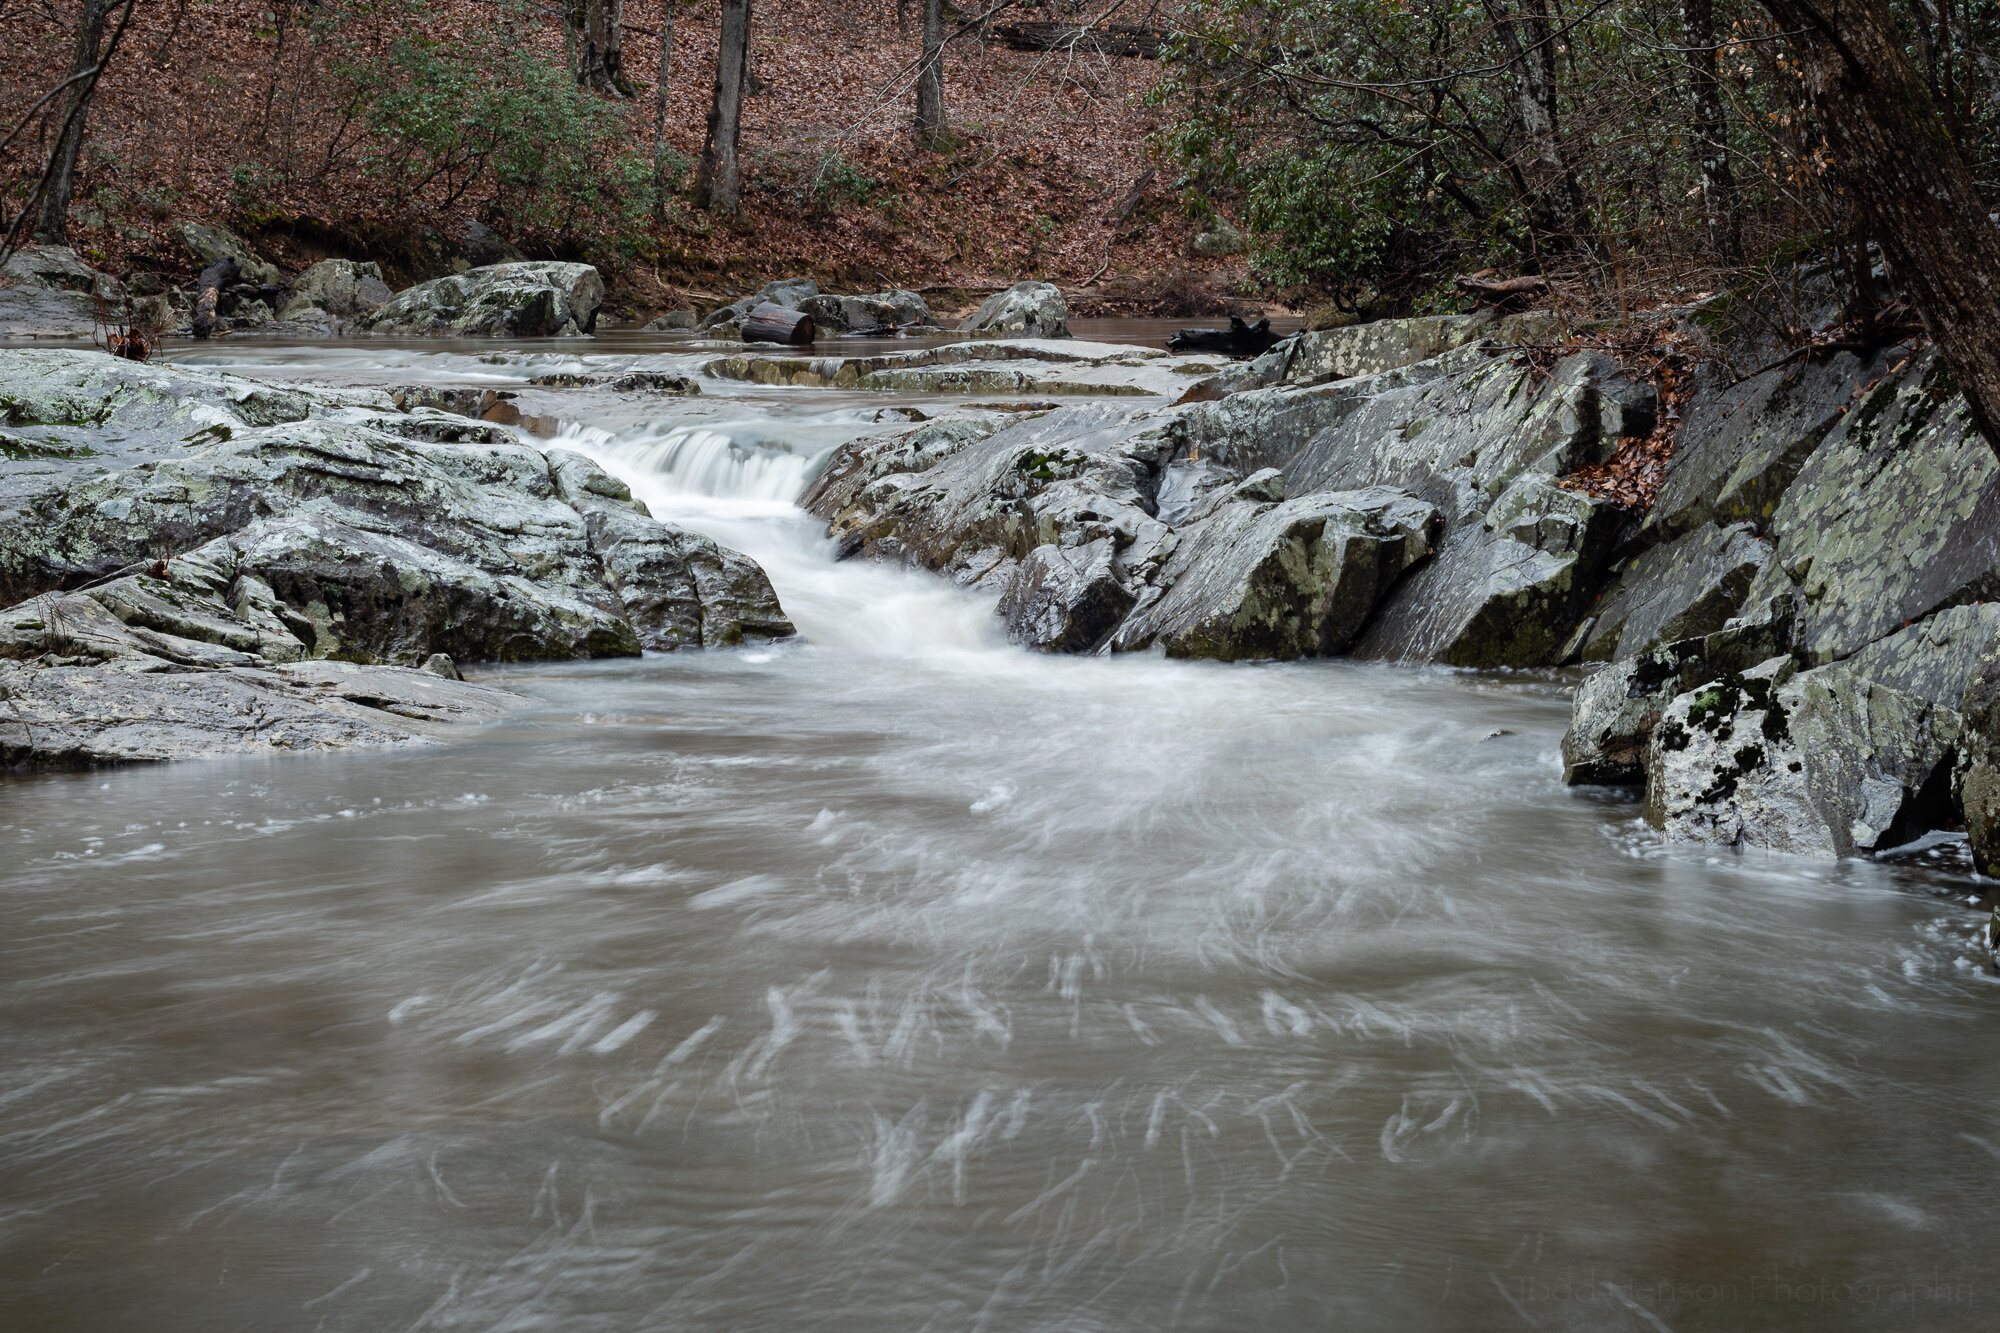
The polarizing filter is adjusted to allow many reflections. This is similar to not using a polarizing filter. The colors of the leaves, green and brown, are less saturated, the rocks and water have a bit of a blue sheen from reflected light from the sky.

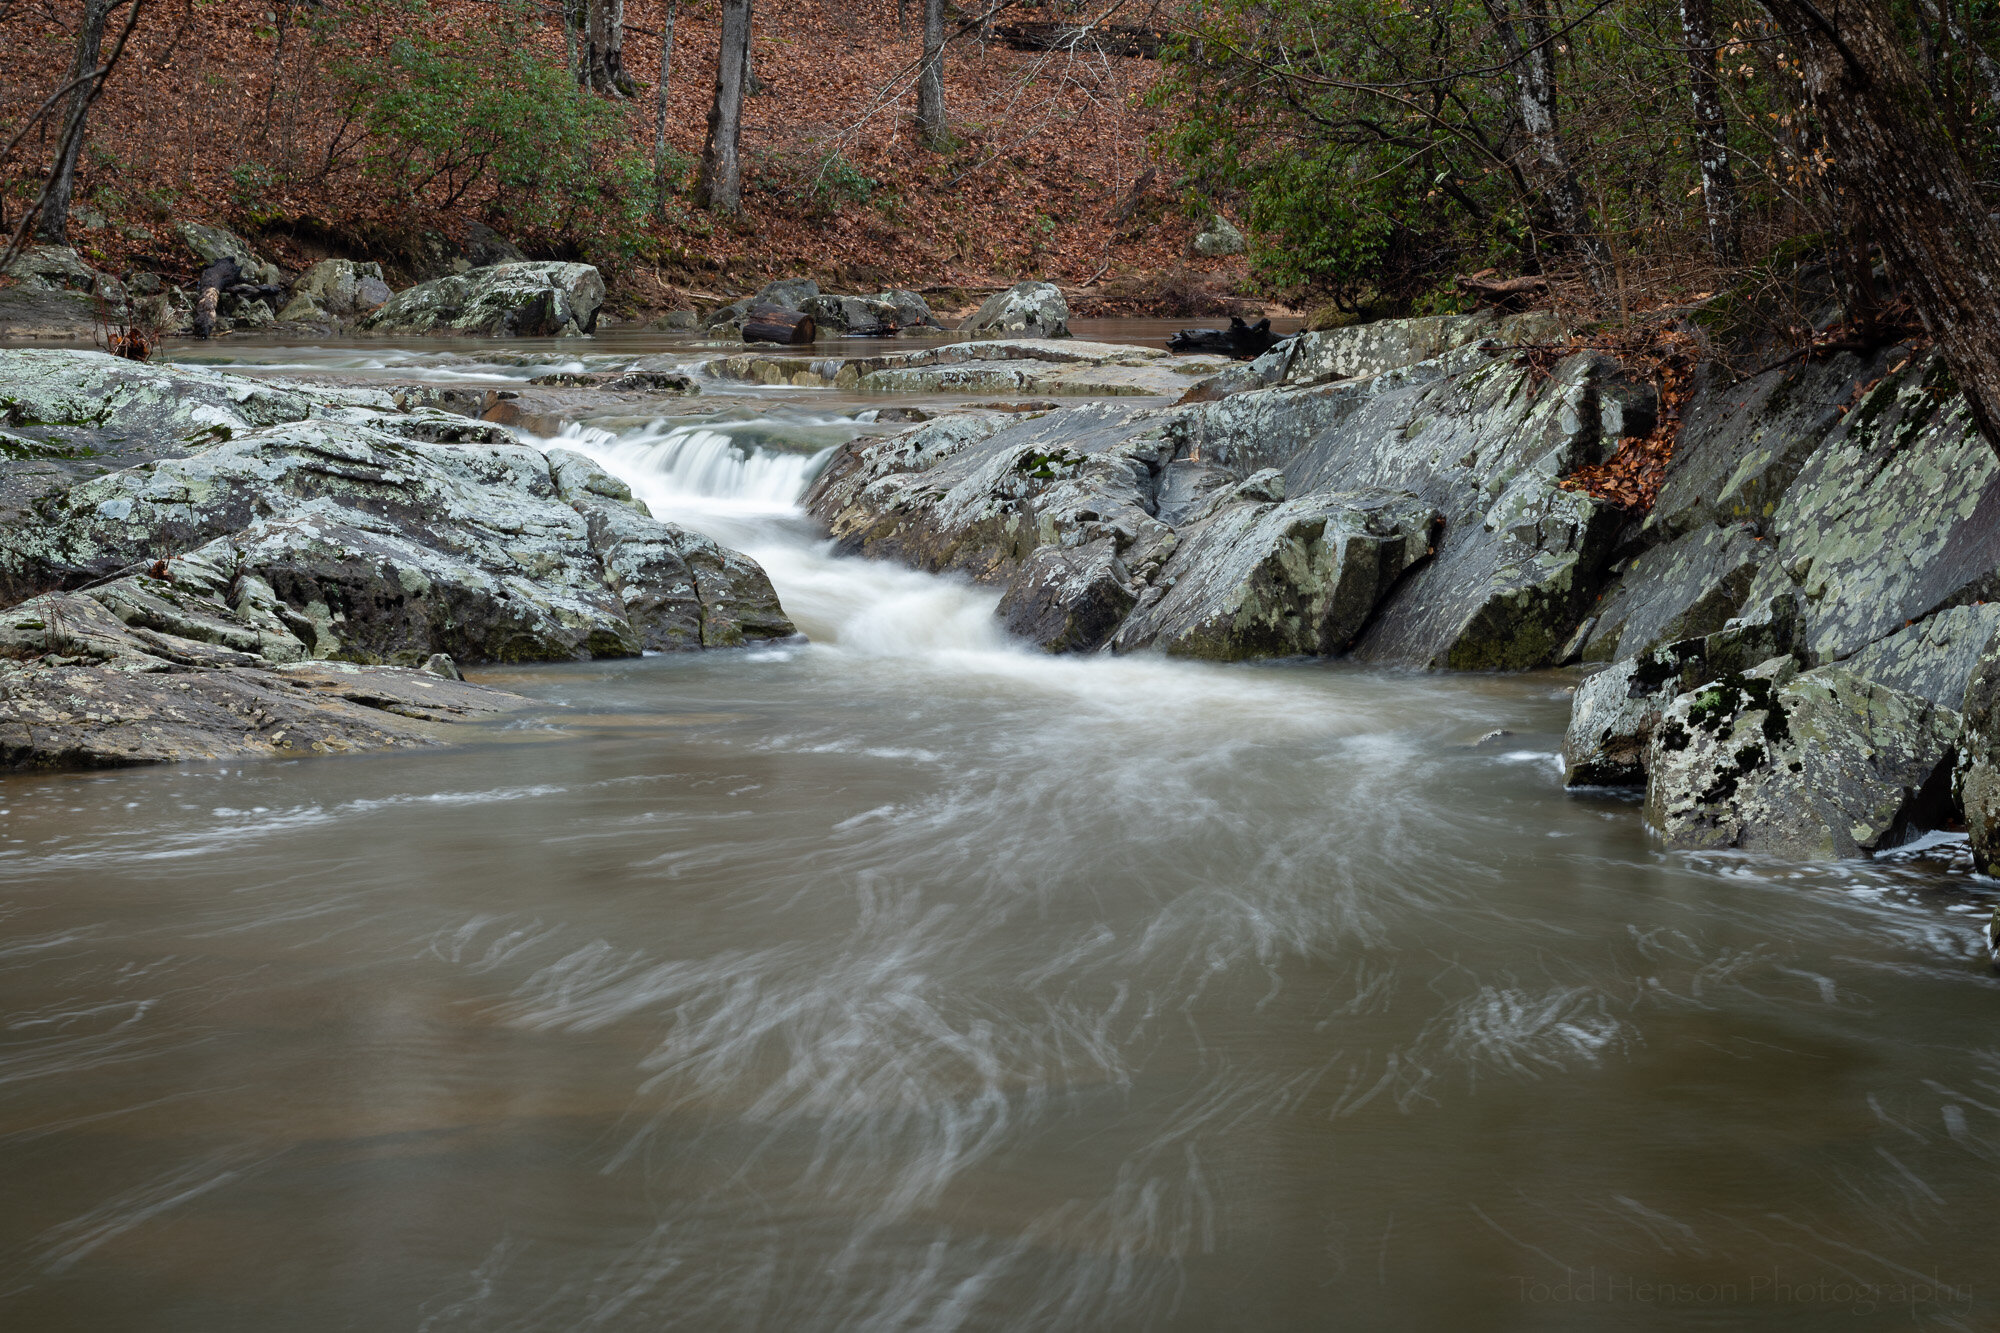
The polarizing filter is adjusted to reduce reflections. Look at the green and brown leaves on the far hillside, how they are darker and have more saturated colors. Notice the look of the rocks has changed, they are darker and look a little less blue. The same can be seen with the water, it’s less blue because the filter helps filter out some of the reflected blue light from the sky.

So now we come to the main point of this post, the benefits of using a polarizing filter when out photographing waterfalls in the woods. Besides allowing a slower shutter speed, the big benefit is how it can reduce reflections from water, stones, leaves, anything really. By rotating the circular polarizing filter you can adjust how much light reflects off various surfaces, and reducing the reflections and glare increases the saturation of the underlying colors. And the great thing is you can see the results in the camera since the filter is over the front of the lens.

Click on the slideshow below to cycle back and forth between the images, one showing an example where the polarizing filter is set to allow reflections and the other where it’s set to reduce reflections. Study the differences. They can be subtle, but they can make a big difference in the final look of your photograph.

Take a close look at the sample photographs in this post. There are two versions of each image. Both are using a polarizing filter but one has it adjusted to allow more reflections and the other has it adjusted to reduce the reflections. I’ve presented each by itself, combined into a single image, and as a slideshow you can click on to switch back and forth between versions. This will let you see how the polarizing filter is affecting the scene. Each of the photos was processed exactly the same, so the only differences should be from the filter (note, the shutter speed does change slightly as the filter is adjusted because of how the filter reduces the amount of light entering the lens).

In this example there’s more of the brown and green leaves in the background to compare. Notice those on the left, where the polarizing filter is reducing reflections, are more saturated than those on the right, where the filter is allowing more reflections.

Look closely at the water, notice how it darkens in some areas. This is because the filter is reducing the reflections of light off the water, allowing us to see more of the color of the water or what’s below it instead of the reflections from the sky.

Look at the leaves in the scene, both the green ones on the trees and the fallen brown ones. Notice how they darken, and when they darken how the color looks more saturated. This is because the filter is reducing the reflections off the leaves, letting us see their color instead of that reflected by the sky.

Look also at the rocks. The same thing happens with them. Reducing the reflections off the rocks changes how they look, often darkening them, and giving a more saturated look.

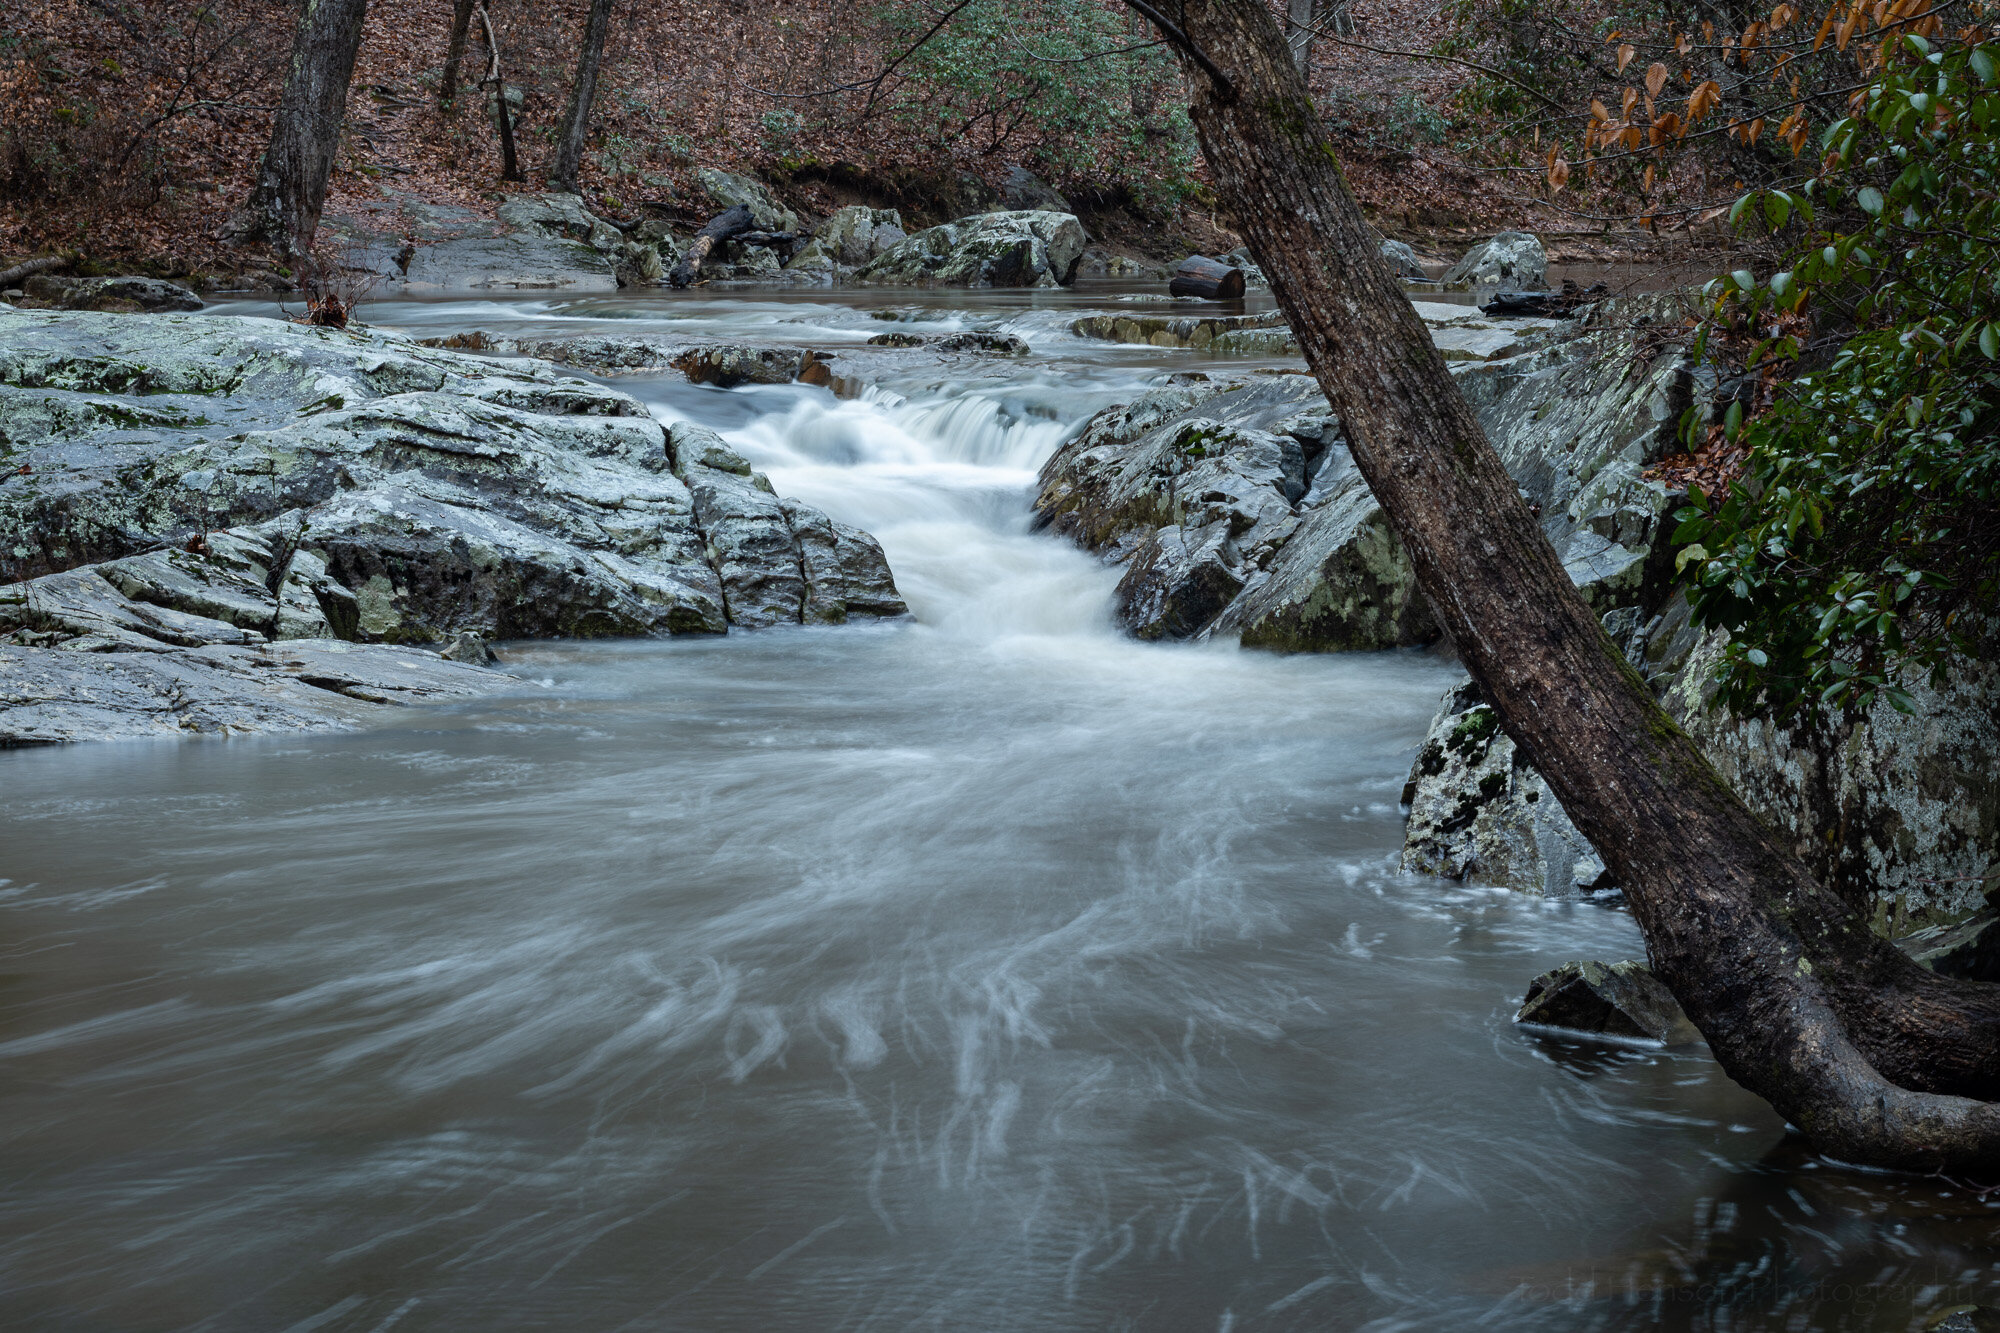
Here the polarizing filter has been adjusted to allow more reflections. The colors aren’t as saturated. The leaves have a lighter tone to them as light from the sky is reflected from them.

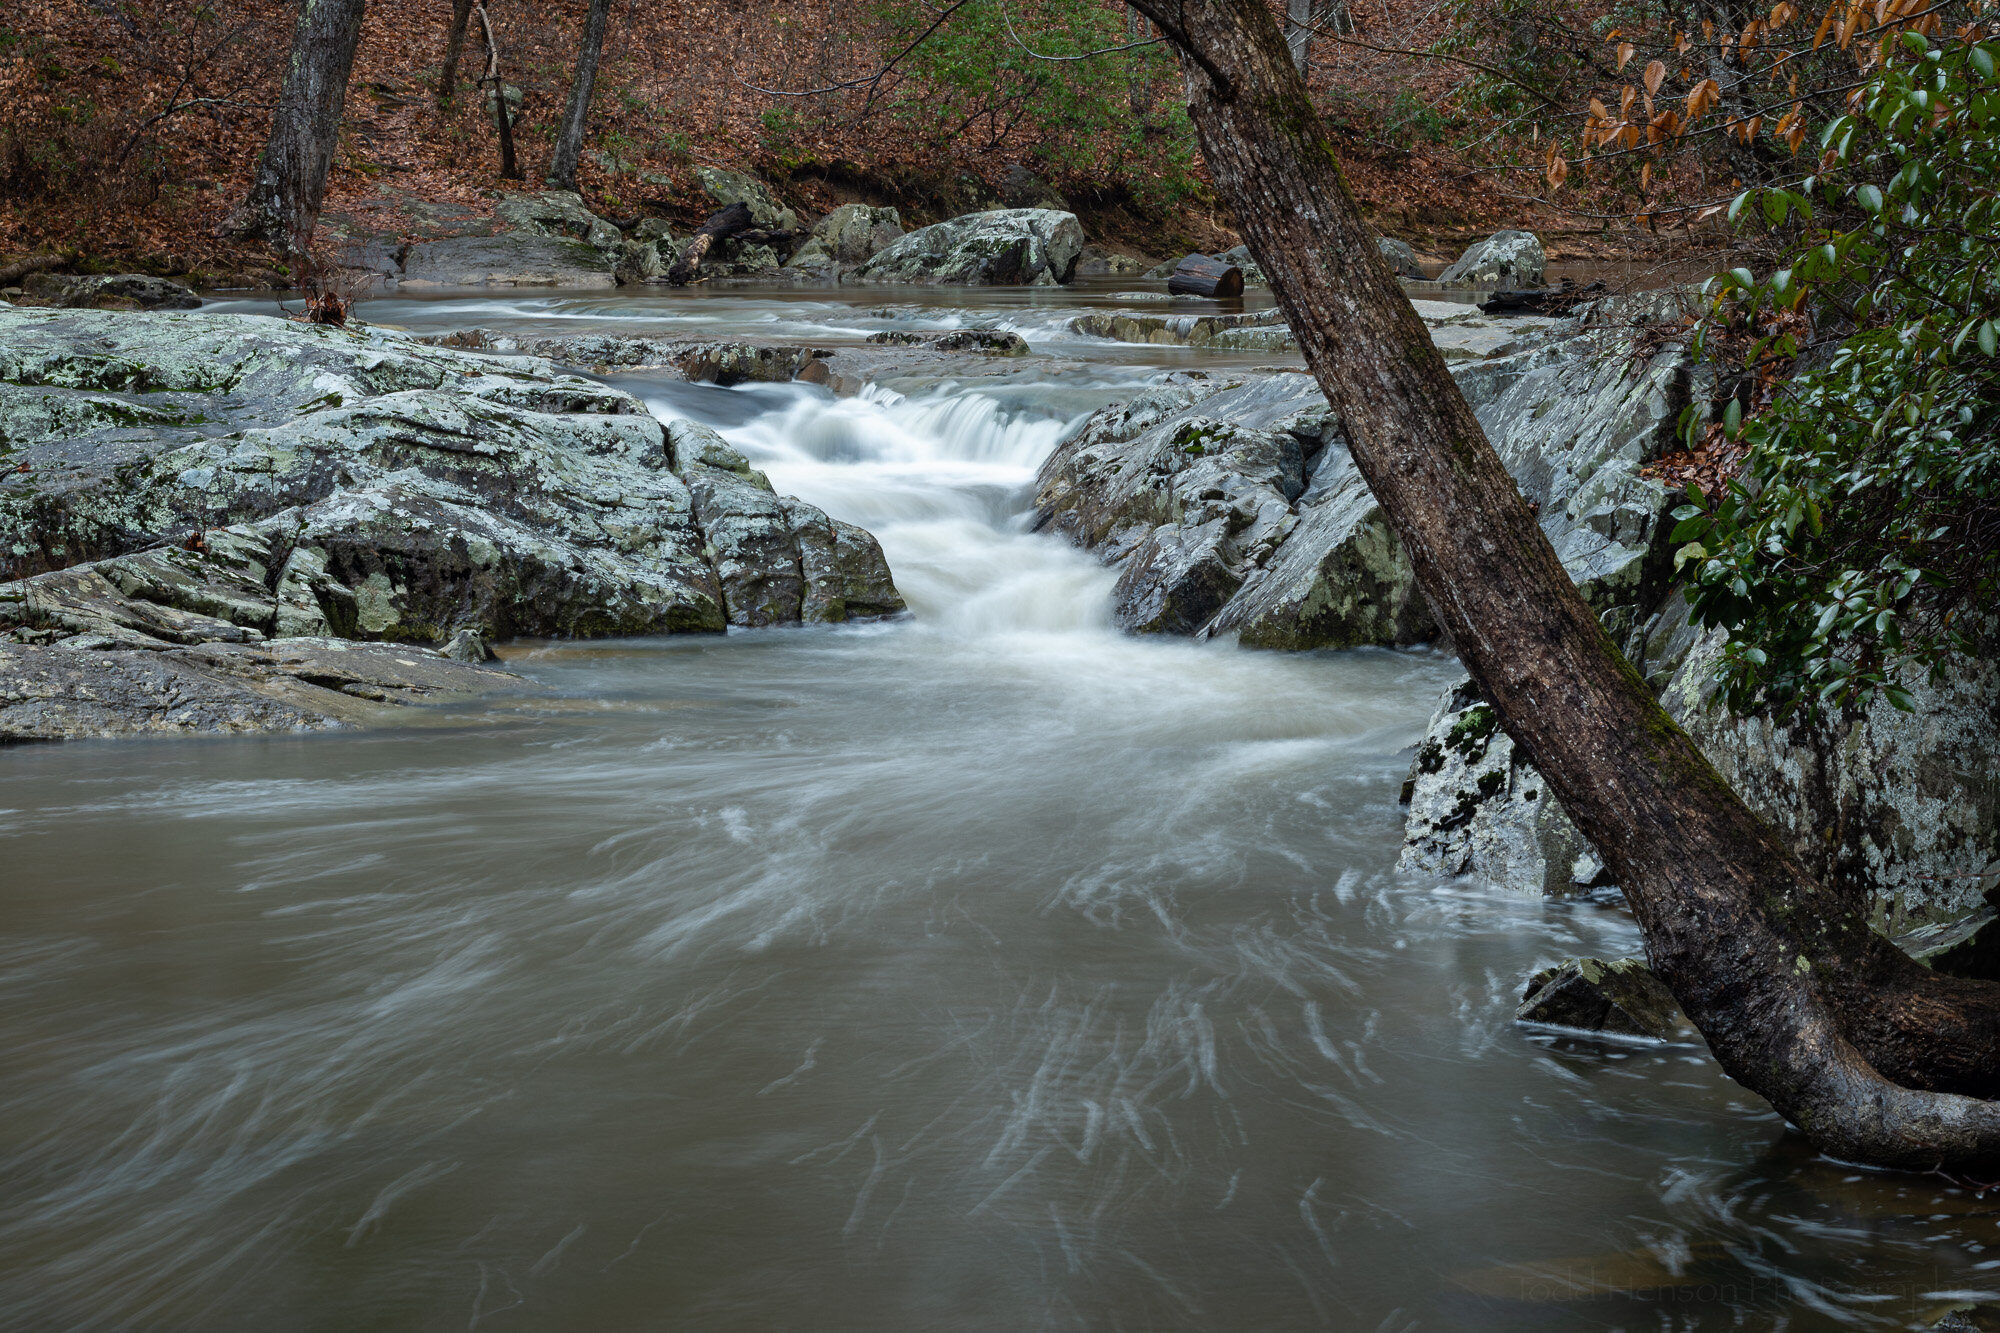
Here the polarizing filter has been adjusted to reduce reflections. The colors are more saturated. The leaves, rocks and water show less reflection. You can begin to see some detail under the surface of the water.

One thing you might also notice when switching between photos is how the ones with more reflections appear more blue. The white balance is set the same between them so this is caused by the bluer light from the sky reflecting off all the surfaces, even though it was a very overcast day. When we reduce this with the polarizing filter it reduces the blue cast to the image and in this case shows more of the browns and greens actually in the scene.

Click on the slideshow below to cycle back and forth between the images, one showing an example where the polarizing filter is set to allow reflections and the other where it’s set to reduce reflections. Watch the rocks as you flip between them, see how it changes. Notice the surface of the water down below, how in one you can’t see much below the surface but in the other you begin to.

I hope you’ve enjoyed this look at the usefulness of polarizing filters. These specific examples are of waterfalls in the woods but everything we’ve seen here can be applied to other scenes, as well. And many of these features, such as reducing reflections, are ones that would be difficult to duplicate in software. So consider carrying a polarizing filter with you. Experiment with it, try it in different situations, and get a feel for how it affects the look of your photographs.

The specific polarizing filter I used on these images was a Singh-Ray LB “Lighter, Brighter” Warming Polarizer.

Curious to see more? Check out some examples of using a polarizing filter with water lilies.


Do you enjoy these posts?

Sign up to receive periodic emails with updates and thoughts. Don’t worry, I won’t spam you. And please consider purchasing artwork or products from my online store, and using my affiliate links in the sidebar to the right when shopping online.

I appreciate your support!


Tips For Blurring Moving Water by Todd Henson

I’ve been asked in the past how to blur moving water from rivers and waterfalls in a photograph. It all comes down to shutter speed. The slower the shutter speed the more blur in the water. Below are a number of tips to help you do this. You don’t have to follow all of these tips to blur water. Pick whichever ones you’re able to use. Just realize some of them may not get the shutter speed as slow as you’d like. That’s when you may need to try the other tips.

Stabilize Your Camera

If you want a sharp image of everything but the water you’ll first need to stabilize your camera. The best way to do this is to put it on a good tripod. If you don’t have a tripod you can try resting the camera on something stable such as a stone wall or a large rock or tree. Just be careful not to let the camera drop.

Use a Remote Shutter Release or Self-Timer

To reduce the chance of introducing shake into the camera during the exposure it’s best not to press the shutter button with your finger to start the exposure. Two options for avoiding this are a remote shutter release, or setting the camera’s self-timer such that your exposure begins some number of seconds after you press the shutter button.

Using the self-timer is the least expensive option if your camera supports it, though you will lose a little flexibility in choosing exactly when to start the exposure.

There are two options for remote shutter releases: cable releases that attach to a special connector on your camera and wireless releases. At present I use a simple cable release that just presses and optionally locks the shutter. Some higher-end cable (and wireless) releases include intervalometer features which let you take a photo every so many seconds for some period of time.

Shoot Early, Late, or on an Overcast Day

It’s best if it’s not a bright sunny day as the sunlight can blow out the white highlights in the water. Try to photograph very early or very late, before the sun is up or after it has gone down. Or pick an overcast day when clouds will hide the sun. This reduces the quantity of light in the scene, reducing the chances of blowing out highlights, and requiring a longer exposure in your camera, increasing your chances of blurring the water.

This was shot on an overcast morning. Less light meant a longer exposure. ISO 200, aperture f/36, shutter speed 15 seconds.

Adjust Your ISO

Set your ISO to the lowest setting your camera allows. The ISO controls how sensitive your camera’s sensor is to light. The lowest setting, for example, 100 or 200, will require more light to make an exposure. Your camera will need more time to collect more light which will help you achieve the slow shutter speed you’re after.

Stop Down Your Aperture

Stop down your aperture as far as you can. To do this use a larger f-stop number, such as f/16, f/32, etc. This closes down the aperture, making a smaller opening that light will need to travel through, requiring more time for the camera to gather enough light to make the exposure. This lets you shoot using slower shutter speeds. Be aware, though, that the very smallest apertures can cause diffraction, which may reduce the sharpness of your photo. If this happens you’ll need to open up the aperture just a bit.

A wider aperture results in a faster shutter speed allowing you to see more detail in the water. ISO 200, aperture f/4, shutter speed 1/50 second.

A smaller aperture results in a slower shutter speed allowing you to blur the water. ISO 200, aperture f/11, shutter speed 1/8 second.

A wide aperture results in a faster shutter speed, freezing action and showing more detail in the water. ISO 320, aperture f/6.3, shutter speed 1/1250 second.

A small aperture results in a slower shutter speed, helping convey action by blurring the water. ISO 320, aperture f/25, shutter speed 1/60 second.

Use a Polarizing Filter

If everything above still isn’t enough to slow the shutter speed down enough to create the blur you’re after then you may need to resort to filters that fit over your lens. The first to try is a polarizing filter if you already have one.

A polarizing filter is often used to reduce reflections and glare on surfaces such as water and leaves, to create richer colors, and to darken skies. A side effect of these filters is reducing the amount of light that reaches the sensor, usually by about 1 to 2 stops. This isn’t a lot but it might be enough to get the shutter speed slow enough to blur the water.

Using a polarizing filter and a small aperture helped slow down the shutter speed, blurring the water from the fountains. ISO 200, aperture f/25, shutter speed 1.6 seconds.

Use a Neutral Density (ND) Filter

If nothing else will get the shutter speed slow enough you’ll want to invest in a neutral density filter. Think of this as sunglasses for your camera lens. It’s a dark filter that reduces the amount of light entering the lens. Neutral density filters are available in a range of levels, some reducing 1 stop of light, some 3 stops, some 5, 10 or even 15 stops of light. You can even find variable neutral density filters that let you turn the filter like a polarizer to change the density of the filter. With neutral density filters you’ll be able to slow the shutter speed down as much as you’d like.

You can also stack filters, using multiple neutral density filters to slow things down even more. And you can stack a polarizing filter and neutral density filters. Just be aware that if you stack too many filters you may begin to see the filters at the corners of the image. If this happens you either need to remove some of the filters or crop the image when you’re finished.

A polarizing filter in the middle of the day allowed a slow exposure, but not slow enough to really blur (or still) the moving water. ISO 200, aperture f/22, shutter speed 1/8 second.

A polarizing filter and a 5-stop neutral density filter in the middle of the day allowed a slow enough exposure to blur (or mostly still) the moving water. ISO 200, aperture f/22, shutter speed 4 seconds.

It's reasonably early in the morning without a filter. ISO 200, aperture f/11, shutter speed 1/80 second.

Adding a Singh-Ray Gold-N-Blue Polarizer and a 10-stop neutral density filter shifted the colors and slowed the shutter speed way down, introducing a lot of blur into the water. ISO 200, aperture f/11, shutter speed 67 seconds.

In this triptych I used a Singh-Ray Vari-N-Duo filter, which combines a polarizing filter with a variable neutral density filter, to gradually slow the shutter speed down by increasing the amount of neutral density. All images are ISO 200 with an aperture of f/25. The left image has a shutter speed of 1/8 second. The center image has a shutter speed of 4/5 second. The right image has a shutter speed of 8 seconds.

I hope these tips for blurring moving water have been useful to you. It can be a lot of fun and it can really add a nice dynamic to a photograph. So head out there and try a few of them out, see what kinds of interesting photographs you can create.


Do you enjoy these posts?

Sign up to receive periodic emails with updates and thoughts. Don’t worry, I won’t spam you. And please consider purchasing artwork or products from my online store, and using my affiliate links in the sidebar to the right when shopping online.

I appreciate your support!


Examples of Using a Polarizing Filter with Water Lilies by Todd Henson

Example showing maximum and minimum effect using a polarizing filter with a purple water lily.

Do you use polarizing filters? I hope to convince you that polarizing filters can help you enhance your photographs. The effects can be dramatic, but they can also be subtle. It’s those subtle differences that can really make a photograph sing.

I don’t want to get too deeply into the technicals of how polarizing filters work. But at a simple level they just control how much polarized light reaches the camera’s sensor. You put the polarizing filter on the front of your lens. You then rotate the filter to control how much polarized light reaches the camera. 

What this means in the real world is that polarizing filters can:

  • reduce reflections and glare on water and other surfaces, such as leaves

  • saturate colors, like the greens of foliage and the colors of flowers

  • darken skies, turning them a deeper blue

  • slightly reduce the amount of light reaching the camera.

Today we’re looking specifically at using a polarizing filter when photographing water lilies. This is great both because it can reduce reflections and glare and will help saturate the colors of the flowers and lily pads. A potential disadvantage is that a polarizing filter does reduce the amount of light reaching the camera, sometimes forcing you to use a slower shutter speed. So watch your shutter speed and if it gets too slow then increase your ISO or open up your aperture.

Purple water lily. Left: maximum effect from polarizing filter. Right: minimum effect from polarizing filter.

As you can see in the first example above, the effect can be dramatic. The purple water lily on the left has the polarizing filter set to full effect, reducing the reflections as much as possible. The same lily is shown on the right with the polarizing filter set to minimum effect, letting us see the reflections.

It’s not necessarily that one photo is better than another. But the polarizing filter lets us control the look of the scene, it lets us control what we emphasize. In this example I prefer the left image where the polarizing filter has reduced the reflections. This darkens the water and helps the water lily pop off the surface. I also like the brighter tones of the green stem.

Pair of Arc-en-Ciel water lilies. Left: maximum effect from polarizing filter. Right: minimum effect from polarizing filter.

In the second example, of a pair of Arc-en-Ciel water lilies, the effect from the polarizing filter is more subtle. Again, the image on the left is at full effect and the image on the right is at minimum effect. The polarizing filter reduced glare off the water which darkened the water. I like this effect as it helps draw your eyes to the lighter colored flowers. You can see subtle differences in the flowers and lily pads.

Pink water lily. Left: maximum effect from polarizing filter. Right: minimum effect from polarizing filter.

The third example shows how the polarizing filter can affect colors, in particular the greens of the lily pads. The left image is at full effect. It reduces the reflections but does not eliminate them. But notice what it does to the greens of the lily pads.

The left image, with full polarizing effect, has beautiful green lily pads. The right image, with minimum polarizing effect, has lily pads with more blue in them. Which do you prefer? The polarizing filter lets you adjust the effect to serve your own taste.

I decided to take the third example a step further. I prefer the look when the polarizing filter is set to full effect. However, I really like the reflection of the water lily in the water and the polarizing filter tends to reduce this effect.

To deal with this I loaded both images into Adobe Photoshop as separate layers. I chose the fully polarized image as the primary image, then using a layer mask I slowly painted in the reflection from the less polarized image. This gave me the best of both worlds. I have the richer colors of the polarized image and also the more pronounced reflection of the water lily from the less polarized image. It’s a subtle difference, but again, these subtle differences can help enhance your photographs.

Pink water lily with maximum polarizing effect. I like the saturated colors of the green lily pads and the flower.

Pink water lily with minimum polarizing effect. I like the enhanced reflection but not the glare on the lily pads.

Pink water lily composite. Combined the color saturation of the maximum polarization version with the reflection of the minimum polarization version.


Do you enjoy these posts?

Sign up to receive periodic emails with updates and thoughts. Don’t worry, I won’t spam you. And please consider purchasing artwork or products from my online store, and using my affiliate links in the sidebar to the right when shopping online.

I appreciate your support!