Techniques

Examples of Using a Polarizing Filter with Water Lilies by Todd Henson

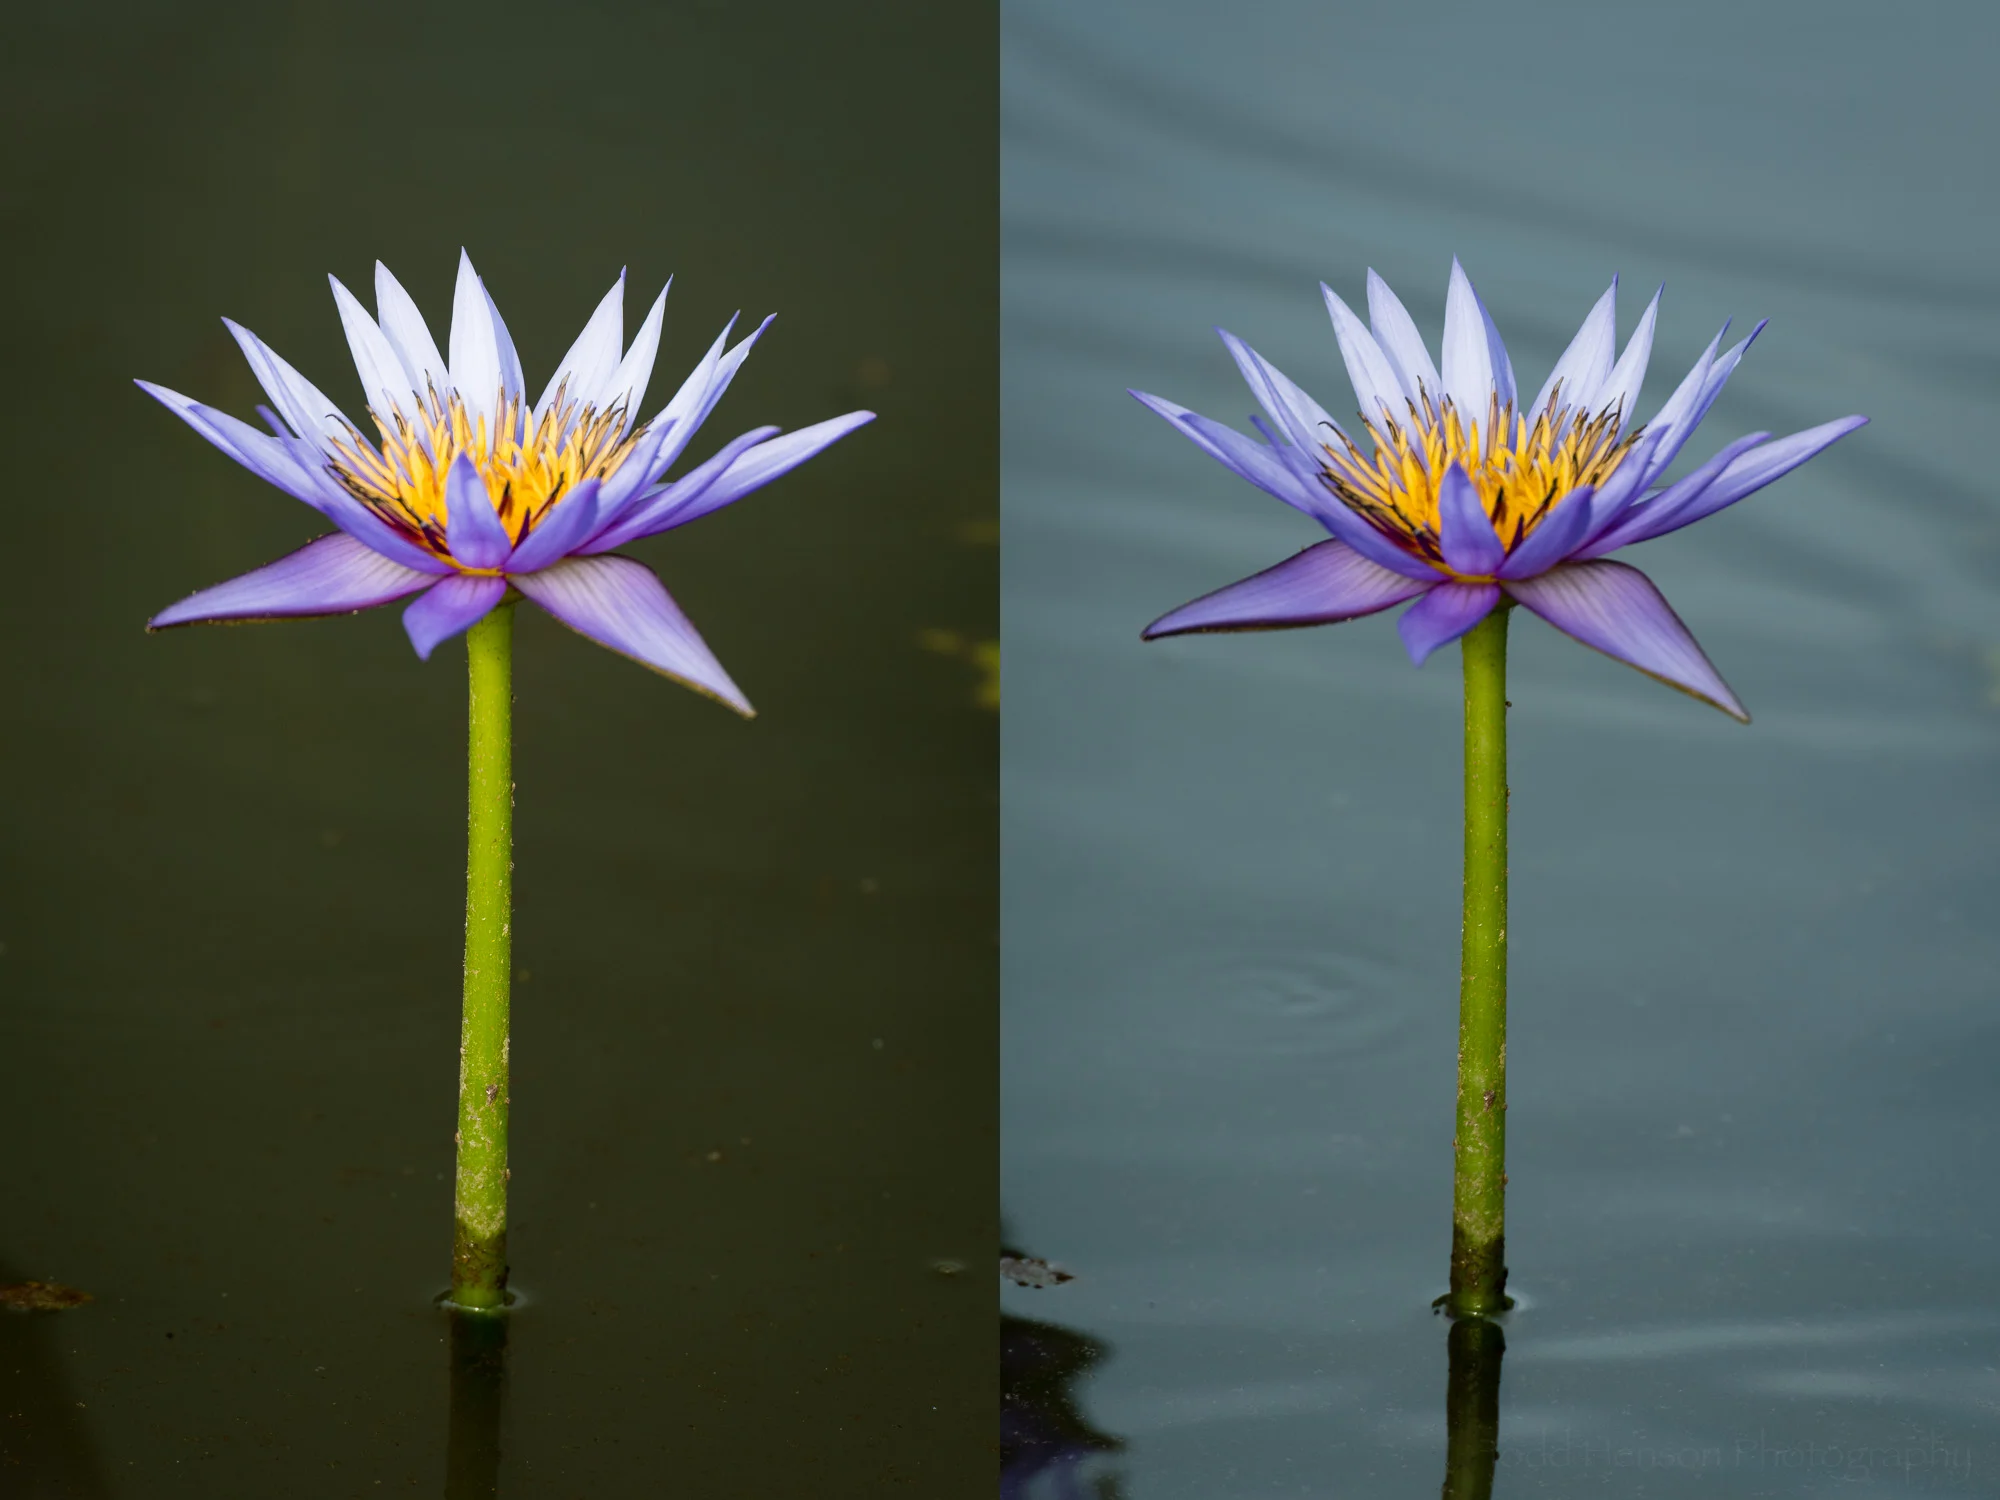
Example showing maximum and minimum effect using a polarizing filter with a purple water lily.

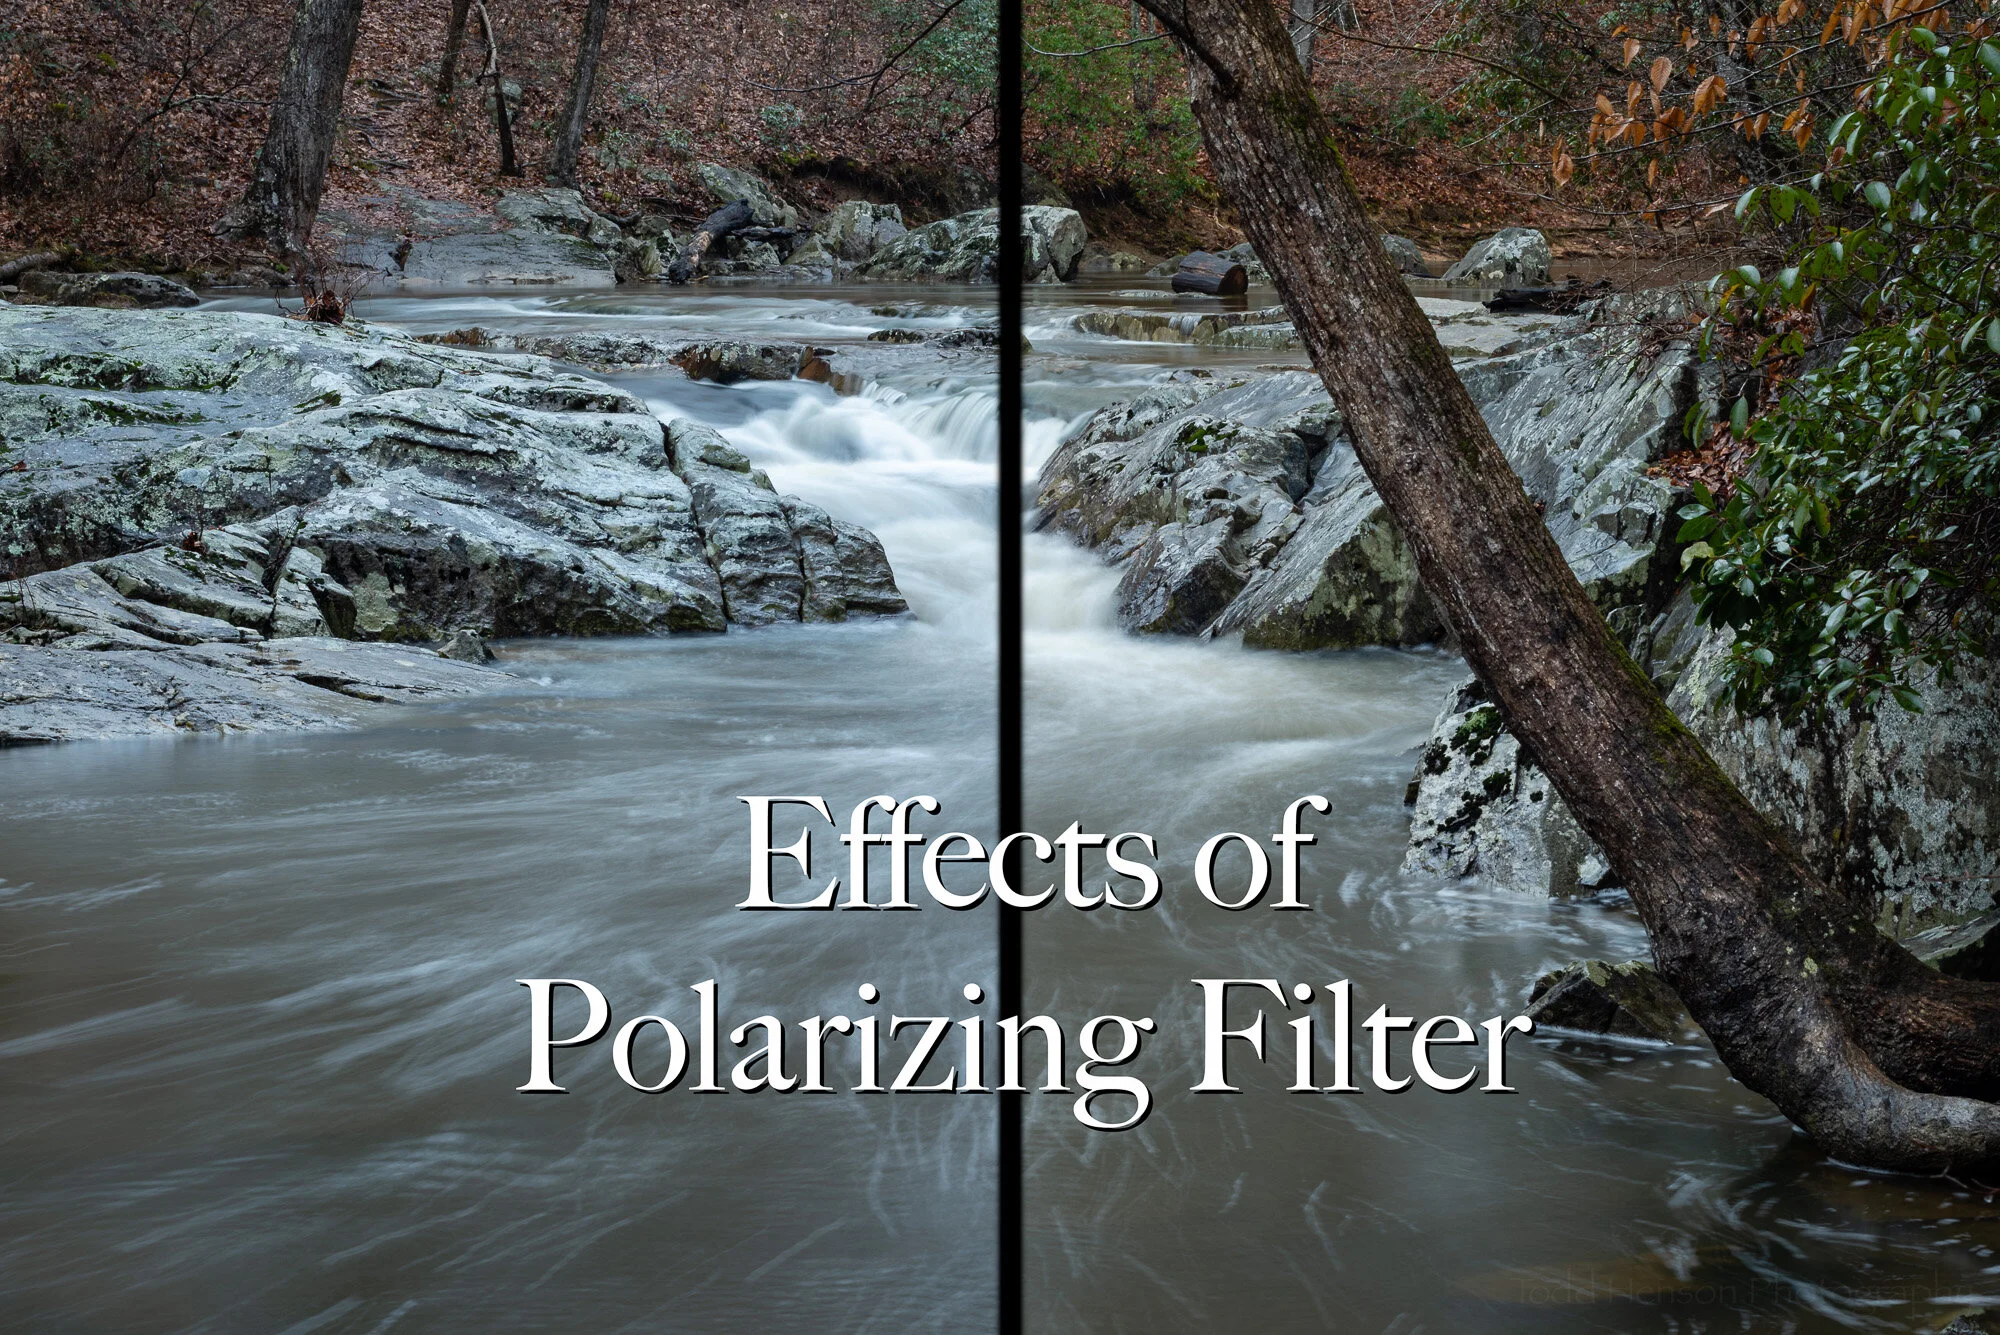
Do you use polarizing filters? I hope to convince you that polarizing filters can help you enhance your photographs. The effects can be dramatic, but they can also be subtle. It’s those subtle differences that can really make a photograph sing.

I don’t want to get too deeply into the technicals of how polarizing filters work. But at a simple level they just control how much polarized light reaches the camera’s sensor. You put the polarizing filter on the front of your lens. You then rotate the filter to control how much polarized light reaches the camera. 

What this means in the real world is that polarizing filters can:

  • reduce reflections and glare on water and other surfaces, such as leaves

  • saturate colors, like the greens of foliage and the colors of flowers

  • darken skies, turning them a deeper blue

  • slightly reduce the amount of light reaching the camera.

Today we’re looking specifically at using a polarizing filter when photographing water lilies. This is great both because it can reduce reflections and glare and will help saturate the colors of the flowers and lily pads. A potential disadvantage is that a polarizing filter does reduce the amount of light reaching the camera, sometimes forcing you to use a slower shutter speed. So watch your shutter speed and if it gets too slow then increase your ISO or open up your aperture.

Purple water lily. Left: maximum effect from polarizing filter. Right: minimum effect from polarizing filter.

As you can see in the first example above, the effect can be dramatic. The purple water lily on the left has the polarizing filter set to full effect, reducing the reflections as much as possible. The same lily is shown on the right with the polarizing filter set to minimum effect, letting us see the reflections.

It’s not necessarily that one photo is better than another. But the polarizing filter lets us control the look of the scene, it lets us control what we emphasize. In this example I prefer the left image where the polarizing filter has reduced the reflections. This darkens the water and helps the water lily pop off the surface. I also like the brighter tones of the green stem.

Pair of Arc-en-Ciel water lilies. Left: maximum effect from polarizing filter. Right: minimum effect from polarizing filter.

In the second example, of a pair of Arc-en-Ciel water lilies, the effect from the polarizing filter is more subtle. Again, the image on the left is at full effect and the image on the right is at minimum effect. The polarizing filter reduced glare off the water which darkened the water. I like this effect as it helps draw your eyes to the lighter colored flowers. You can see subtle differences in the flowers and lily pads.

Pink water lily. Left: maximum effect from polarizing filter. Right: minimum effect from polarizing filter.

The third example shows how the polarizing filter can affect colors, in particular the greens of the lily pads. The left image is at full effect. It reduces the reflections but does not eliminate them. But notice what it does to the greens of the lily pads.

The left image, with full polarizing effect, has beautiful green lily pads. The right image, with minimum polarizing effect, has lily pads with more blue in them. Which do you prefer? The polarizing filter lets you adjust the effect to serve your own taste.

I decided to take the third example a step further. I prefer the look when the polarizing filter is set to full effect. However, I really like the reflection of the water lily in the water and the polarizing filter tends to reduce this effect.

To deal with this I loaded both images into Adobe Photoshop as separate layers. I chose the fully polarized image as the primary image, then using a layer mask I slowly painted in the reflection from the less polarized image. This gave me the best of both worlds. I have the richer colors of the polarized image and also the more pronounced reflection of the water lily from the less polarized image. It’s a subtle difference, but again, these subtle differences can help enhance your photographs.

Pink water lily with maximum polarizing effect. I like the saturated colors of the green lily pads and the flower.

Pink water lily with minimum polarizing effect. I like the enhanced reflection but not the glare on the lily pads.

Pink water lily composite. Combined the color saturation of the maximum polarization version with the reflection of the minimum polarization version.


Do you enjoy these posts?

Sign up to receive periodic emails with updates and thoughts. Don’t worry, I won’t spam you. And please consider purchasing artwork or products from my online store, and using my affiliate links in the sidebar to the right when shopping online.

I appreciate your support!

Don't Just Stand There! Photograph From Different Perspectives by Todd Henson

Most people create photos from the same position, standing up and holding the camera at eye level. There’s not necessarily anything wrong with that, but if you always do it most of your photos will end up looking the same. If you’d like to give your photos a different look try shooting from different perspectives. Get up higher if you can, perhaps using a ladder. Lean down lower, or even lay on the ground. These different perspectives will help you create a range of images. The 3 images in this post are one example of how changing perspective can affect the look of an image.

Highest perspective. Prospect Harbor Point Light, a lighthouse in Maine.

The first photo was created at eye level. I was standing on a small raised portion of land looking out over the water. I thought it was a beautiful scene, with a very picturesque lighthouse on the far shore and some great fishing boats in the water for added interest. I like the photo. I think it works. But I knew there were other possibilities.

Middle perspective. Prospect Harbor Point Light, a lighthouse in Maine.

For the second photo I walked along the road, looking out at the lighthouse, watching the perspective change as I slowly walked downhill, closer to water level. If you look closely you can see the angle of the house beside the lighthouse has changed. The second image is more parallel to the camera. The first image was angled just slightly allowing you to see just a sliver of the left side. I also like this second image, and I think it also works. The elevation change has slightly changed the look of the image, but mostly the different look is due to a different composition. I was walking around, trying different shots.

Lowest perspective. Prospect Harbor Point Light, a lighthouse in Maine.

Finally, I walked all the way down to the water, to a small sandy beach. I found a position where I almost had a clear view of the lighthouse, with just a couple boats to the right. But to really change the look of the third image I got down low, bringing the camera almost to water level. You can tell it is a much lower position because the lighthouse now extends above the tree line. In the first image the lighthouse just reached the top of the tree line, and in the second it extended a little above it. To add a little more interest to the image I opened the aperture all the way, creating a very shallow depth of field, throwing the foreground water out of focus. I like this last image, and think it also works.

None of the images are necessarily better than the others. But each is different, both because I tried different compositions and because I changed my perspective, getting lower for each image. This is just one small example of how changing perspective can affect the look of an image. In this case it was subtle changes, but you can also create drastically different photos by changing perspective.

Next time you go out shooting I encourage you to try different perspectives. Don’t create all your images from the same eye-level perspective. Try different angles and different heights. If you’re photographing something down low, such as a flower, insect, or child, try getting down to their level. You’ll be creating an image from the perspective of your subject, and that can be an interesting change from the typical eye-level perspective.


Do you enjoy these posts?

Sign up to receive periodic emails with updates and thoughts. Don’t worry, I won’t spam you. And please consider purchasing artwork or products from my online store, and using my affiliate links in the sidebar to the right when shopping online.

I appreciate your support!

National War College from East Potomac Park, Black and White Infrared Composite by Todd Henson

Black and white infrared composite image of the National War College, taken from East Potomac Park, Washington, D.C.

There are times you may not be able to capture the image you visualize in a single photograph. But you may be able to achieve your aims by combining elements of multiple photographs, known as compositing. The above black and white image of the National War College, in Washington, D.C., is an example of this.

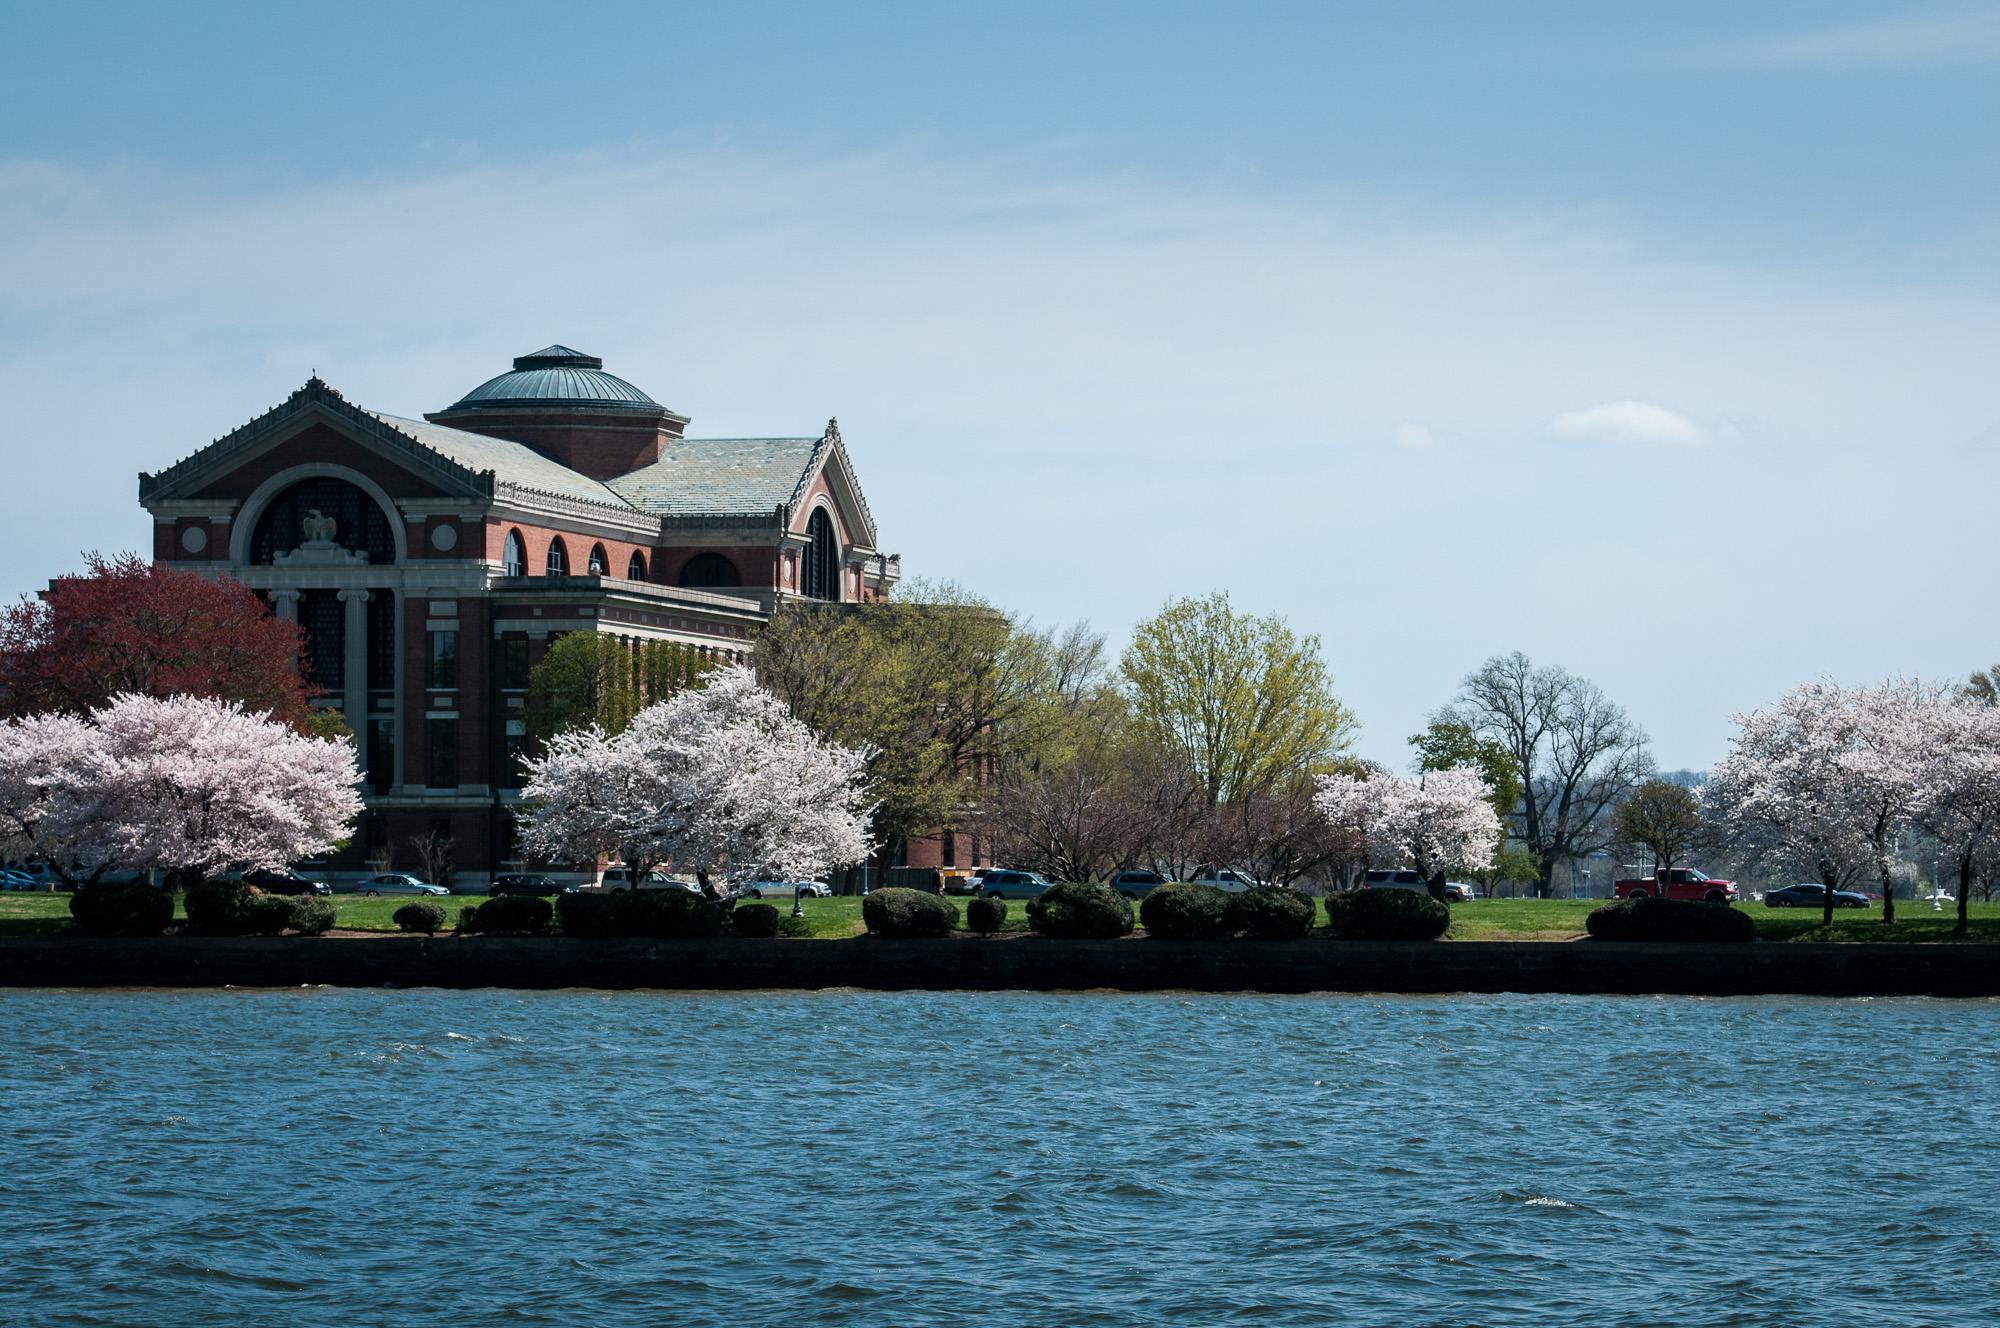
These images were created in the spring, when the cherry blossoms were in full bloom. My brother and I were hiking around East Potomac Park, seeing what it had to offer. Near the end of the park you can see the National War College across the Washington Channel, near where the Anacostia River enters the Potomac. It was almost noon, and not very cloudy, so the light was a bit harsh. You can see from the color image how the scene looked to my eyes.

Color image of the National War College, taken from East Potomac Park, Washington, D.C.

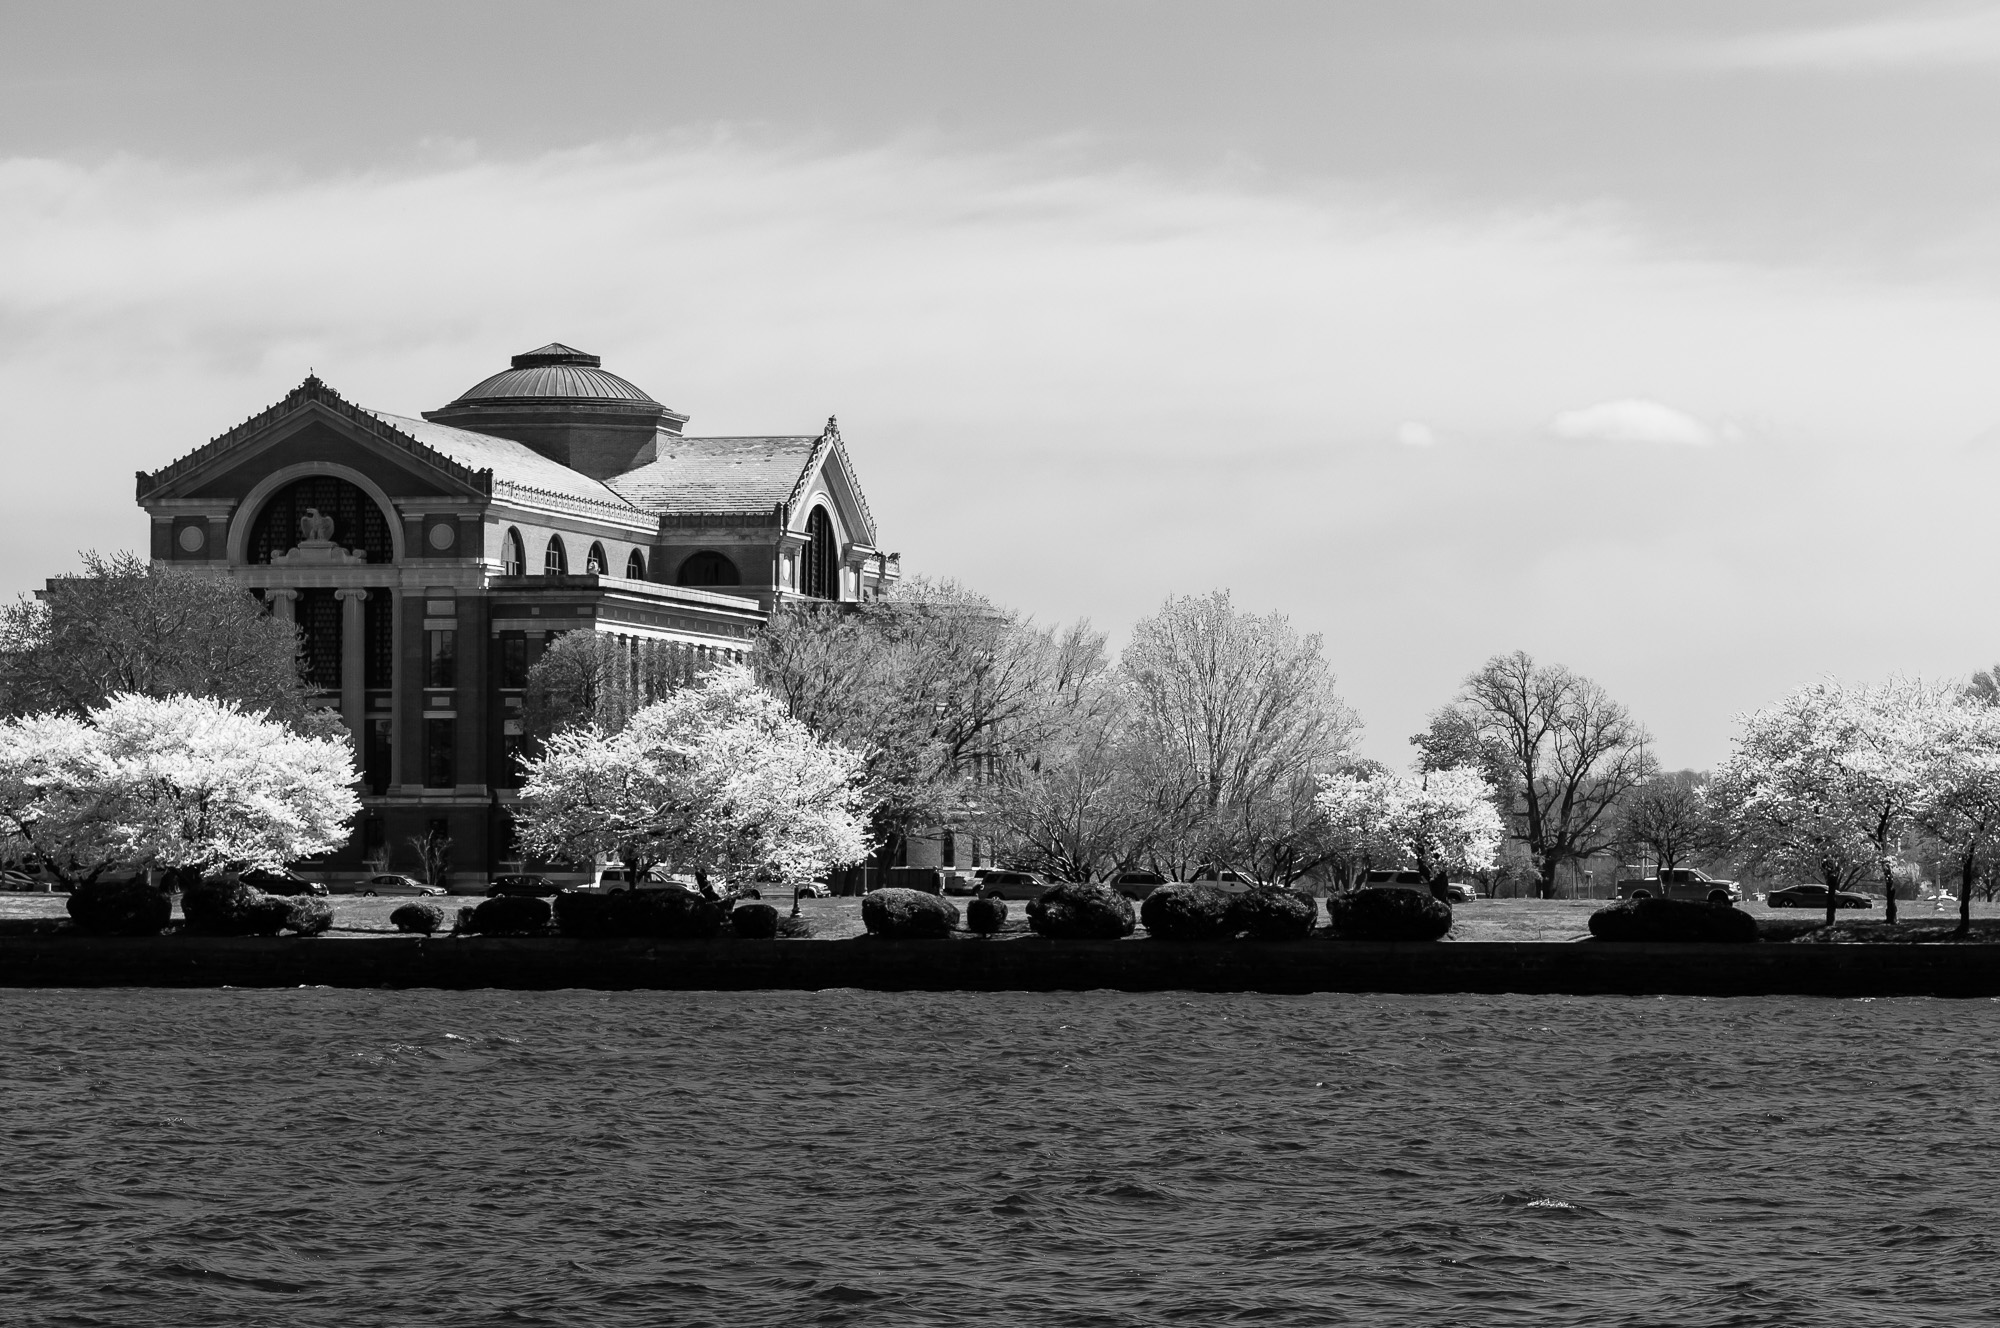
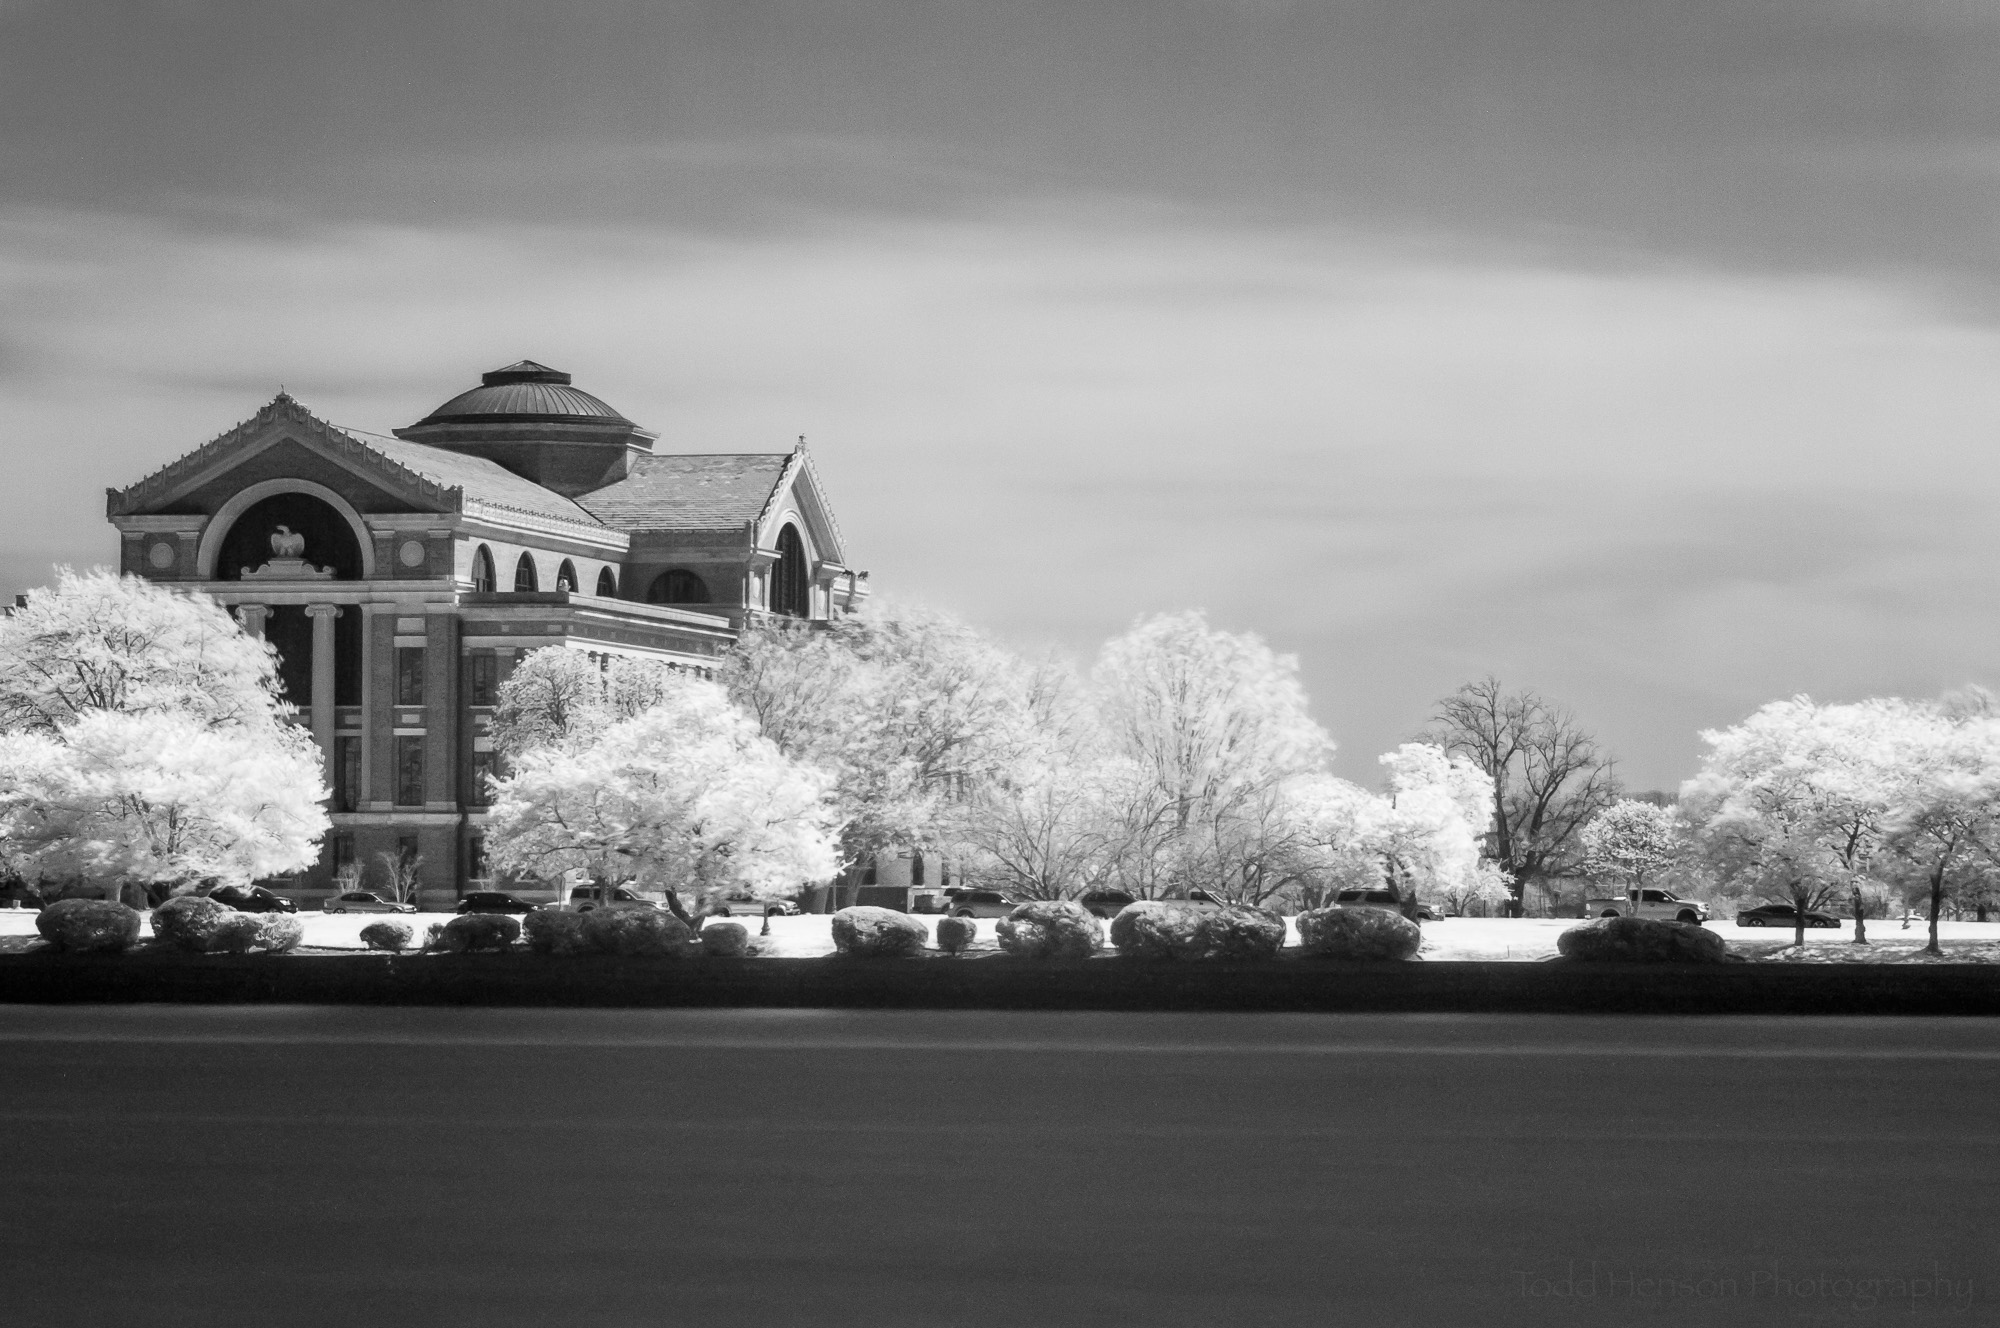
I had an infrared filter with me (see below for details) and thought it might work well. It blocks out visible light and only allows infrared and near-infrared light to reach the sensor. Most digital camera sensors have a filter over them that blocks out most (but not all) infrared light. This means it takes a lot of time for enough light to reach the sensor to create a well-exposed image. When using the IR filter I will usually set the ISO to around 800 to make the sensor more sensitive to light and allow shorter exposure times. In this case, with the ISO set to 800 and the aperture set to f/8, the exposure time with the IR filter was 73 seconds. As you can see in the infrared image, an exposure this long removes all detail from the water. It just looks like a flat grey road. I liked the infrared effect on the trees, building, and sky, but not on the water.

Black and white infrared image of the National War College, taken from East Potomac Park, Washington, D.C.

I made sure to capture images both with and without the infrared filter. This gave me something to work with when in Lightroom and Photoshop. To process the images I converted the color image to black and white, paying attention to the water. When I had the water the way I wanted it I selected the black and white image and the infrared image and told Lightroom to open those in Photoshop as layers.

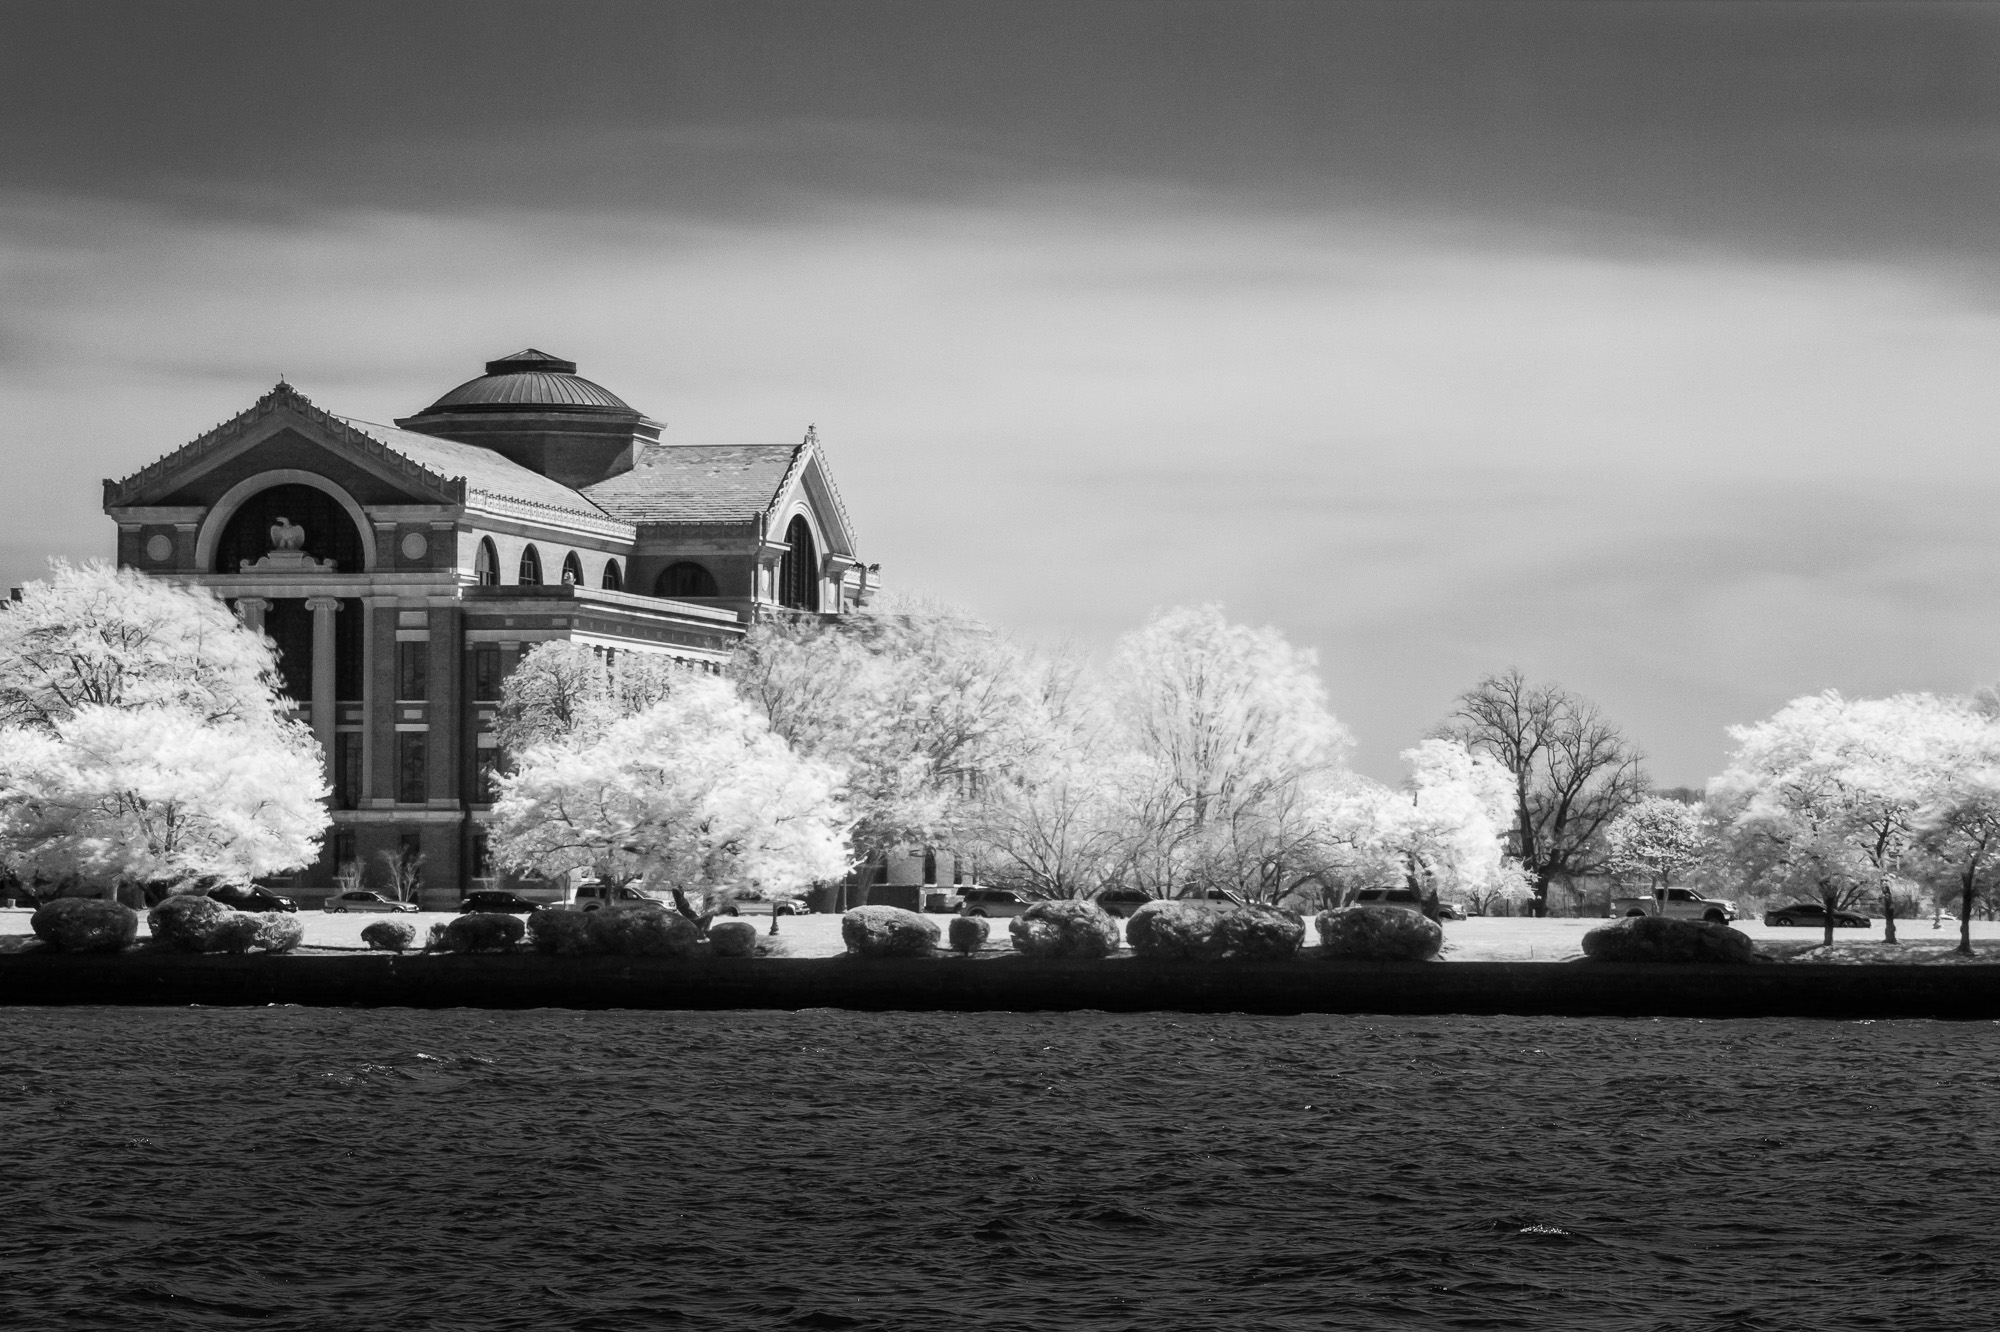
Black and white image (converted from the color image) of the National War College, taken from East Potomac Park, Washington, D.C.

Turns out I had slightly moved the tripod between creating the color image and infrared image, so they didn’t perfectly line up. I was able to correct this in Photoshop by using auto-align layers and cropping off any excess. In this way Photoshop assured both images were perfectly lined up.

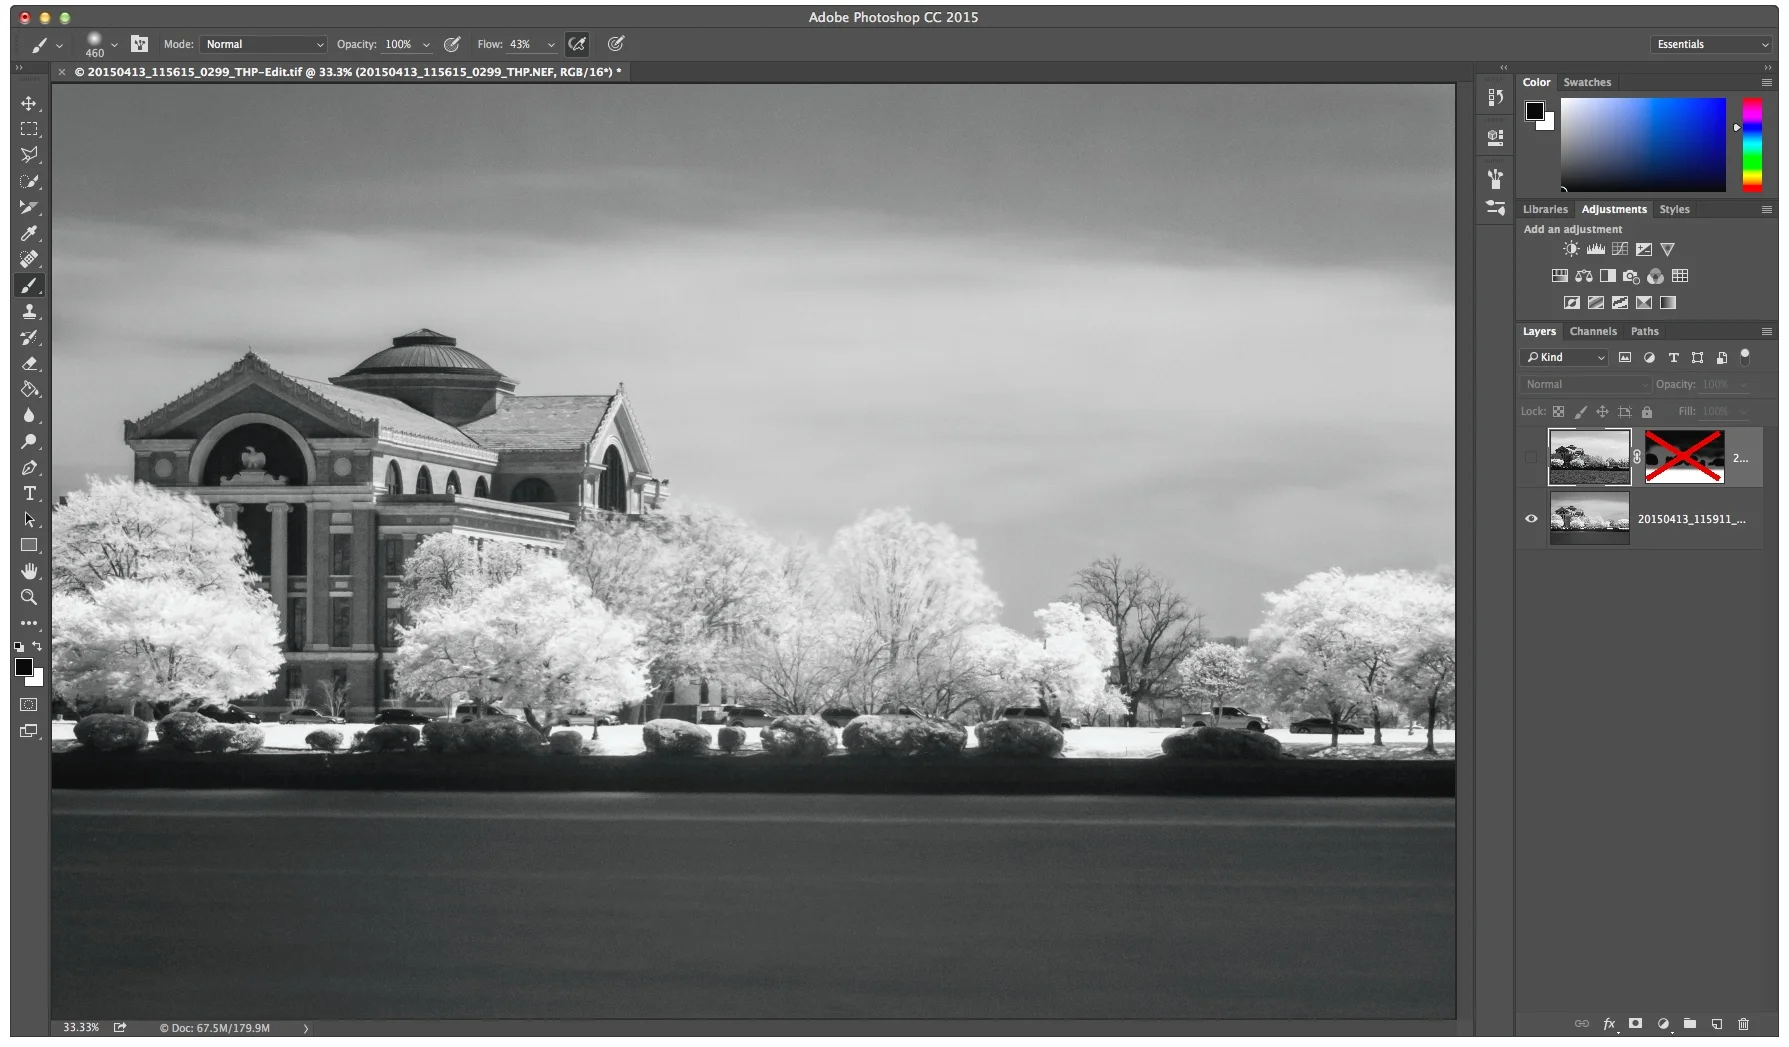
The top layer was the black and white image, converted from color. This is the image with the water the way I wanted it to look. The bottom layer was the infrared image. I created a layer mask on the top layer and painted black on the mask. This revealed the layer below where I painted. At first I set the layer mask opacity to about 50%, so I was painting in 50% of what was below, meaning I had an interesting combination of the two. I used this on the entire upper portion of the image, everything except for the water. Then I bumped up the opacity to 100% for the trees and sky, allowing the infrared image to show through completely for those portions of the image. Because I never brushed anything on the water, it remains completely from the black and white image.

Click through the images below to see the bottom layer (infrared), top layer (black and white), and finally all layers with the layer mask applied (the composite).

When I was finished I saved the image, which imported it back into Lightroom, giving me four images. The first is the original color image. The second is the black and white conversion from the color image. The third is the infrared image. And the fourth is the Photoshop composite of the black and white and infrared images. I performed a couple more small tweaks to the composite in Lightroom, then called it finished.

In the final composite image, the water is from the black and white image, allowing me to show the texture of the water. The sky and trees are from the infrared image. Infrared gives a very unique glow to sources of heat, such as trees. And the building is a combination of the black and white and the infrared images.

The infrared filter I used to create these images is a Singh-Ray I-Ray 830 Infrared filter. It blocks out all visible and ultraviolet light, letting through only pure infrared light. When used with most cameras this filter will require fairly long exposure times, but it can add an interesting look to an image. I really enjoy experimenting with it, seeing how it affects the image in different environments. It’s a great creative tool.


Do you enjoy these posts?

Sign up to receive periodic emails with updates and thoughts. Don’t worry, I won’t spam you. And please consider purchasing artwork or products from my online store, and using my affiliate links in the sidebar to the right when shopping online.

I appreciate your support!